Installation Procedures
To install the uNav device, follow these steps:
1.Do the following:
a.Connect the USB cable to the uNav device.
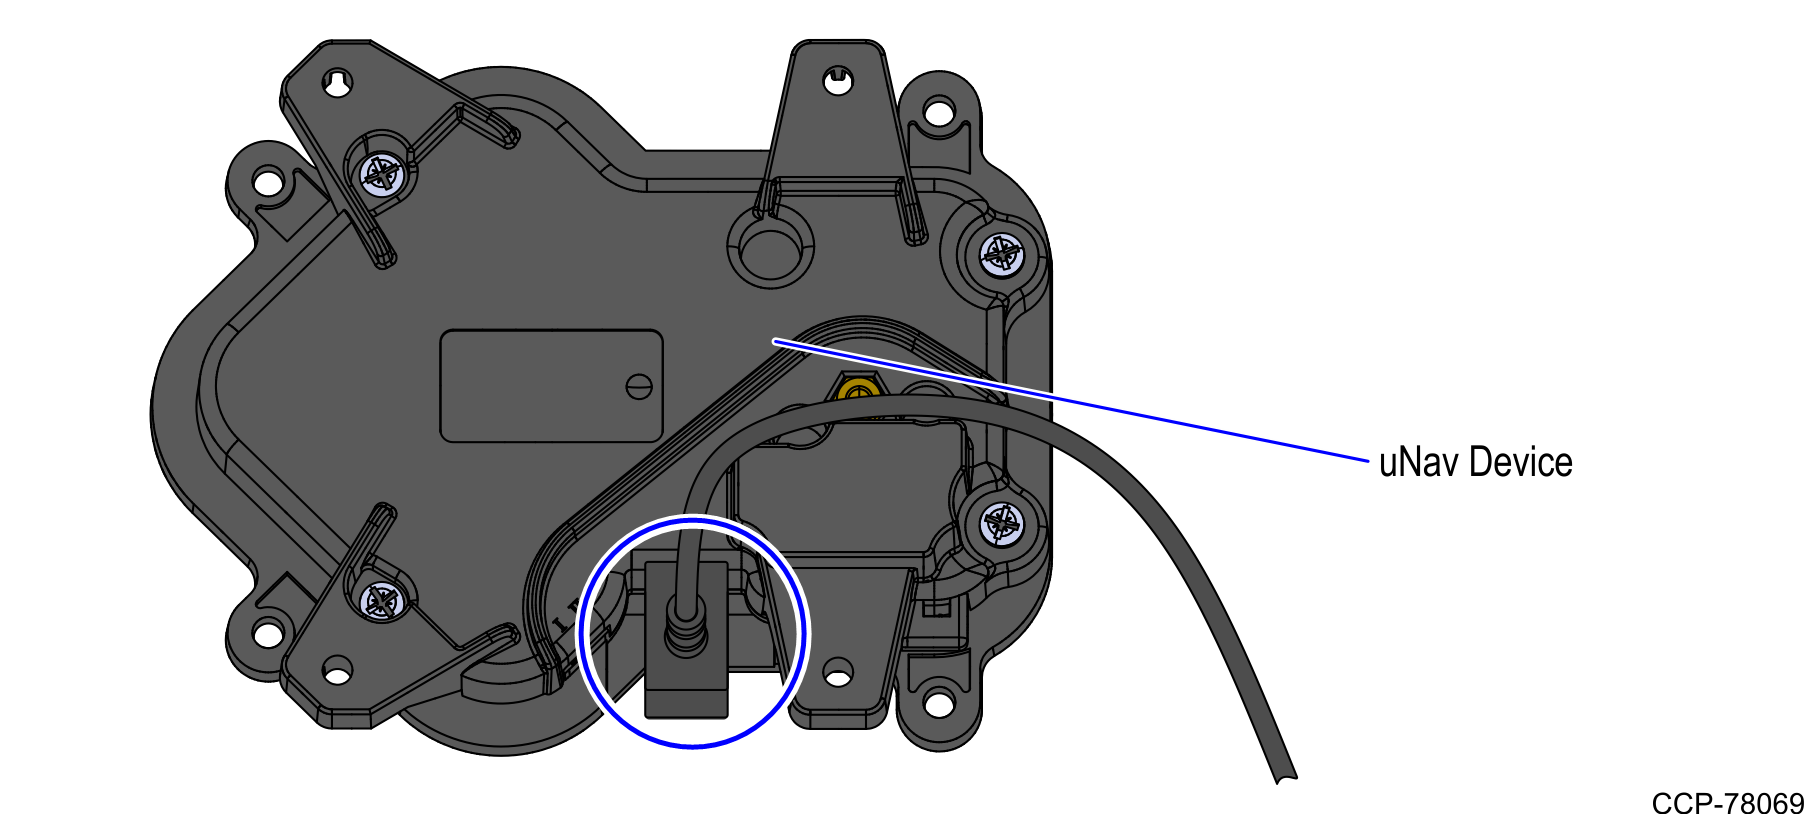
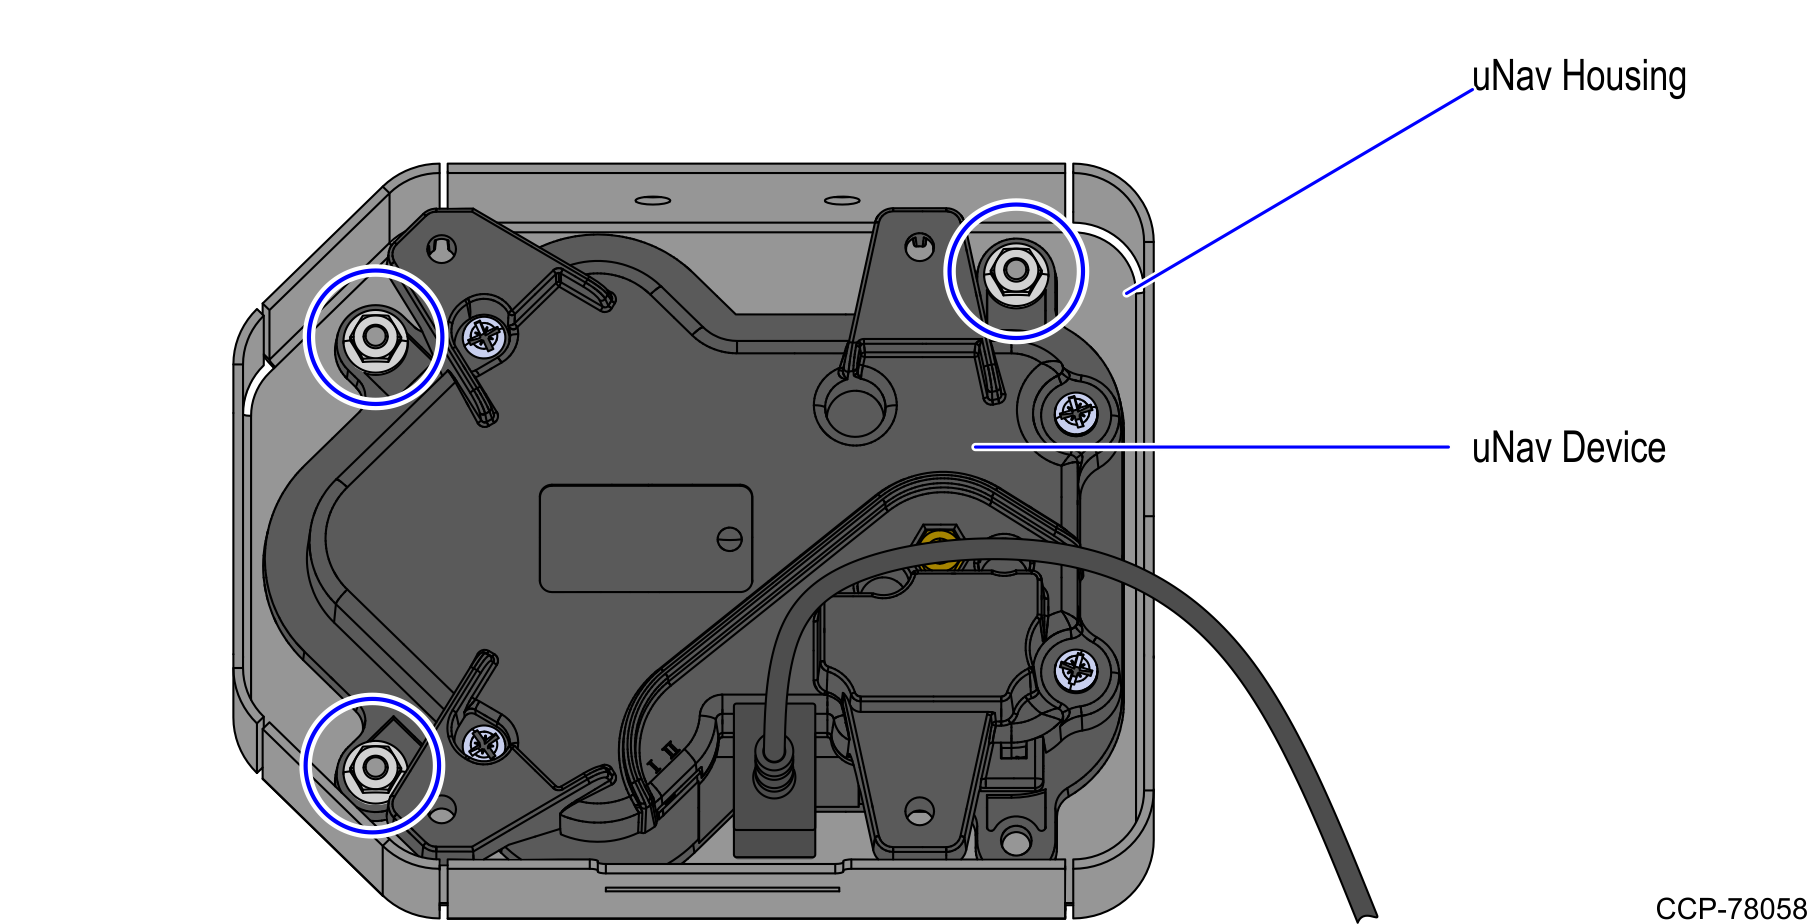
b.Secure the uNav device to the uNav housing using three (3) nuts, as shown in the image below.
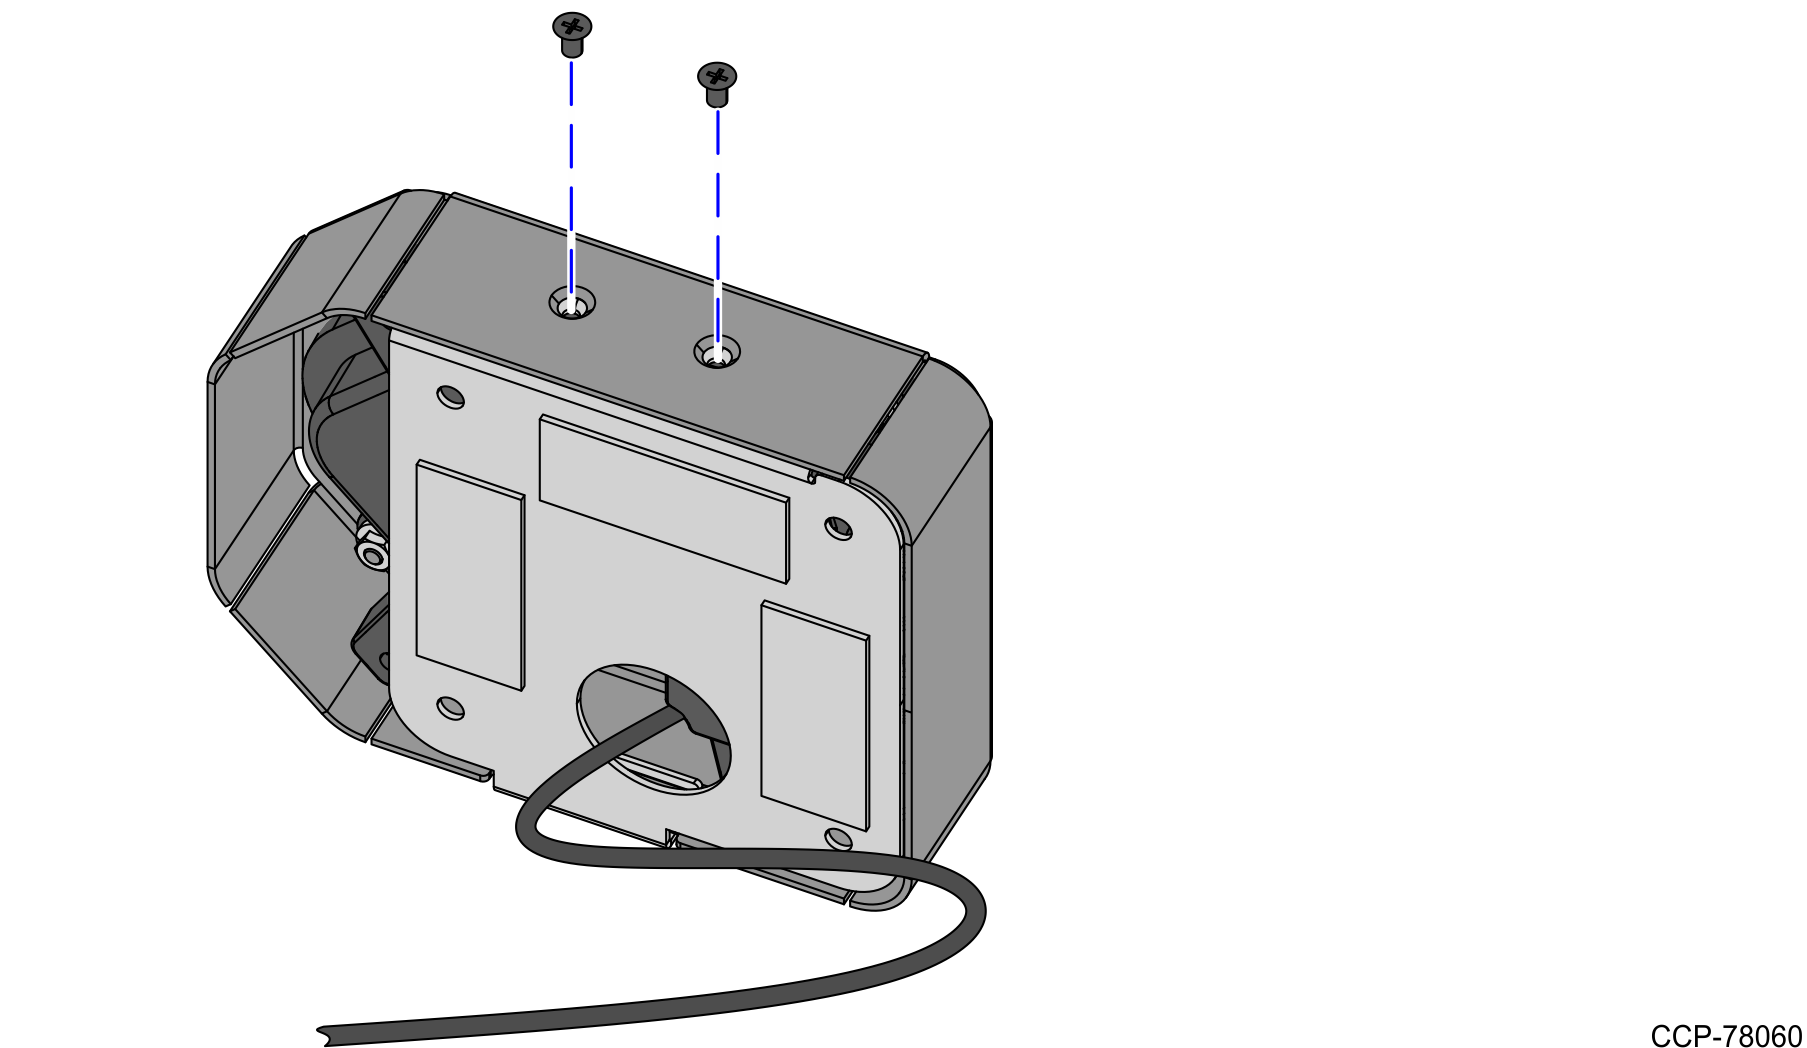
2.Route the other end of the uNav cable through the hole on the uNav mounting plate.
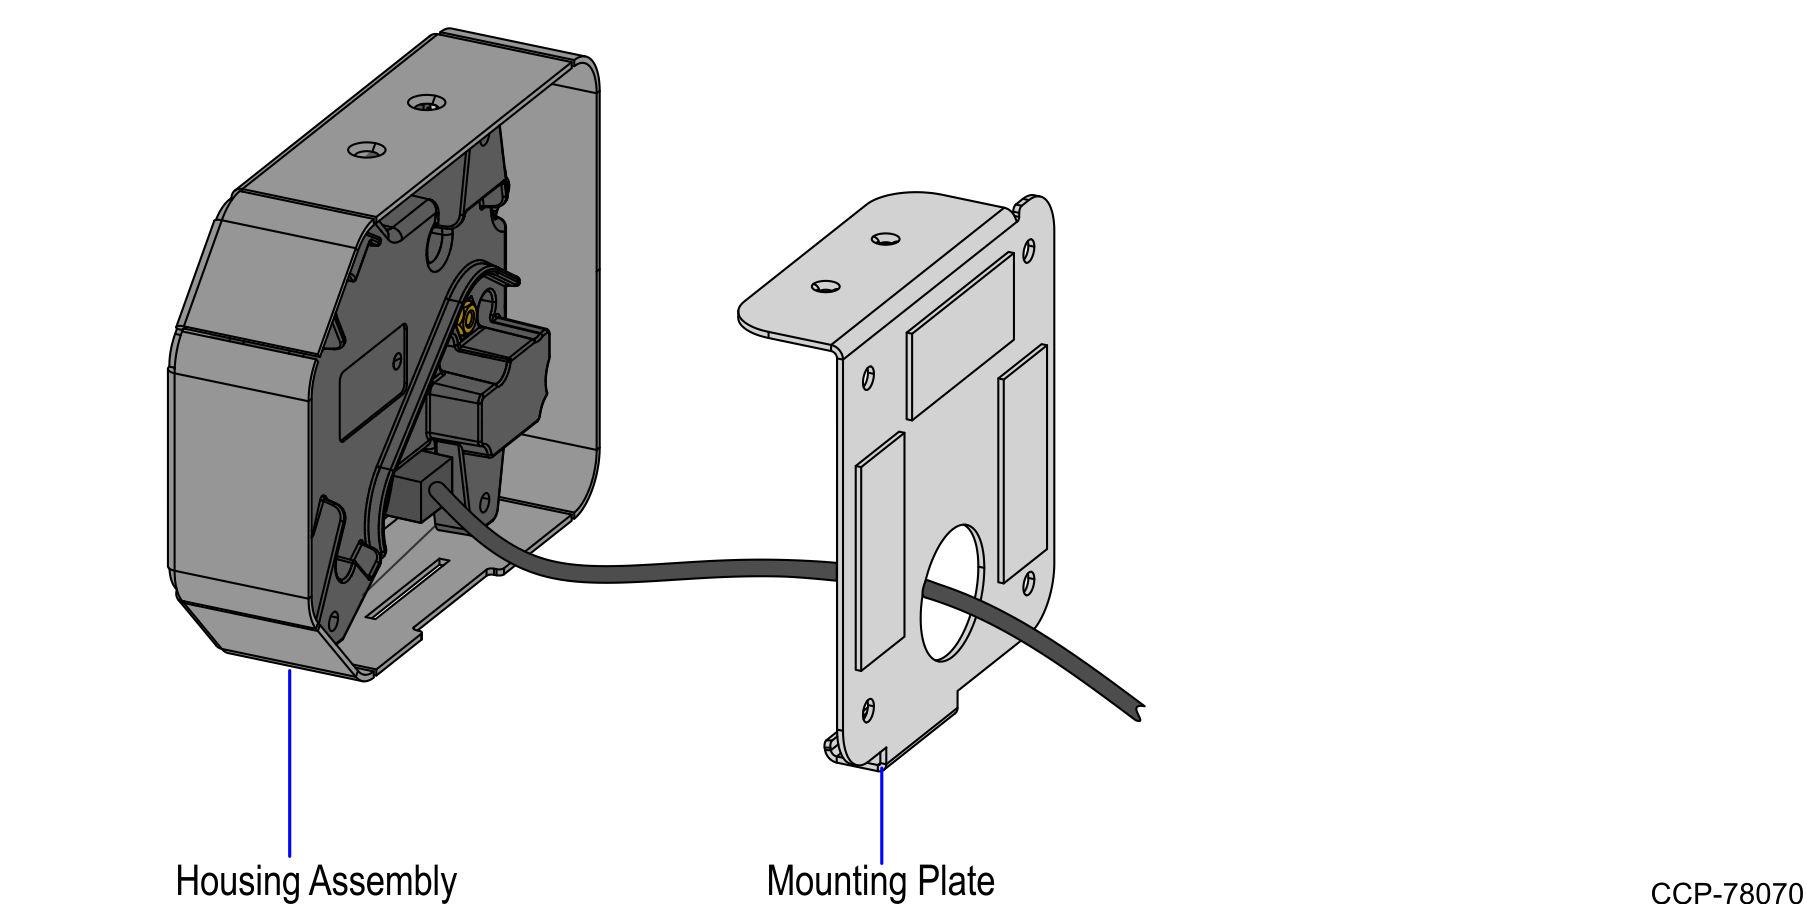
3.Hook the uNav mounting plate to the slot on the bottom of the uNav housing, as shown in the image below.
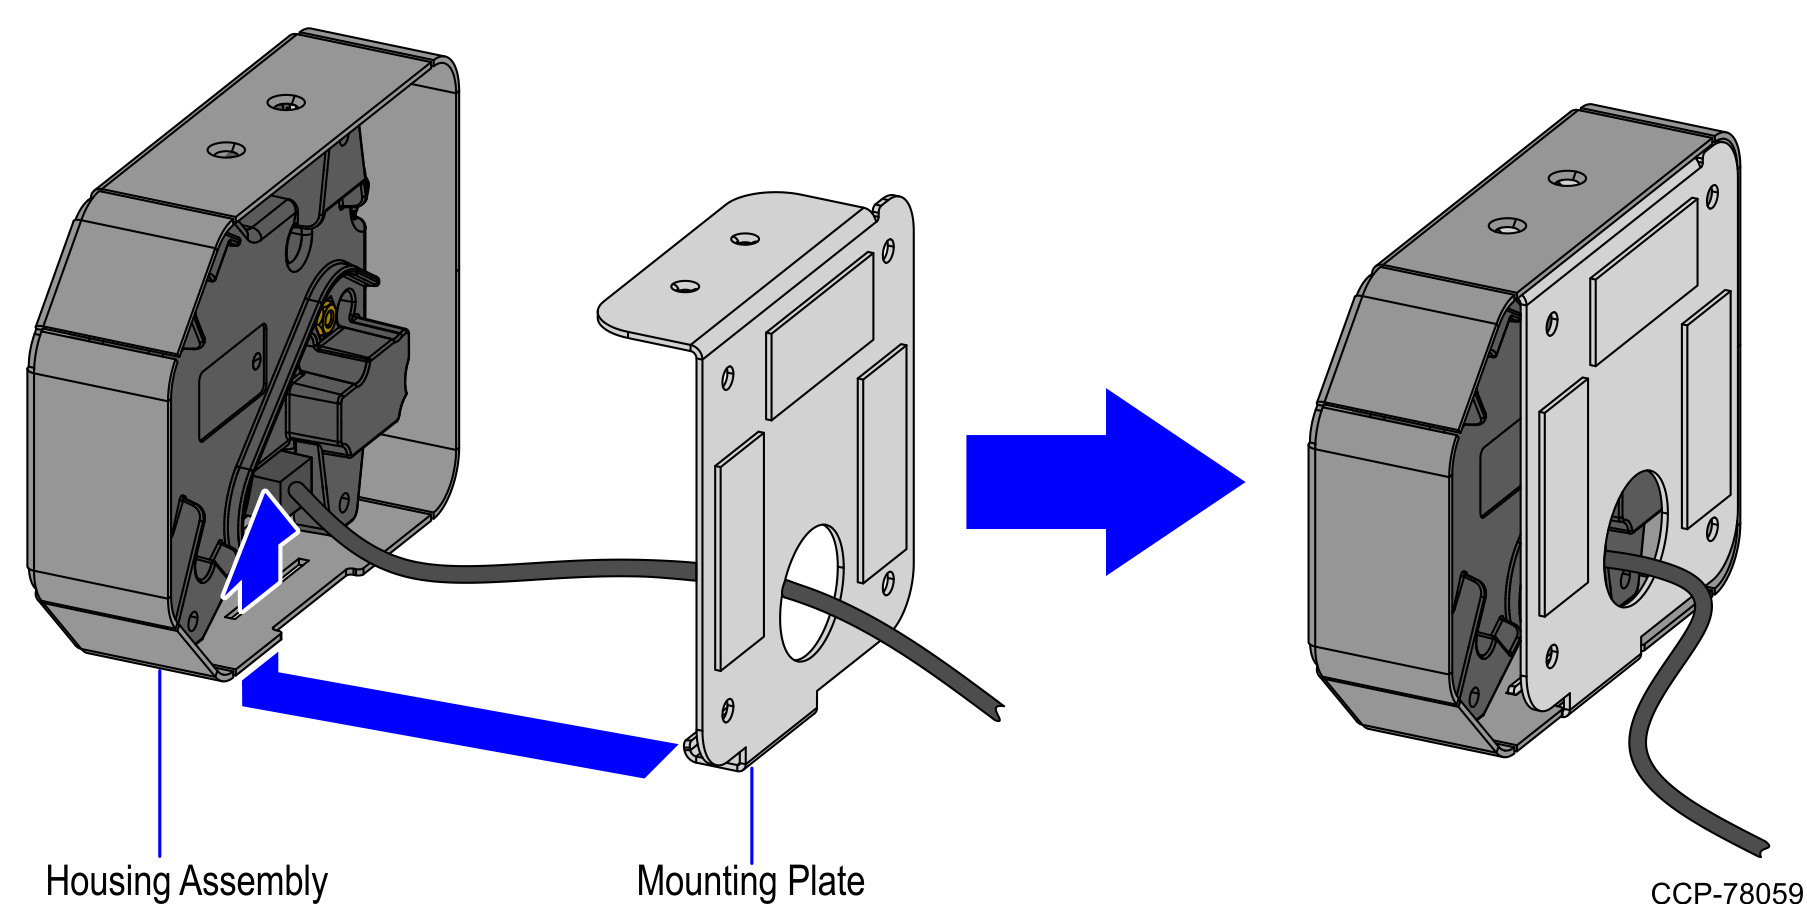
4.Secure the uNav housing to the uNav mounting plate using two (2) screws, as shown in the image below.
5.Depending on the currency configuration of the SelfServ Checkout unit, place the drilling guide on the Core Door, as shown in the image below.
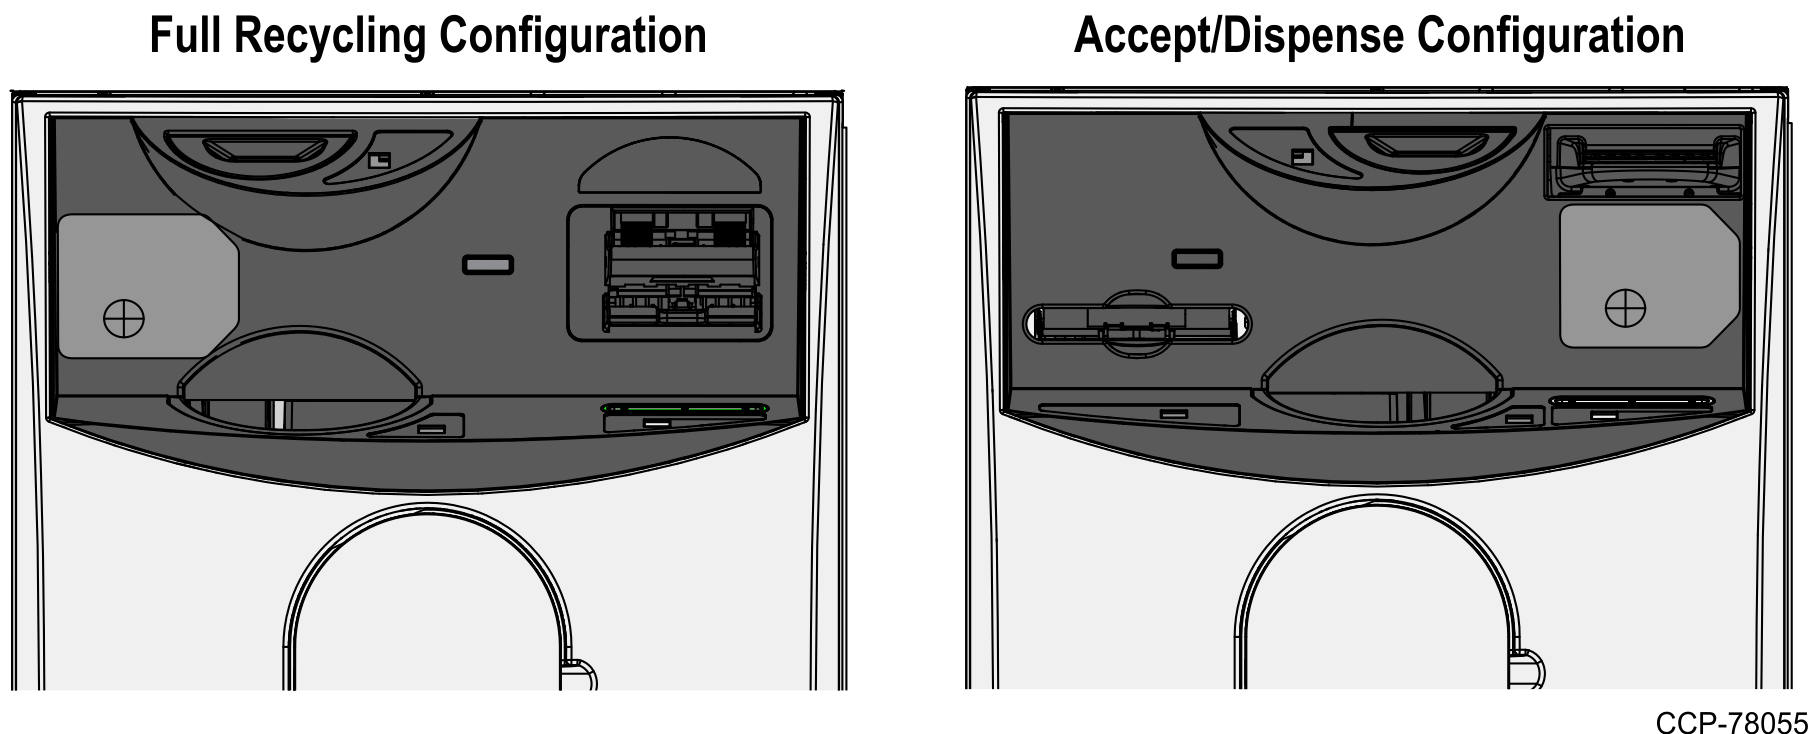
6.Cut along the cross pattern and then mark a spot on the Core Door.
Note: For the purpose of illustration only, the image below shows a Full Recycling configuration unit.
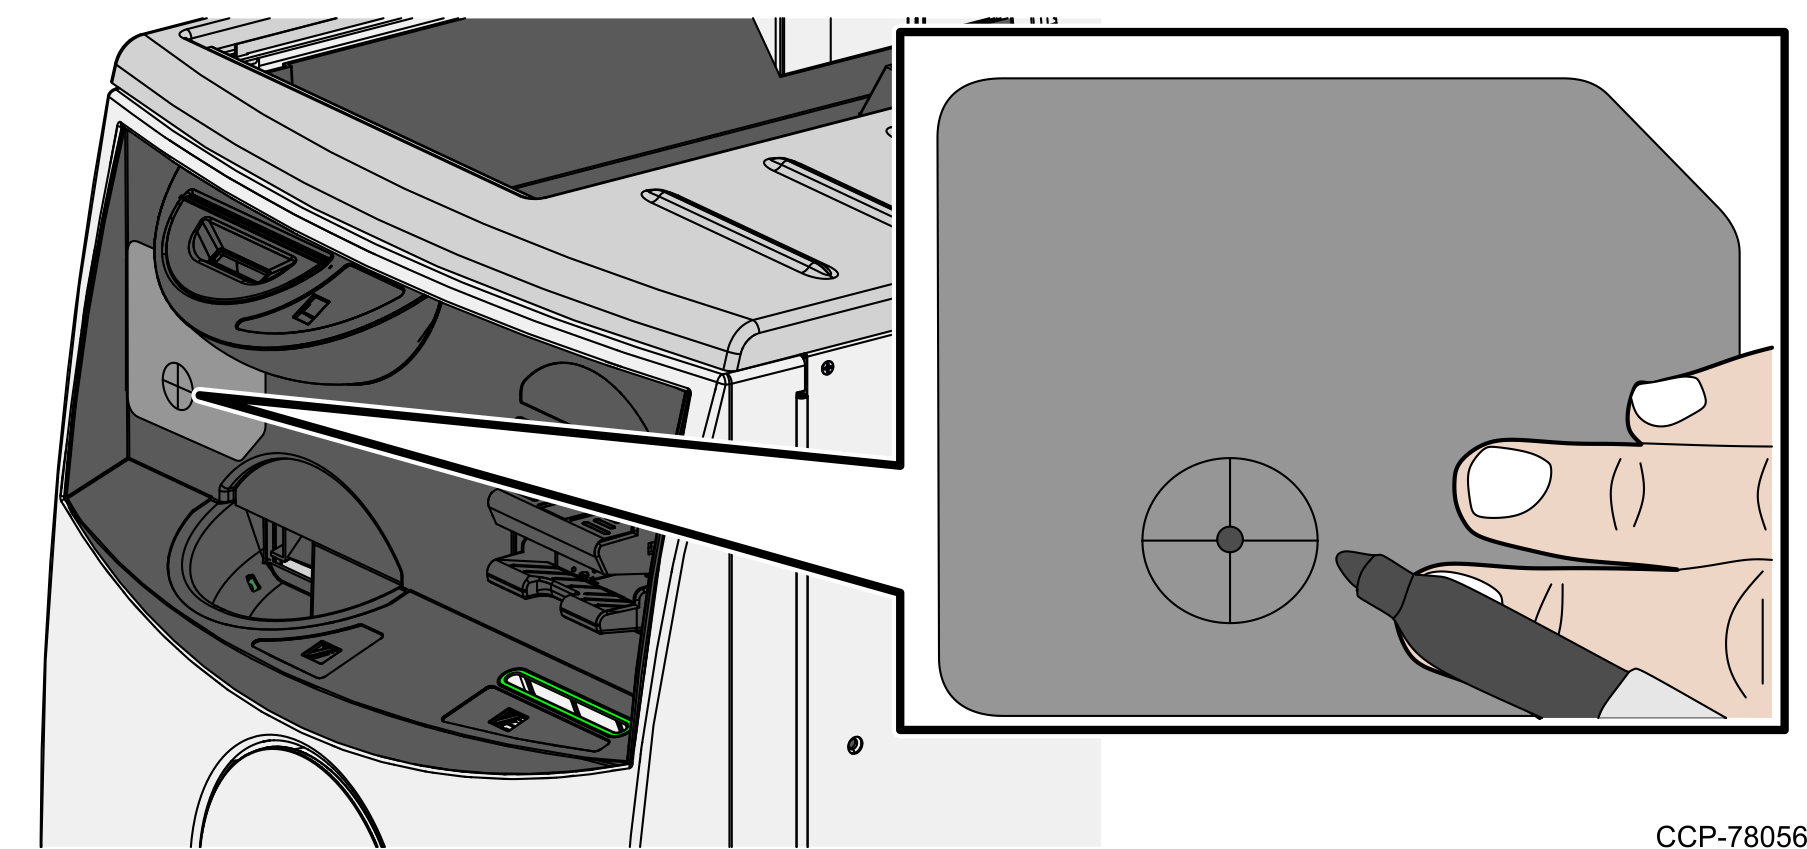
7.Do the following:
a.On the marked spot, drill a hole of at least ¾ in (19 mm) diameter through the Core Door.
b.Clean the Core Door to remove any drilling debris. For more information on properly cleaning the Core Door, refer to NCR FastLane SelfServ™ Checkout (7358) Hardware Service Guide (BCC5-0000-5265).
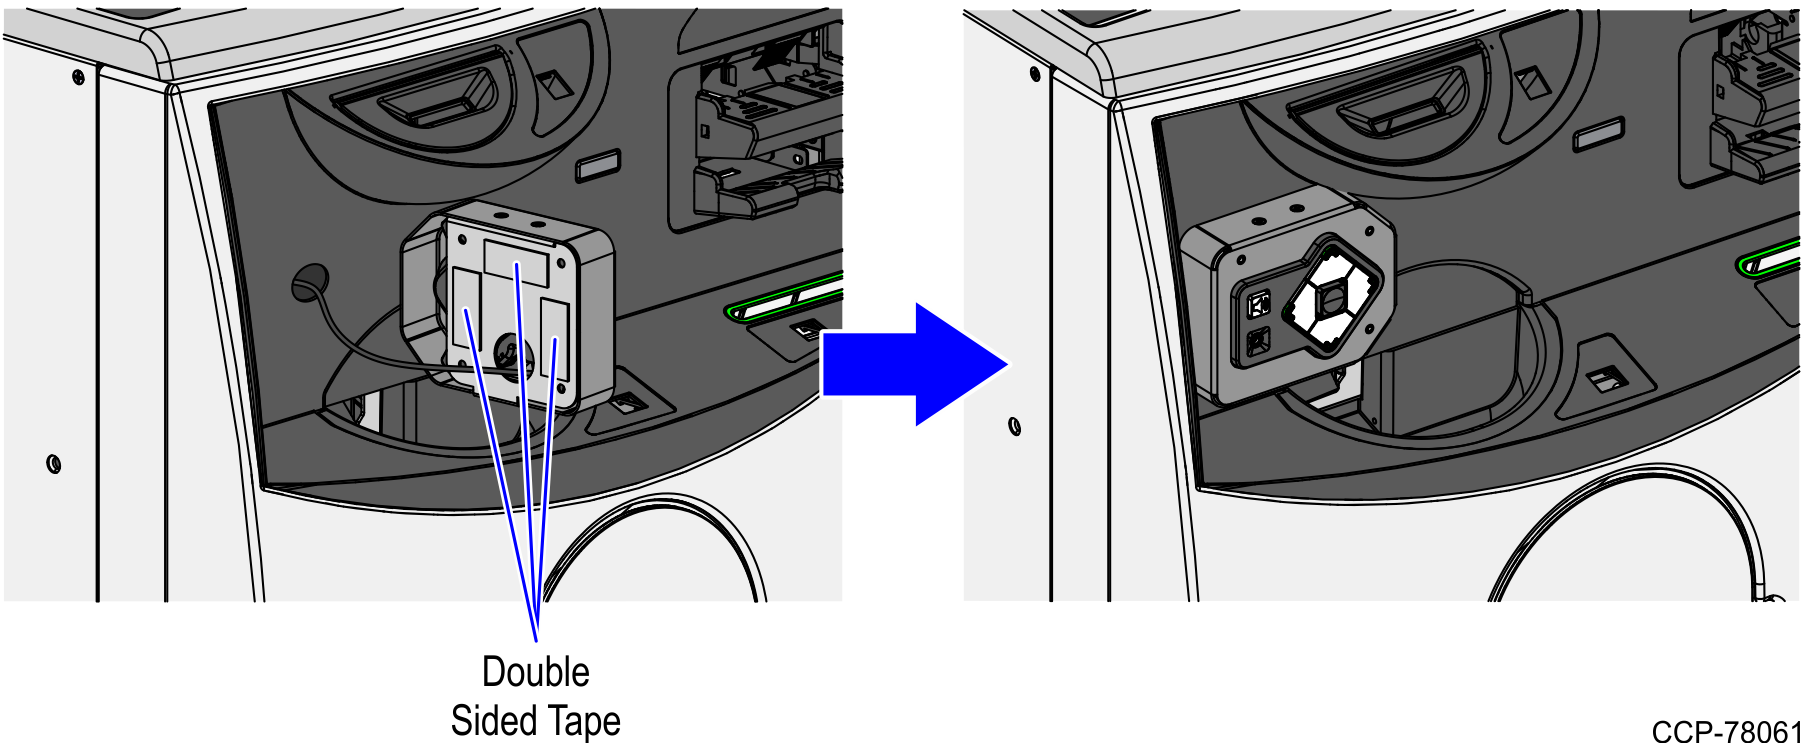
8.Feed the uNav cable through the drilled hole, as shown in the image below.
Note: For the purpose of illustration only, the image below shows a Full Recycling configuration unit.

9.Remove the protective film of the double-sided tape around the uNav mounting plate and then attach the uNav device to the Core Door, as shown in the image below.
Note: For the purpose of illustration only, the image below shows a Full Recycling configuration unit.
10.Open the Core Door and then route the uNav cable through the cable clips at the back of the Core Door, as shown in the image below.
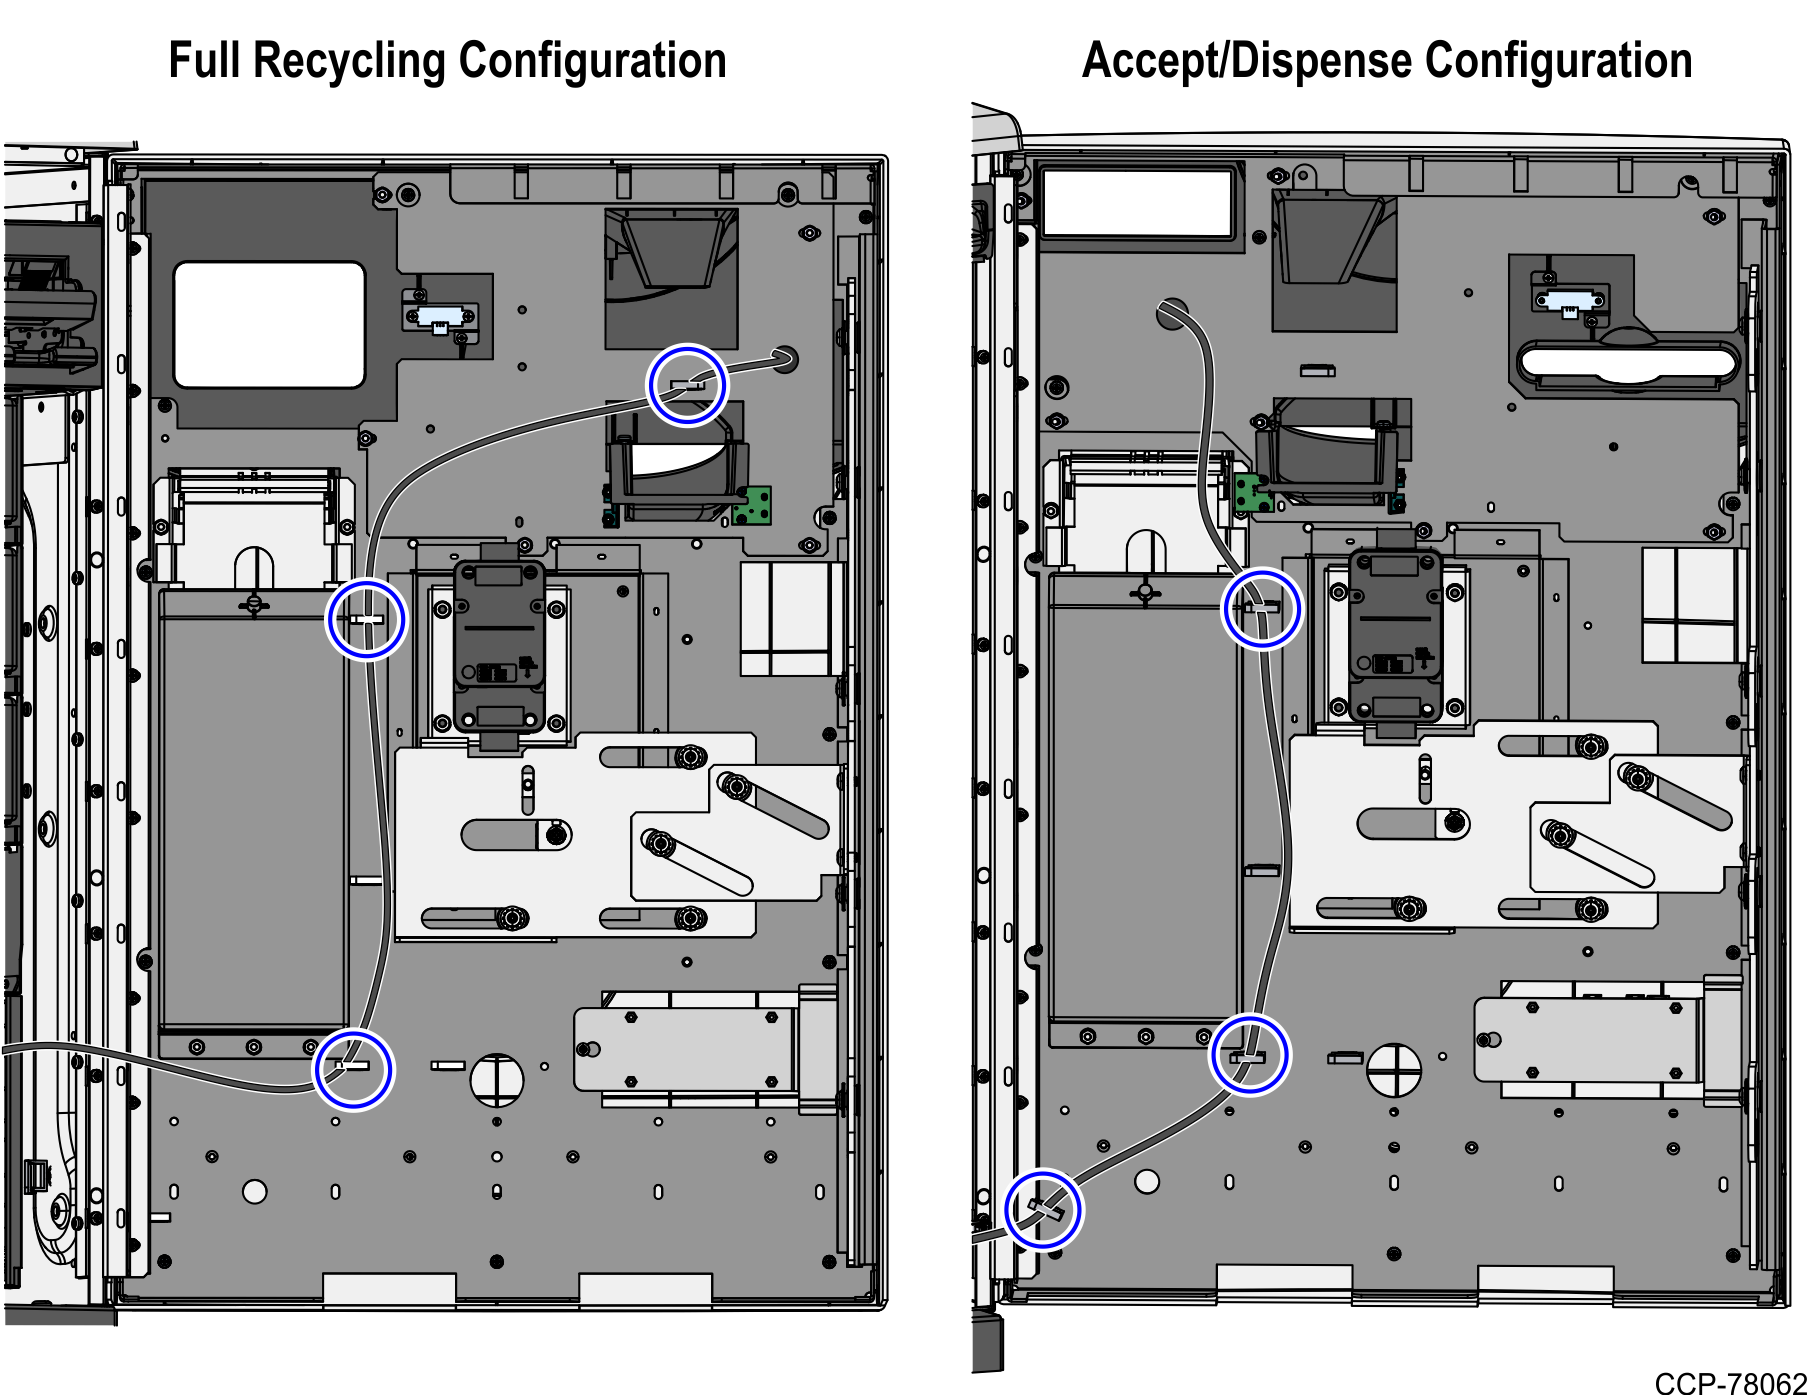
11.Route the uNav cable along with the other cables of Core Door components. For more information, refer to Routing cables of Core Door Components.
12.Connect the uNav cable to the I/O Box.
13.Turn on the SelfServ Checkout unit. The ADD/CADD window is displayed, showing available devices.
Note: The NCR FastLane SelfServ™ Checkout application automatically runs and installs all available devices. If the new or replaced device is not listed in the ADD/CADD window, an error message is displayed. Follow the instructions on how to fix the error and then, restart the SelfServ Checkout system.