Installing Tri-Light/Lane Light with Camera Assembly
To install the Tri–Light/Lane Light assembly, follow these steps:
Note
Ensure that the NCR Customer Helpdesk is informed when the Tri-Light/Lane Light with Camera is installed in the store.
- Remove the existing Tri–Light/Lane Light assembly, if necessary. For more information, refer to Removing Tri–Light/Lane Light Assembly.
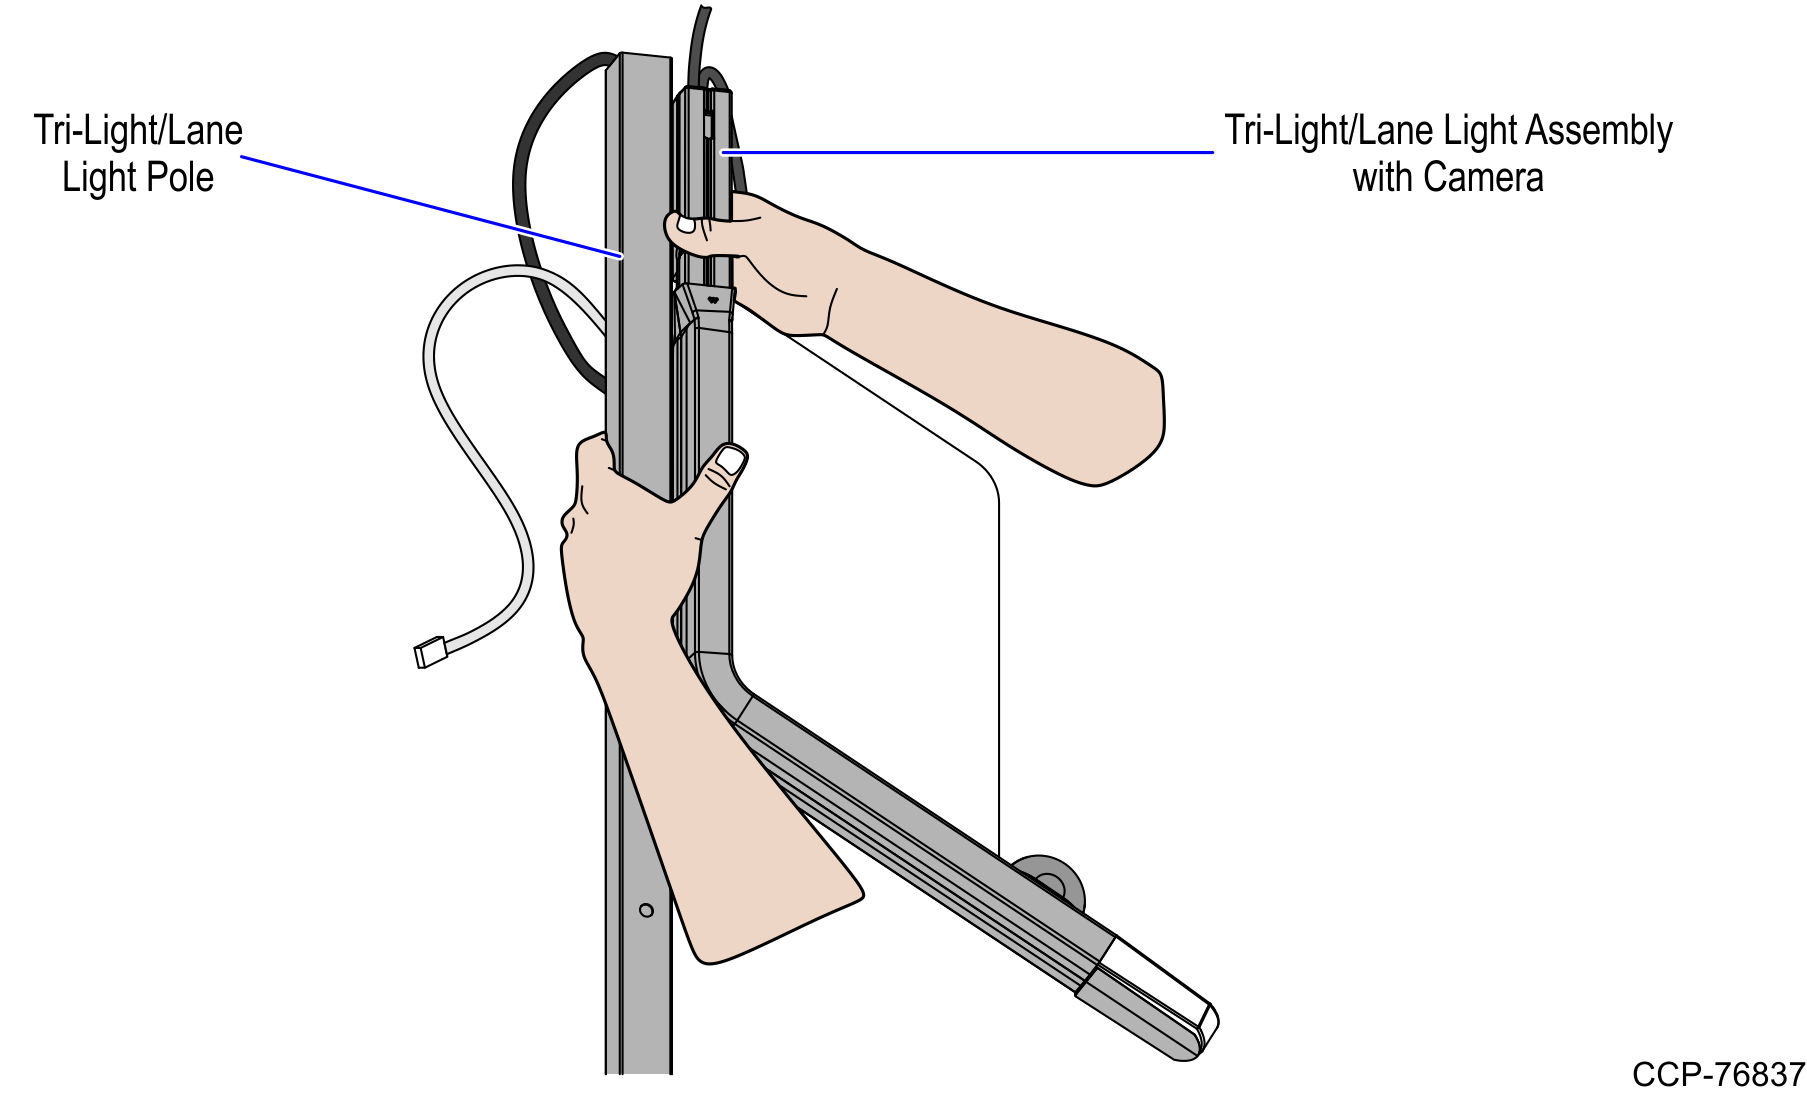
- Tie the Tri–Light/Lane Light assembly to the Tri–Light/Lane Light pole using a cable tie, as shown in the image below.
- Connect the Tri–Light/Lane Light with Camera Assembly cables.
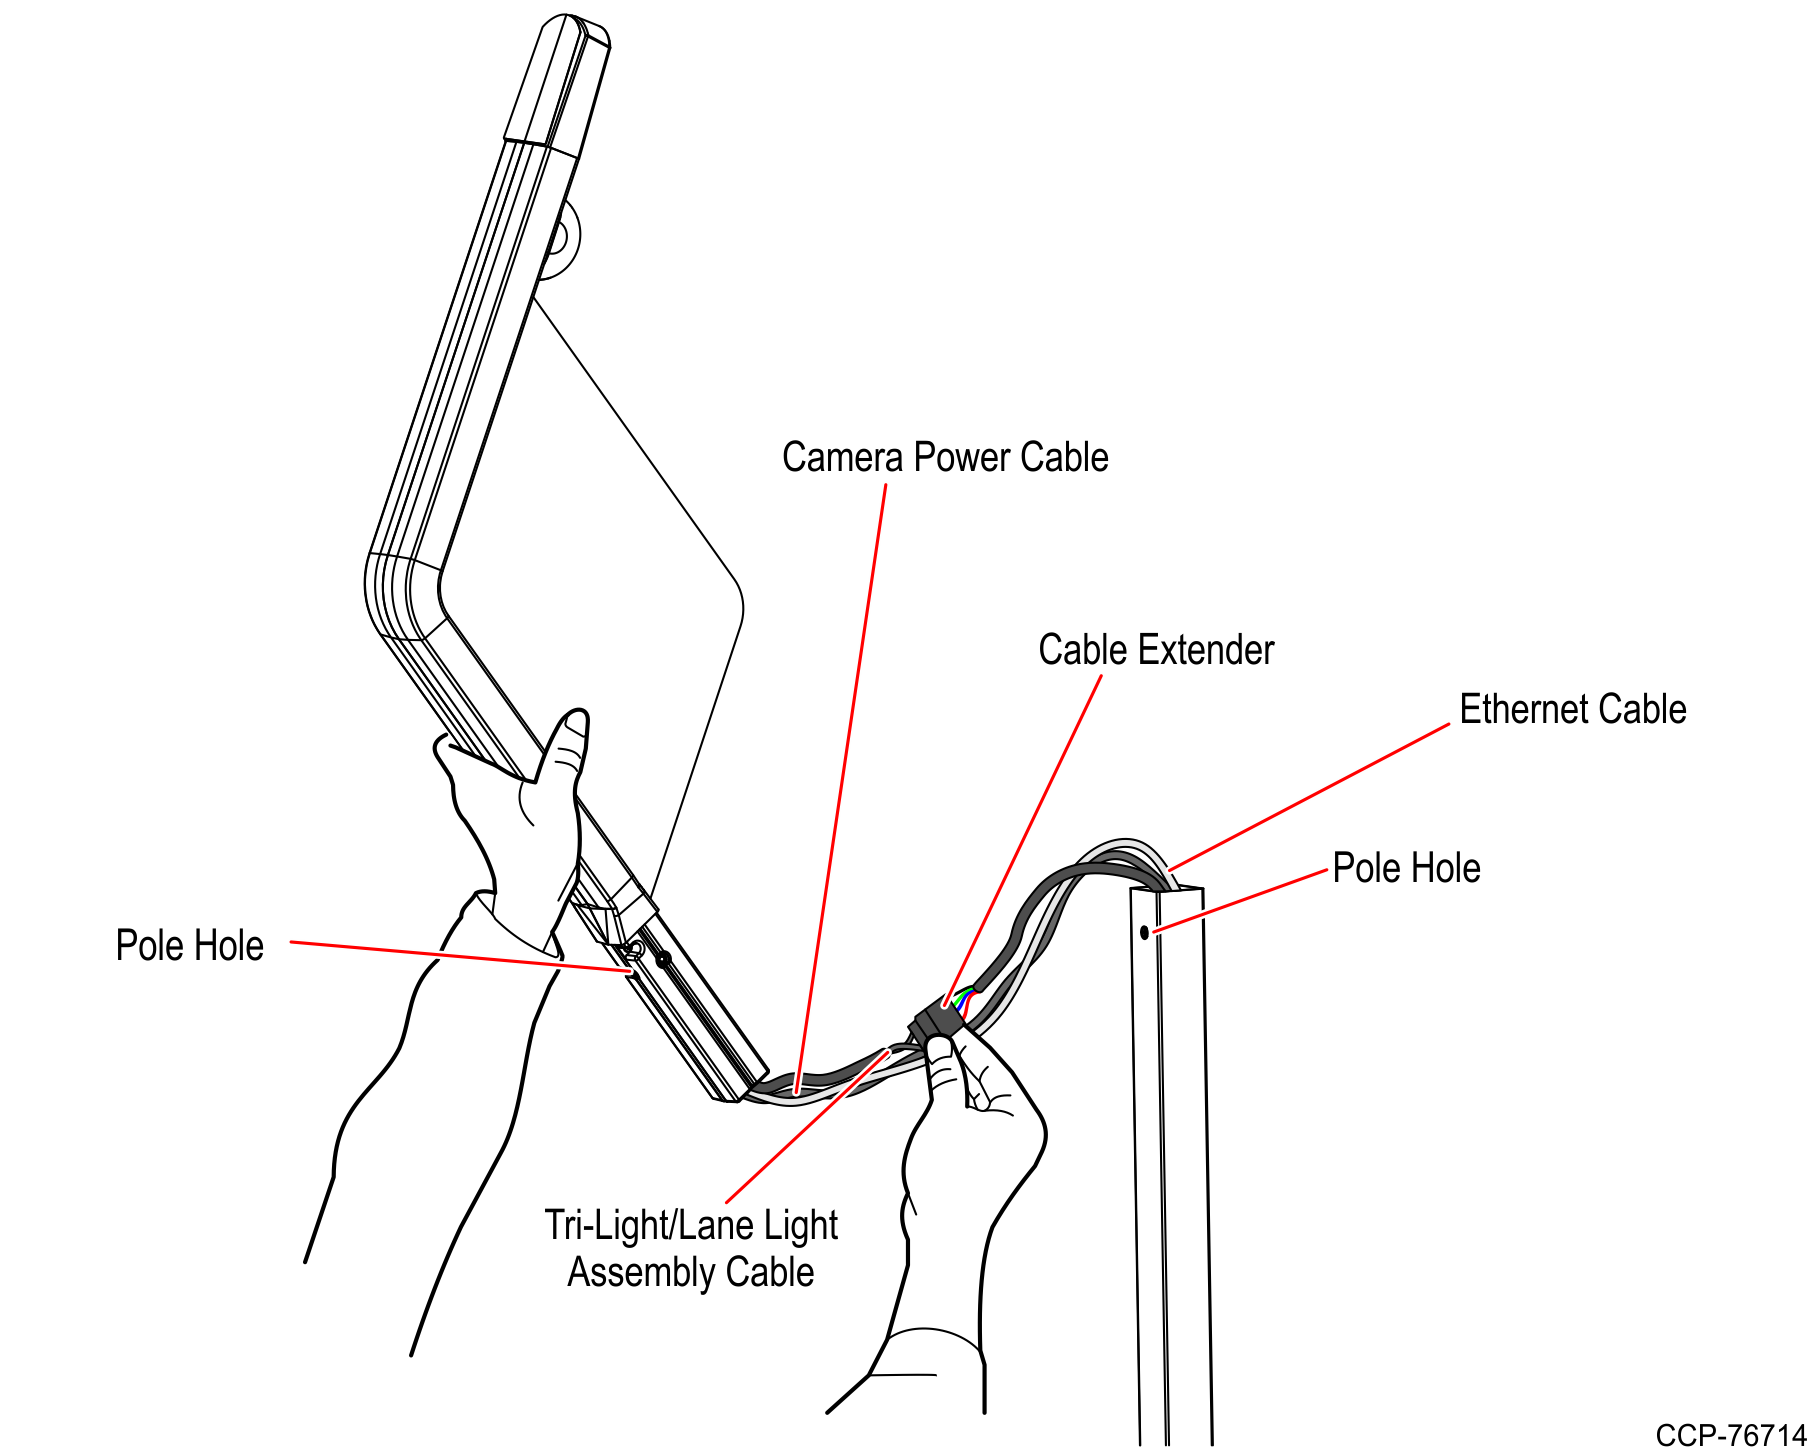
- Install three (3) cable ties on each side of the power connector and on the Ethernet cable to provide strain relief as shown in the image below.

- Orient the Tri–Light/Lane Light assembly so that the Lane Light faces the front of the unit.
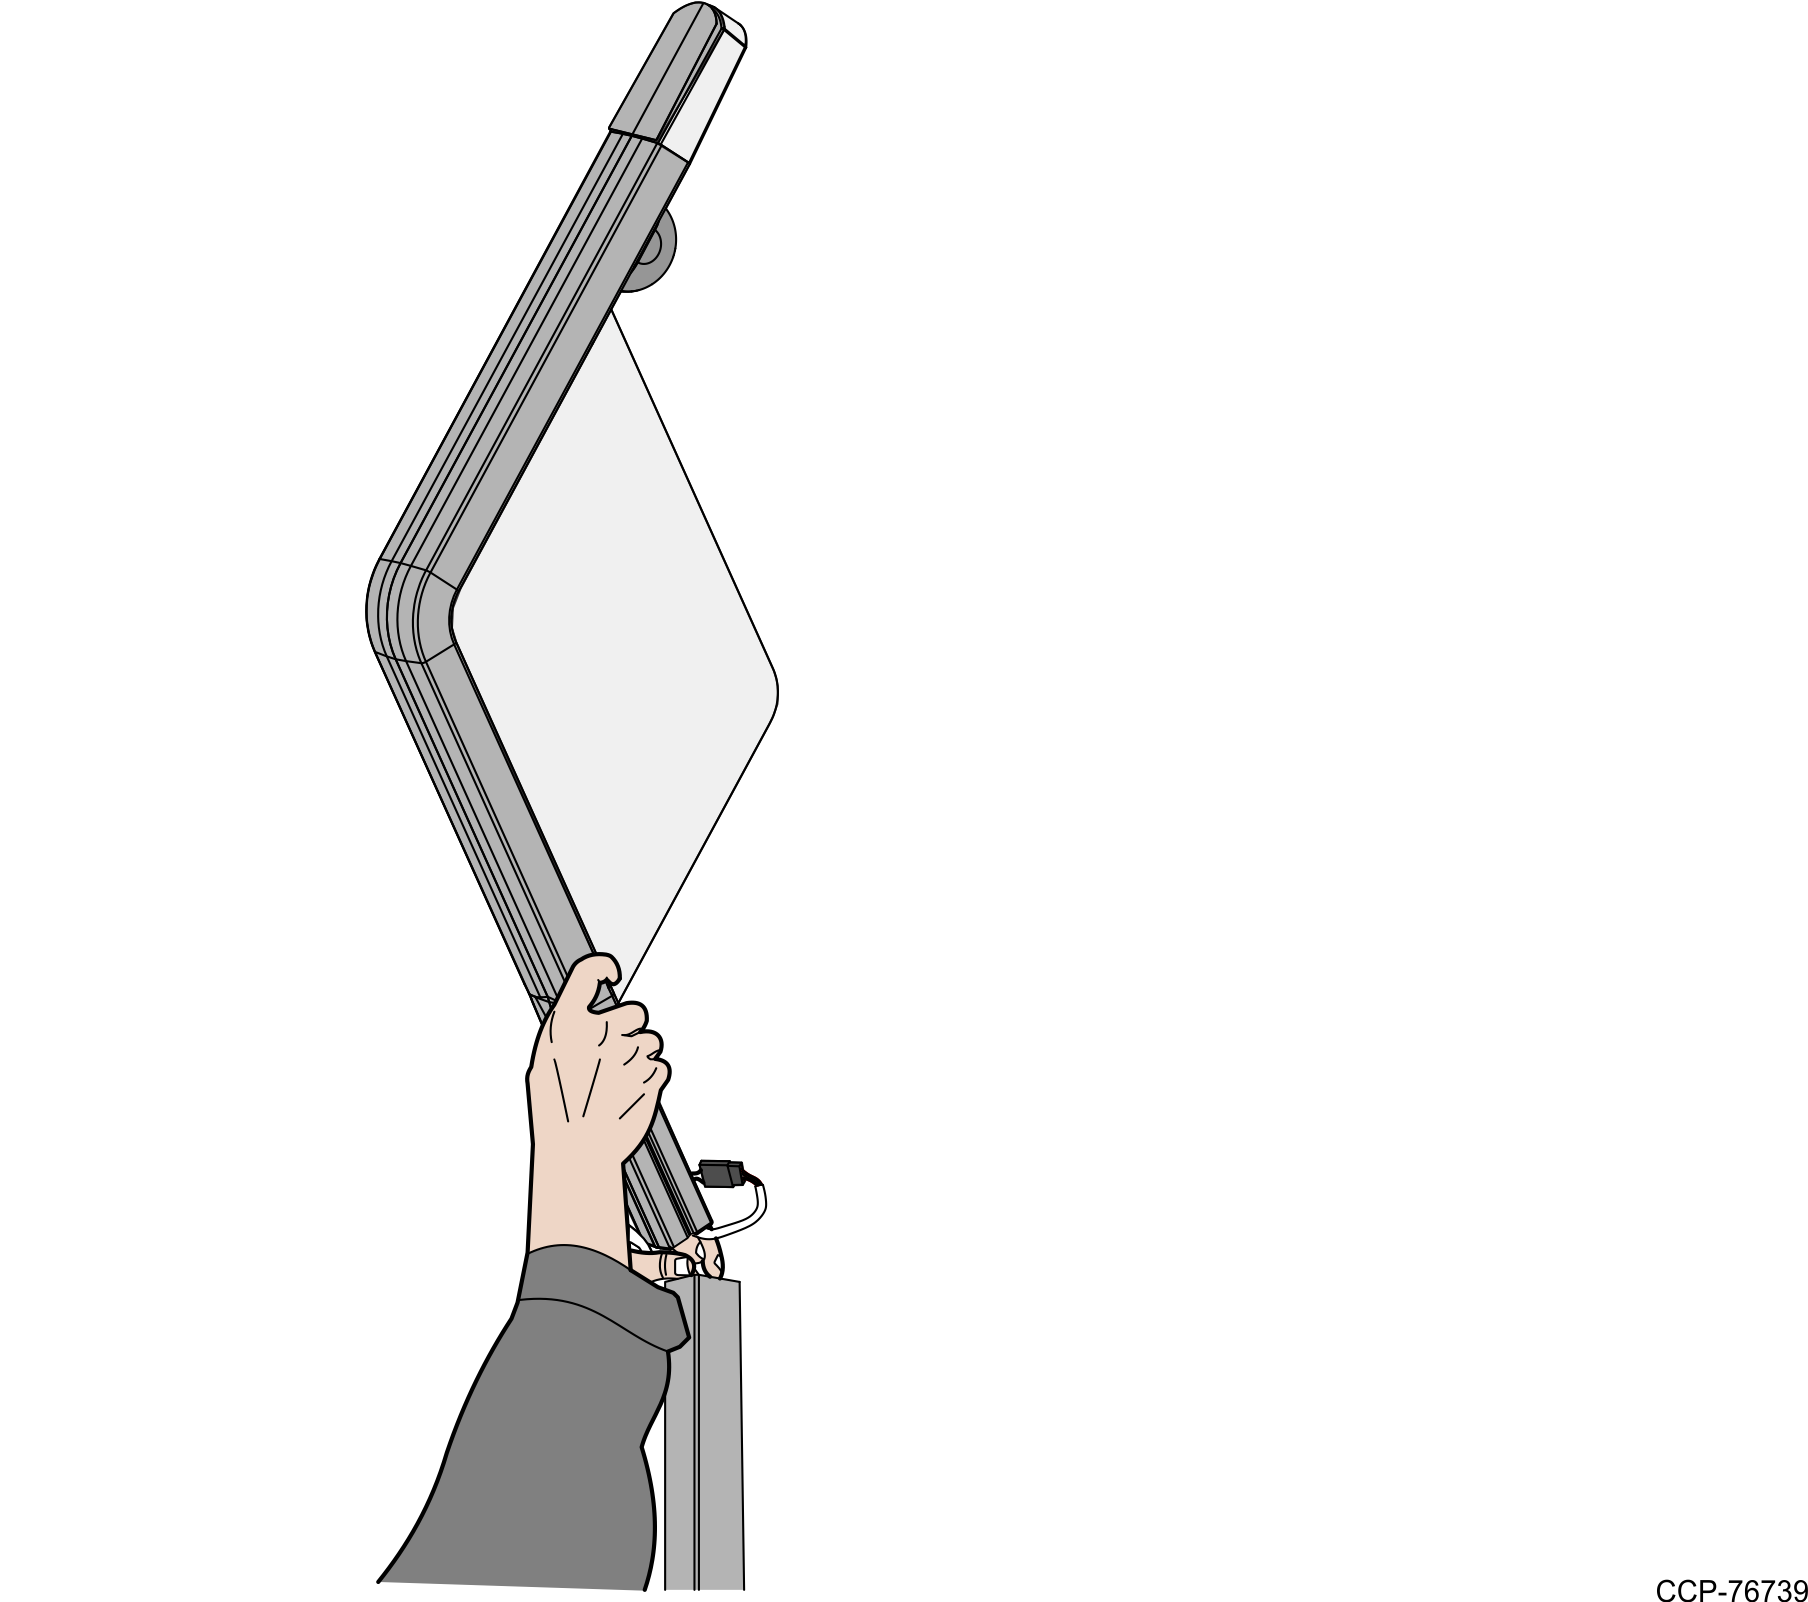
- Insert the Tri–Light/Lane Light assembly into the Tri–Light/Lane Light pole. Ensure that the pole holes are aligned.Tip
To easily insert the cables with connectors through the pole, insert first the LAN cable followed by the Power cable, and then the Tri–Light/Lane Light Assembly cable. Once the extenders are through the pole, slowly push the Tri–Light/Lane Light assemby into pole.
- Connect the Tri–Light/Lane Light and Power cables to the corresponding I/O Box port destinations:
Tri–Light Destination Connection (Location) Tri-Light/Lane Light cable extender
I/O Box (Tri–Light/Lane Light port)
Ethernet (LAN) cable extender
Ethernet (LAN)
I/O Box (Power) cable extender
I/O Box (Input Belt)
- Secure the Tri–Light/Lane Light assembly to the pole with a screw.

- Run the ADD utility to ensure device is updated with the latest firmware.