Installing the Receipt Printer
To install the Receipt Printer, follow these steps:
- Remove the existing printer. For more information, refer to Removing the Receipt Printer.
- Insert the new printer by aligning slots on bottom of printer with tabs on the printer shelf.
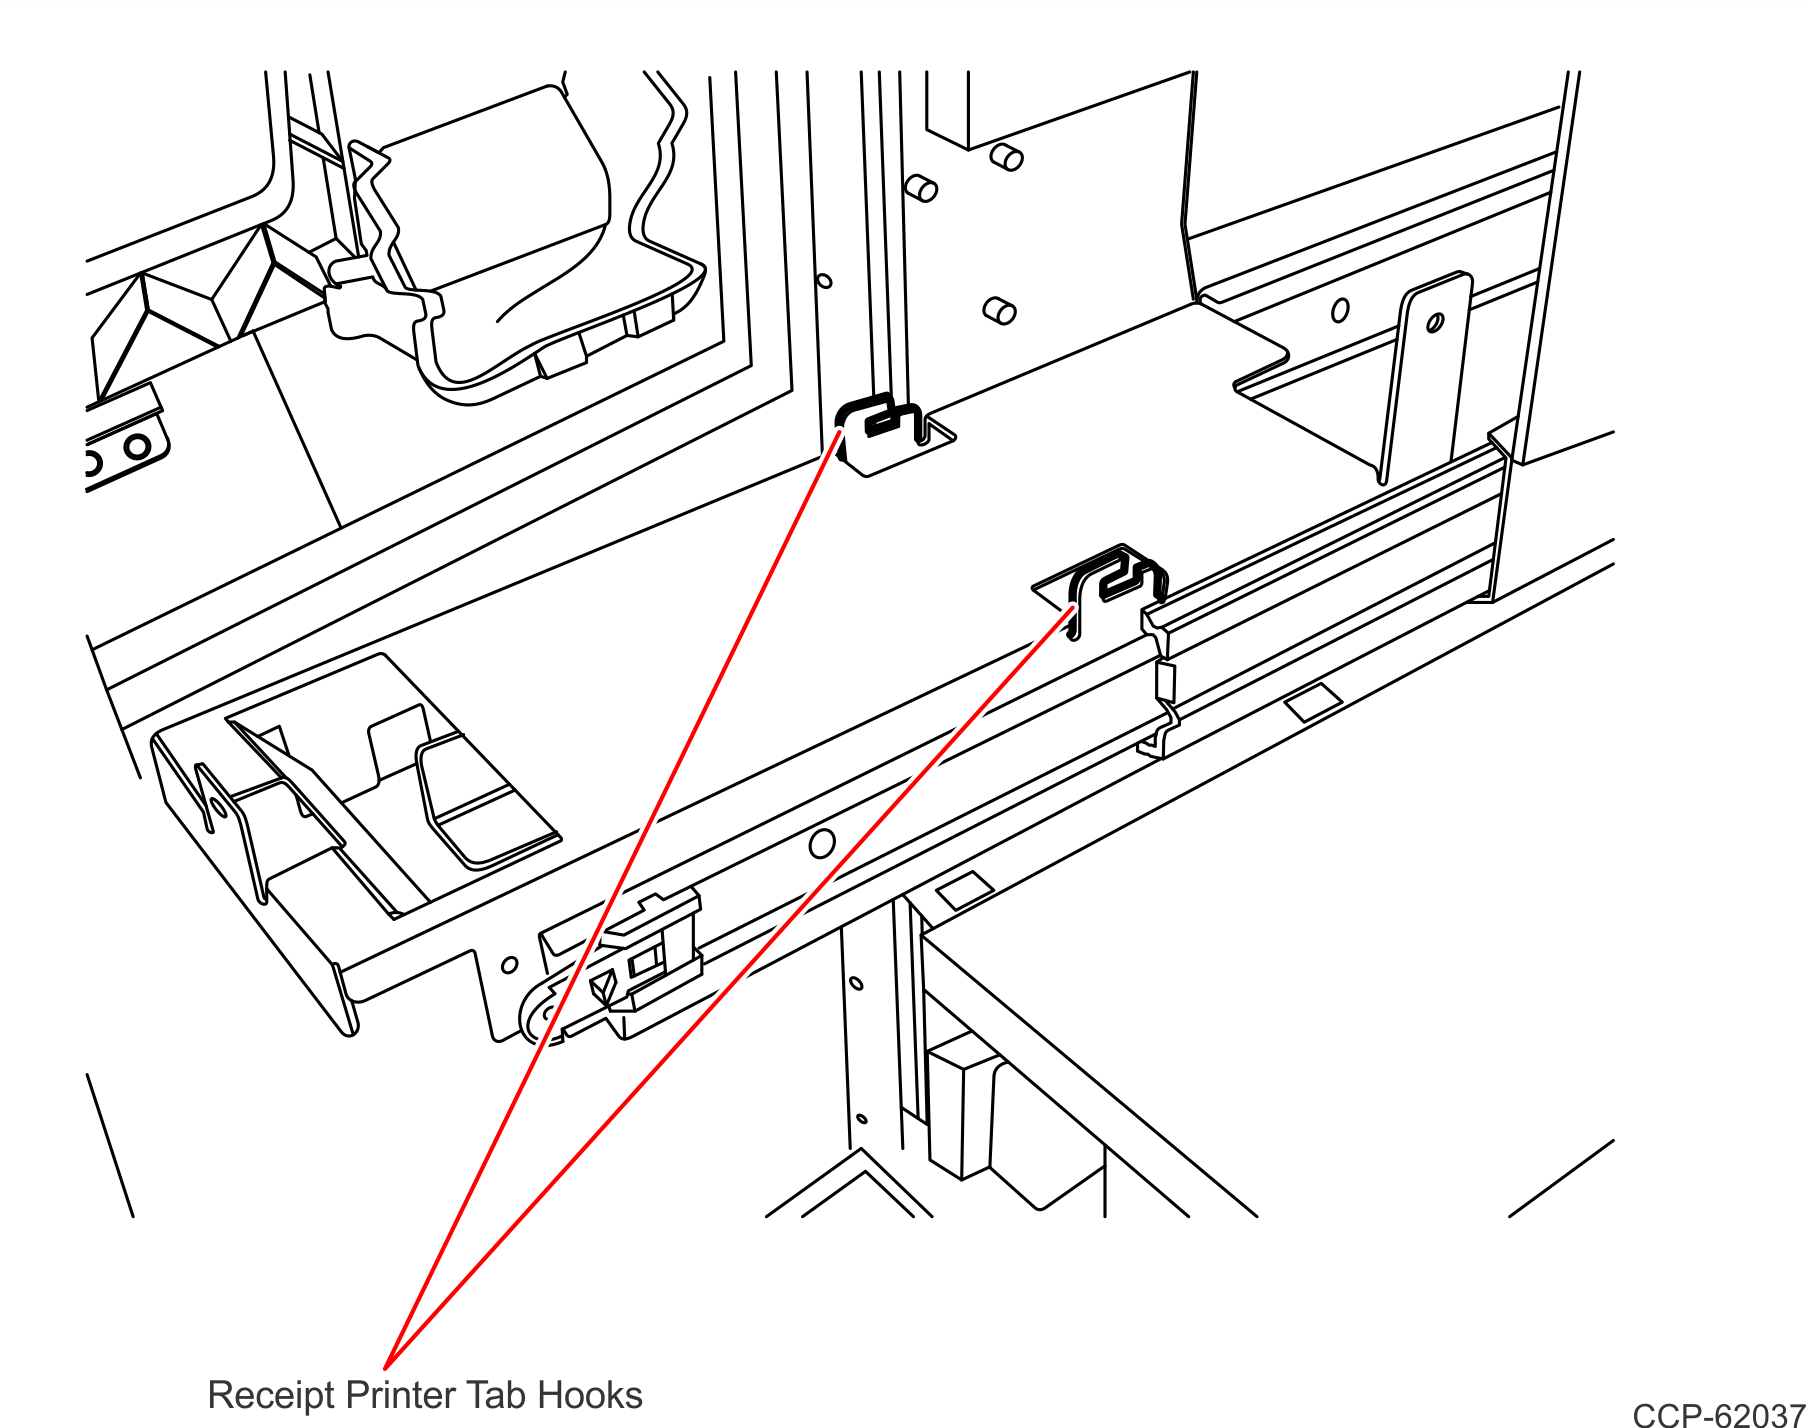
- Slide the printer forward to engage with tab hooks.
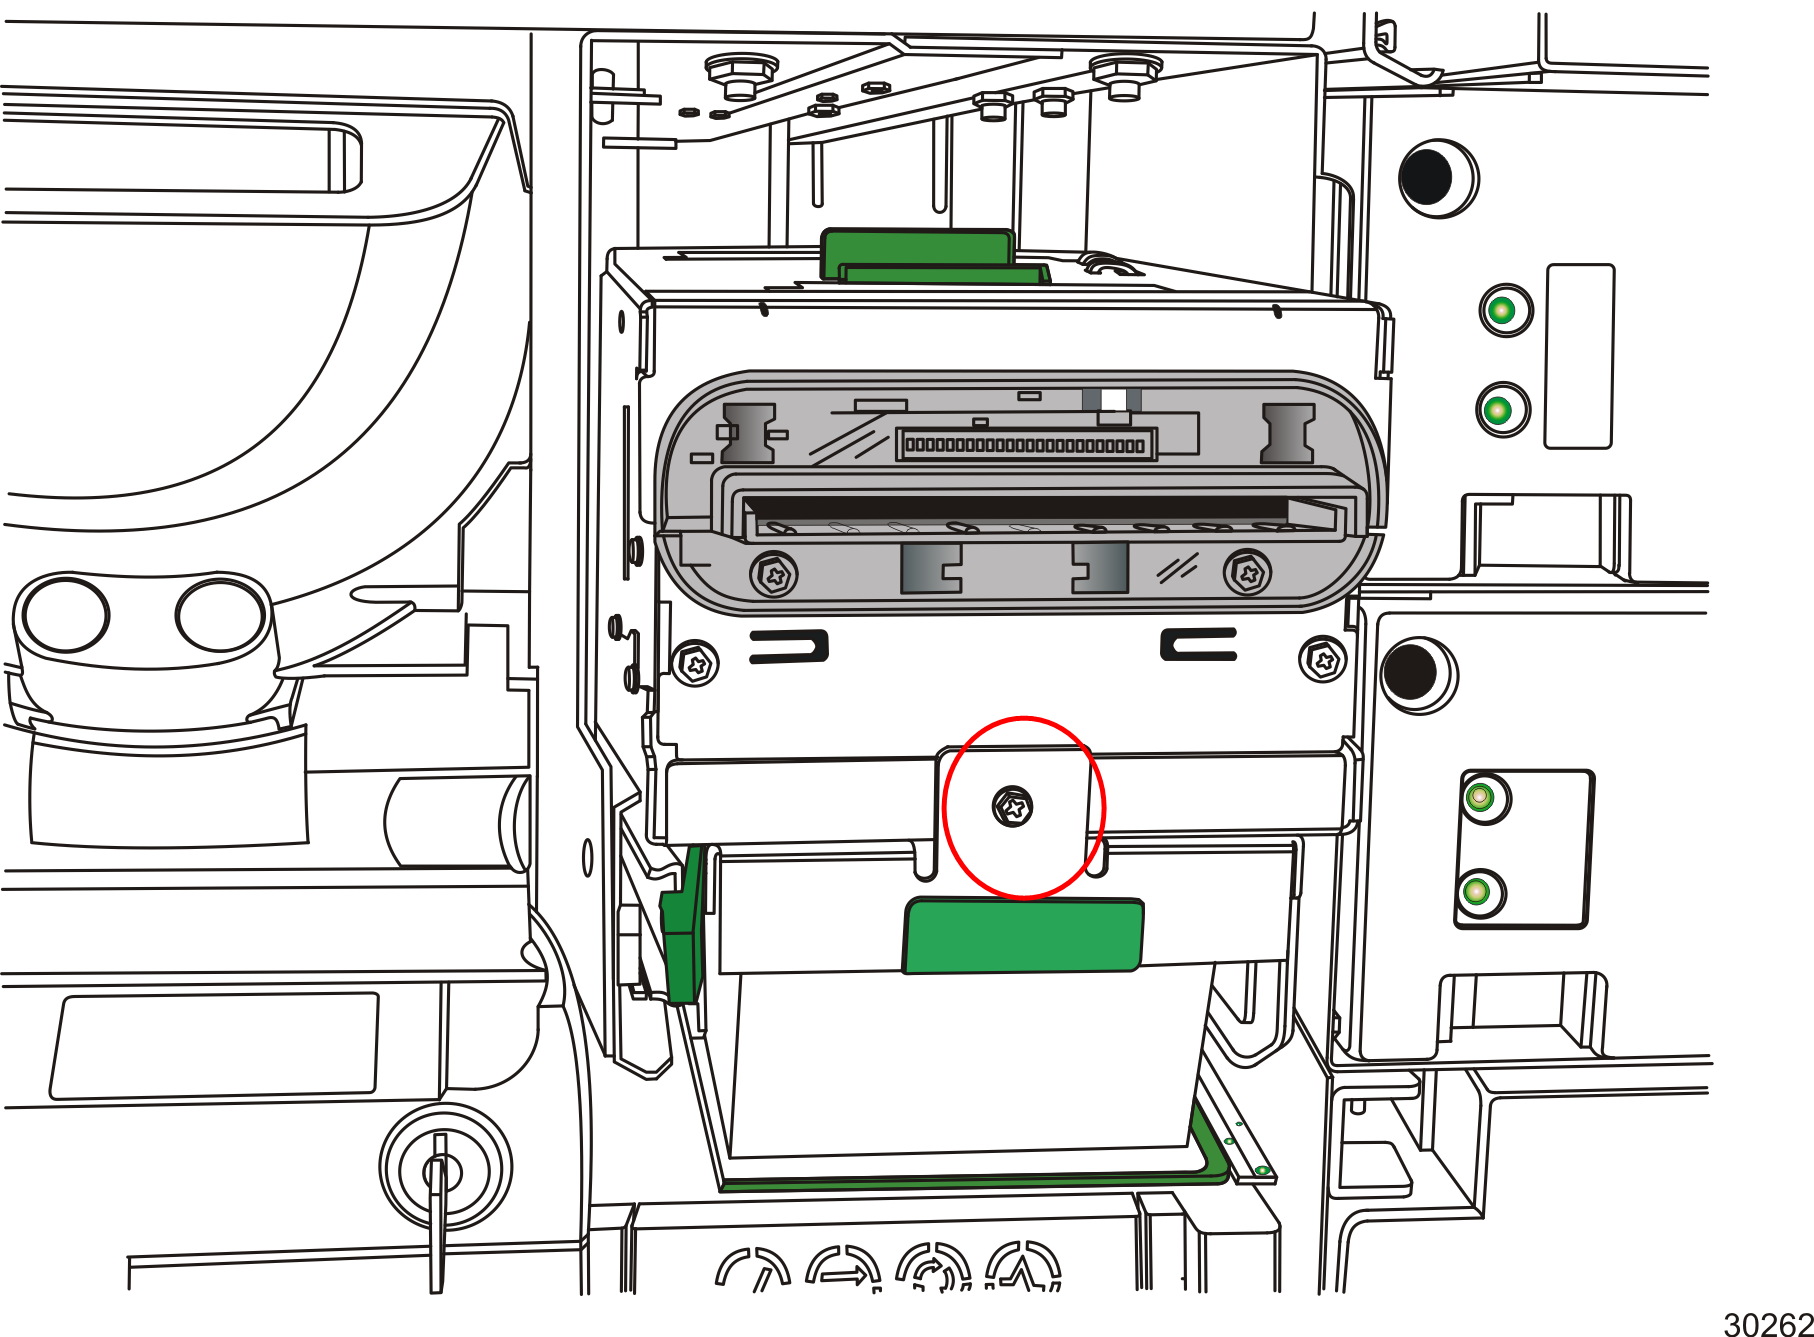
- Secure printer to shelf using one (1) screw.
- Attach printer cable to the back of printer and secure cable with a cable clip.
- Install paper into printer.
- Push printer shelf into the unit until it locks in place.
- Close and then lock the NCR FastLane SelfServ™ Checkout (7360) exterior door.
