Removing the Input Belt assembly
To remove the Input Belt assembly from a NCR SelfServ™ Checkout (7350) or NCR FastLane SelfServ™ Checkout (7358) R6L Plus unit, follow these steps:
Note
This procedure shows theNCR FastLane SelfServ™ Checkout (7358) R6L Plus for illustration purpose only.
Remove the Conveyor Belt from the Input Belt assembly. For more information, refer to Removing the Conveyor Belt assembly.
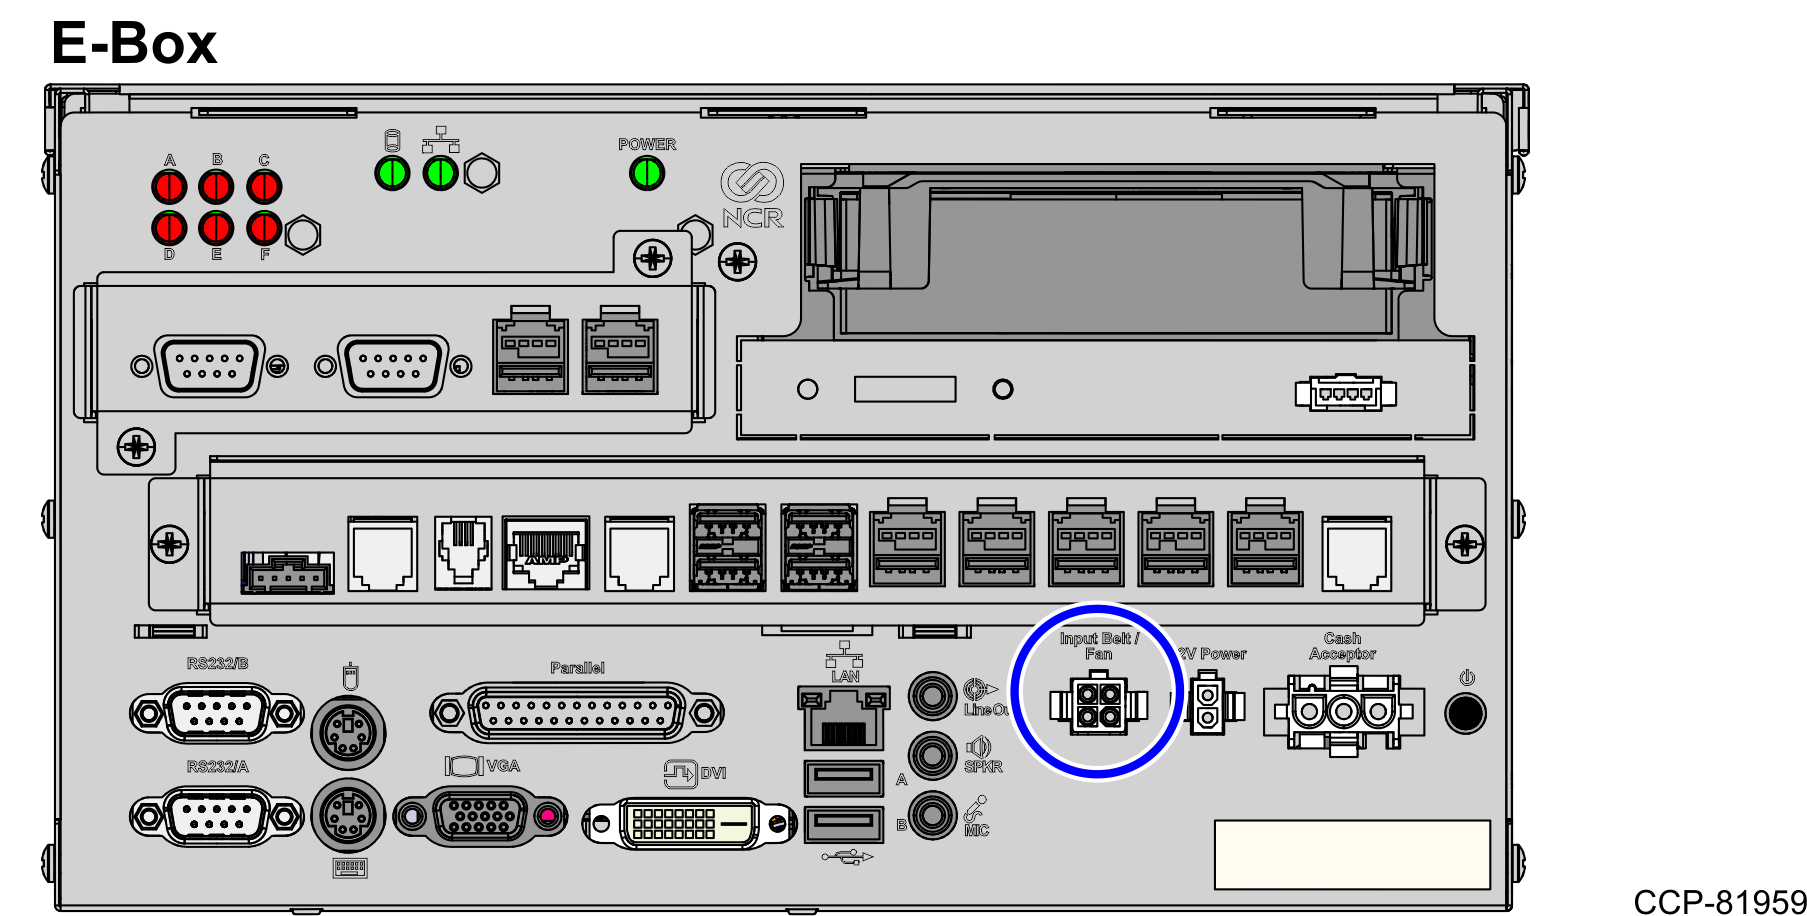
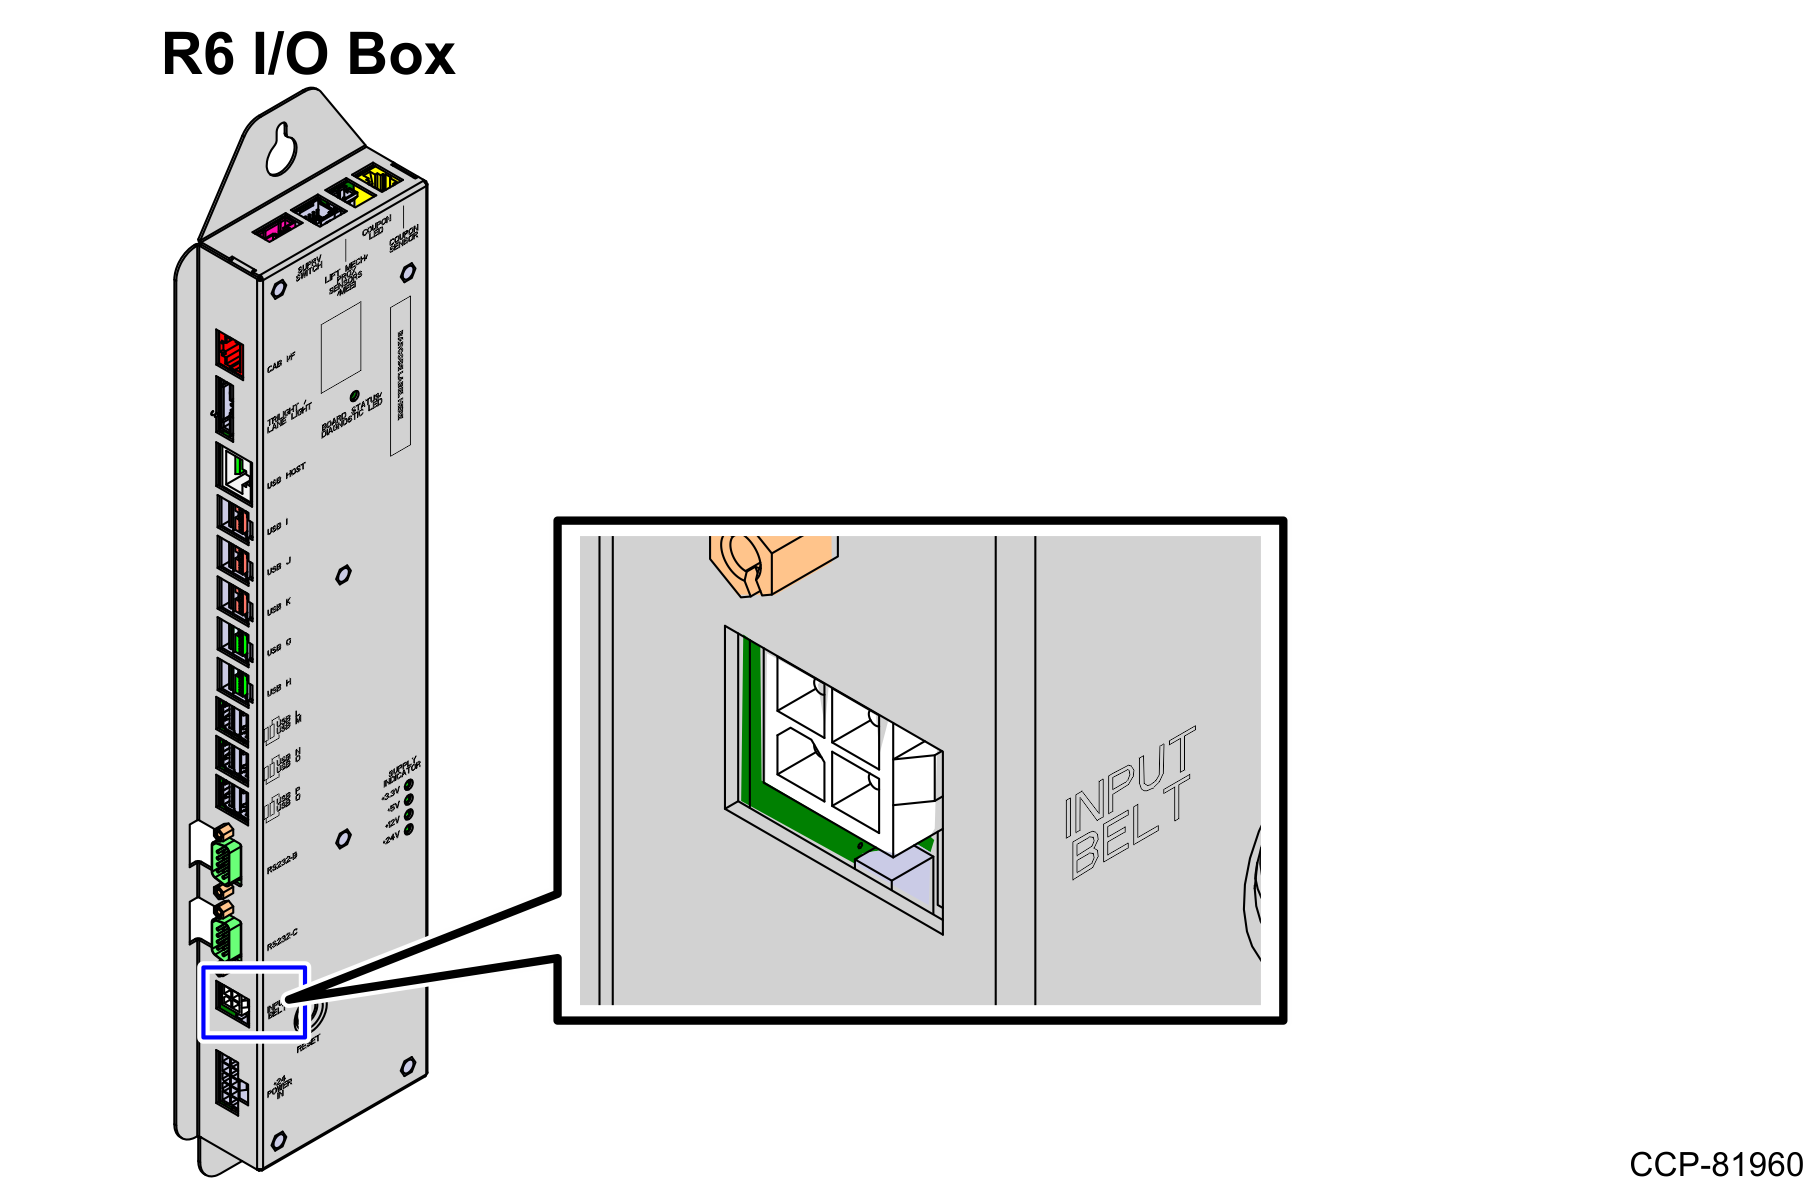
Disconnect the Input Belt cable from the SelfServ Checkout unit. Depending on the SelfServ Checkout unit, refer to the table below:
| SelfServ Checkout Unit | Cable Connection |
|---|---|
| NCR Voyix SelfServ™ Checkout (7350) | EBox (Input Belt /Fan) |
| NCR Voyix FastLane SelfServ™ Checkout (7358) R6L Plus | R6 I/O Box (Input Belt) |
NCR SelfServ™ Checkout (7350)
NCR FastLane SelfServ™ Checkout (7358) R6L Plus
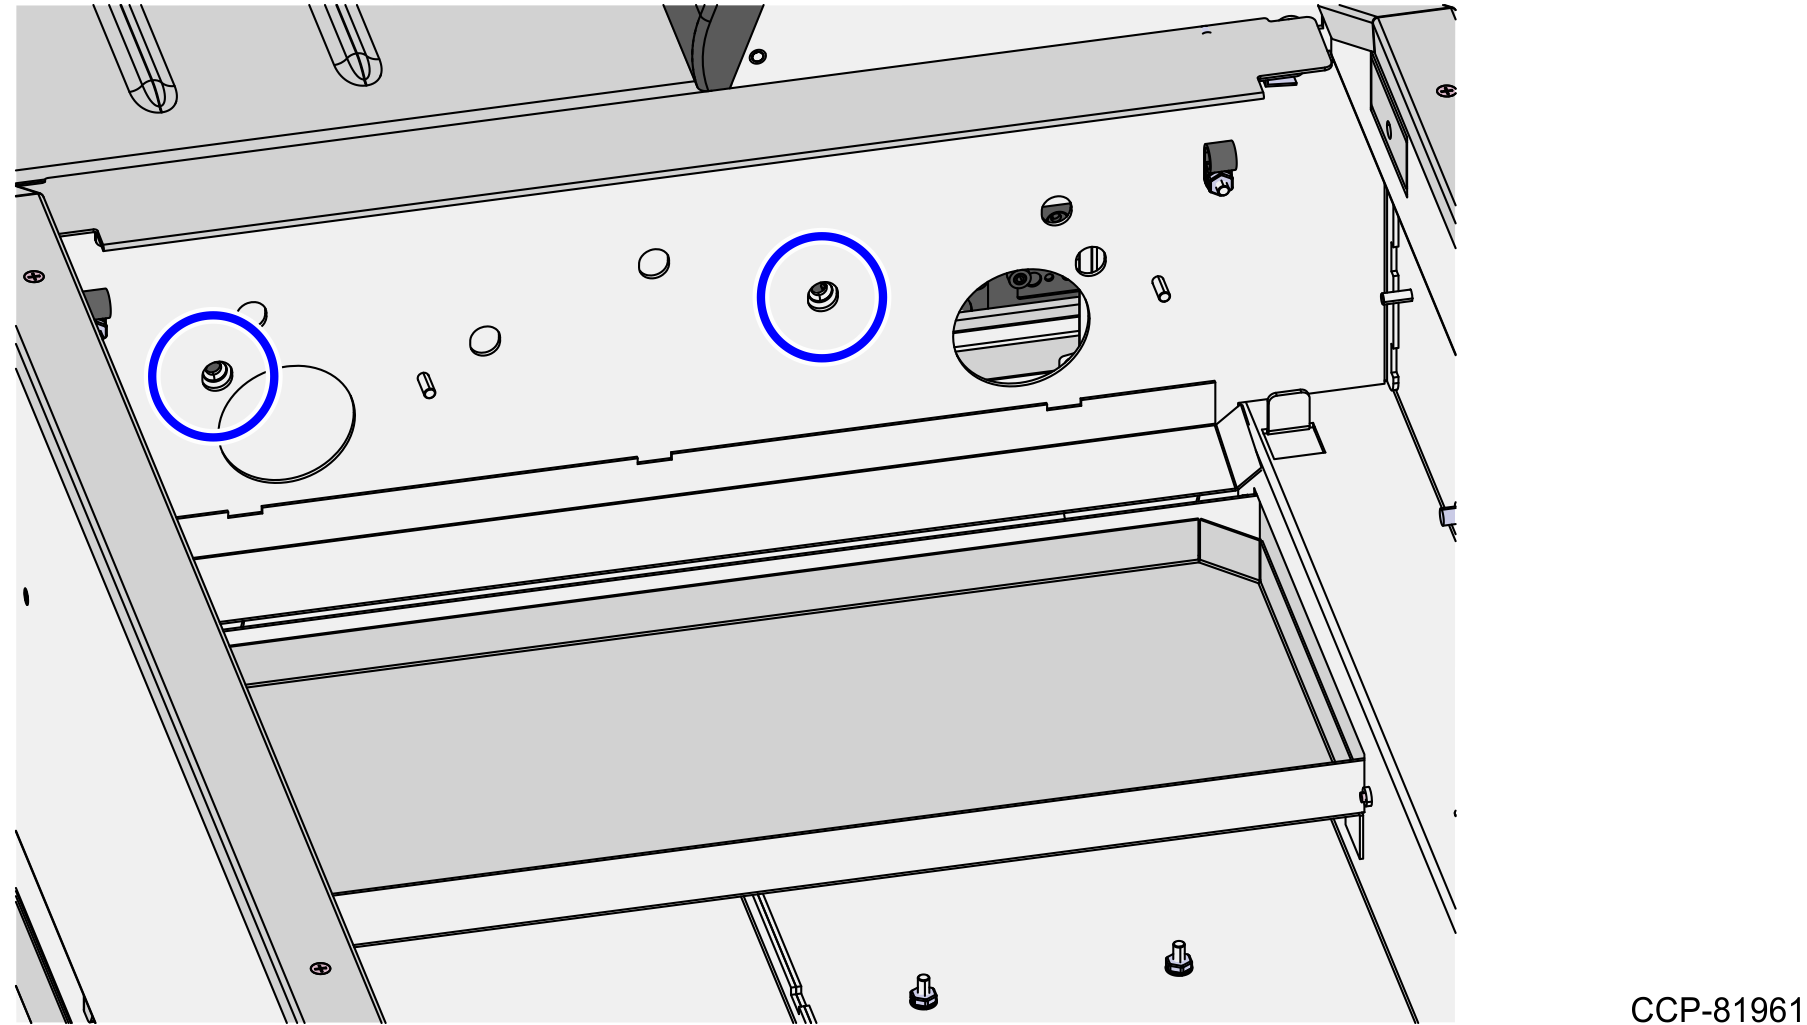
- Remove two (2) screws from inside the Input Belt frame, as shown in the image below.
- Remove three (3) screws from the Input Belt Mount, as shown in the image below.Caution
Ensure that someone is holding the Input Belt to avoid dropping it.

