Installing the Electronic Lock
To install the Electronic Lock, follow these steps:
- Remove the existing Electronic Lock, if necessary. Depending on the type of Lock, refer to either of the following procedures:
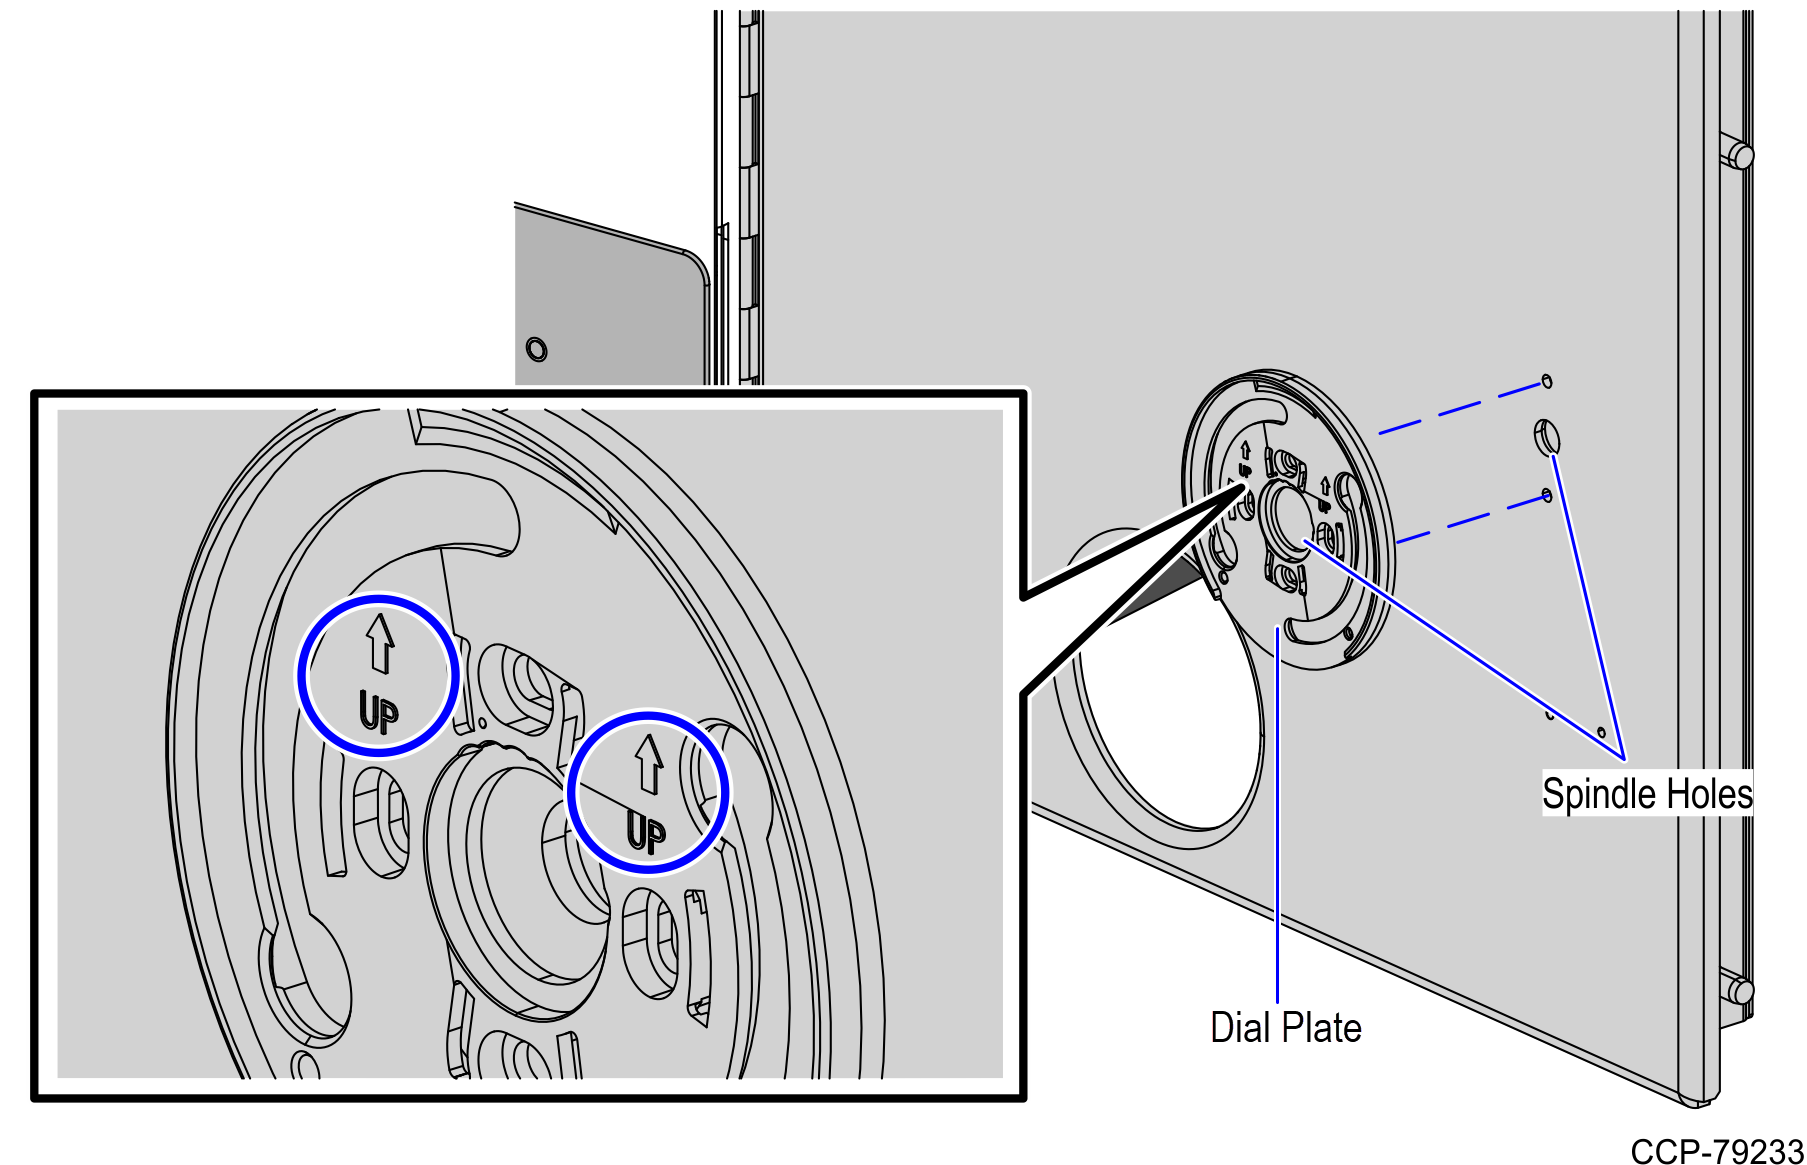
- Align the Dial Plate to the Spindle hole of the Security Door and then secure it using two (2) screws, as shown in the image below.Note
Ensure that the Dial Plate is in its proper orientation with the UP labels pointing upwards.
- Assemble the Entry Device Assembly by doing the following:
- Insert the Spindle into the Entry Device and ensure that it is fully seated in the slot.
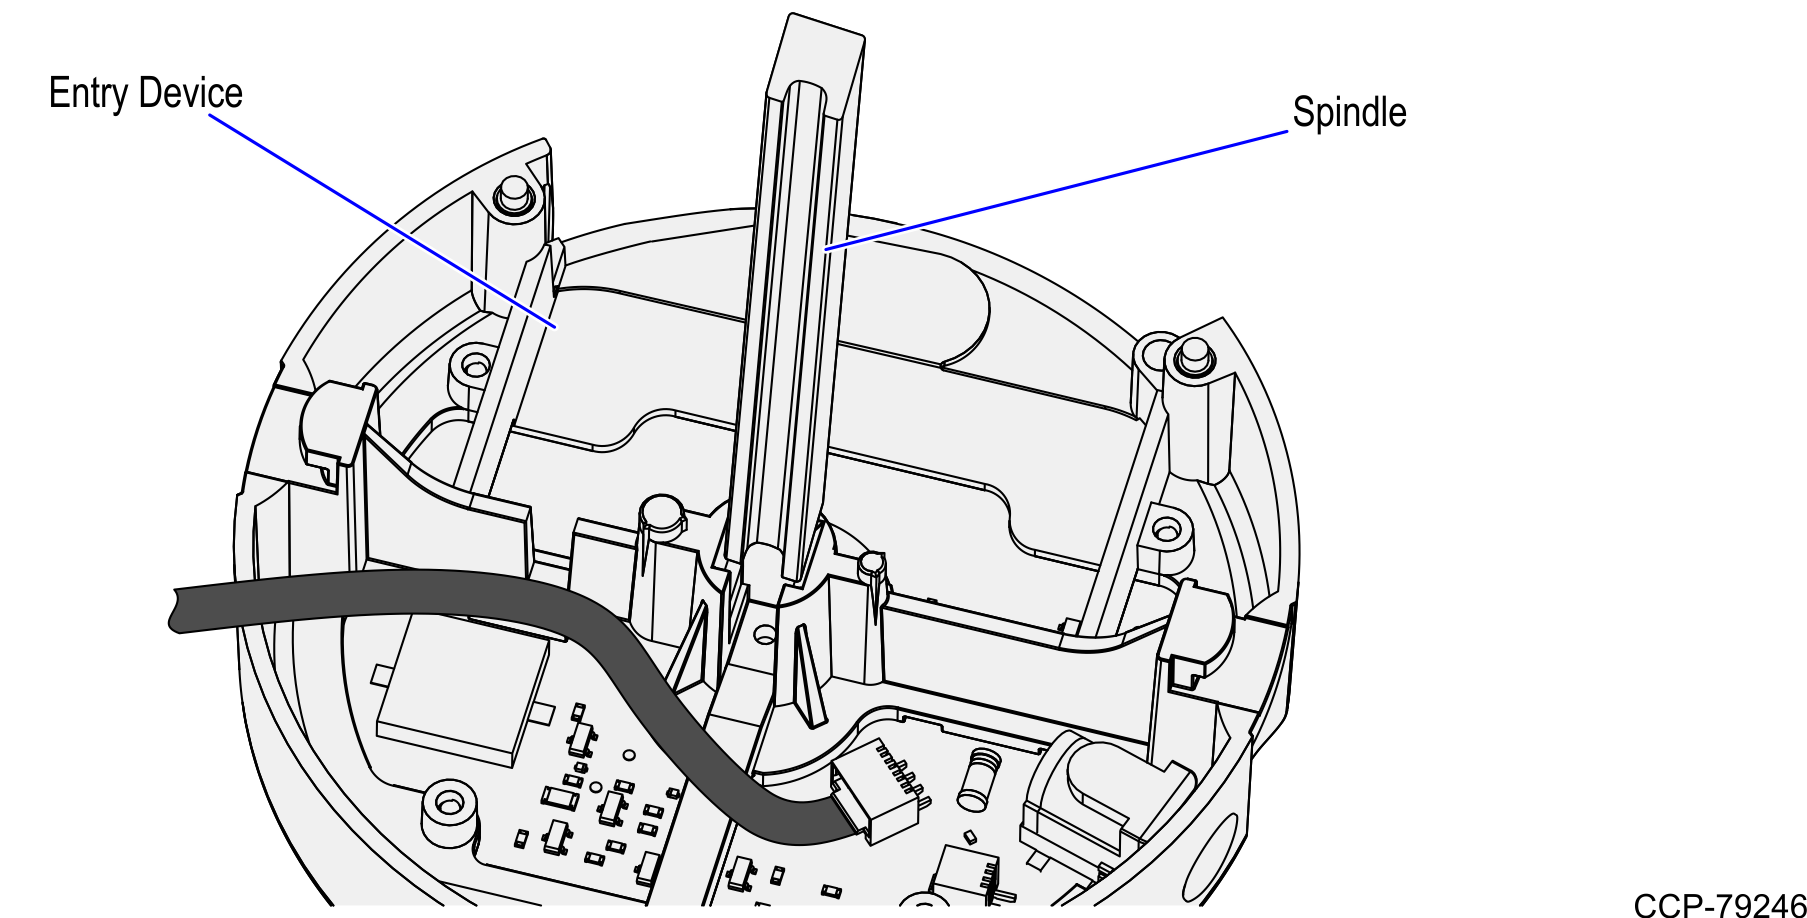
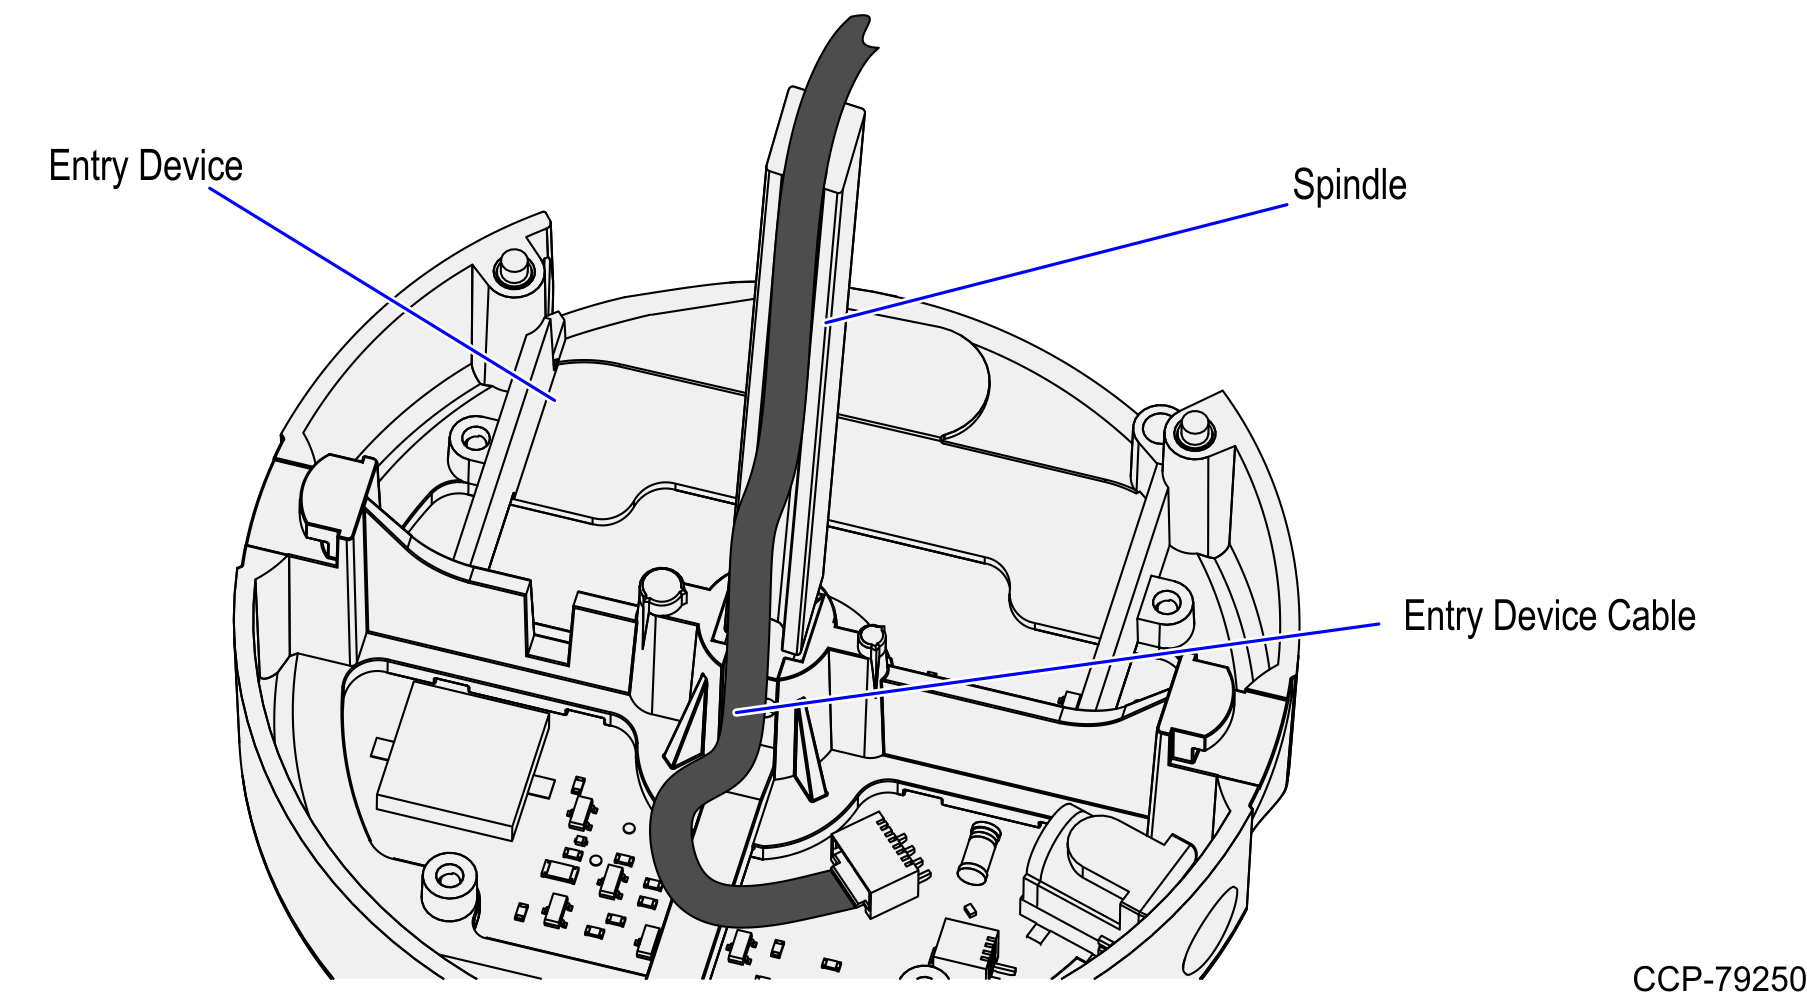
- Route the Entry Device cable in the groove of the Spindle, as shown in the image below.
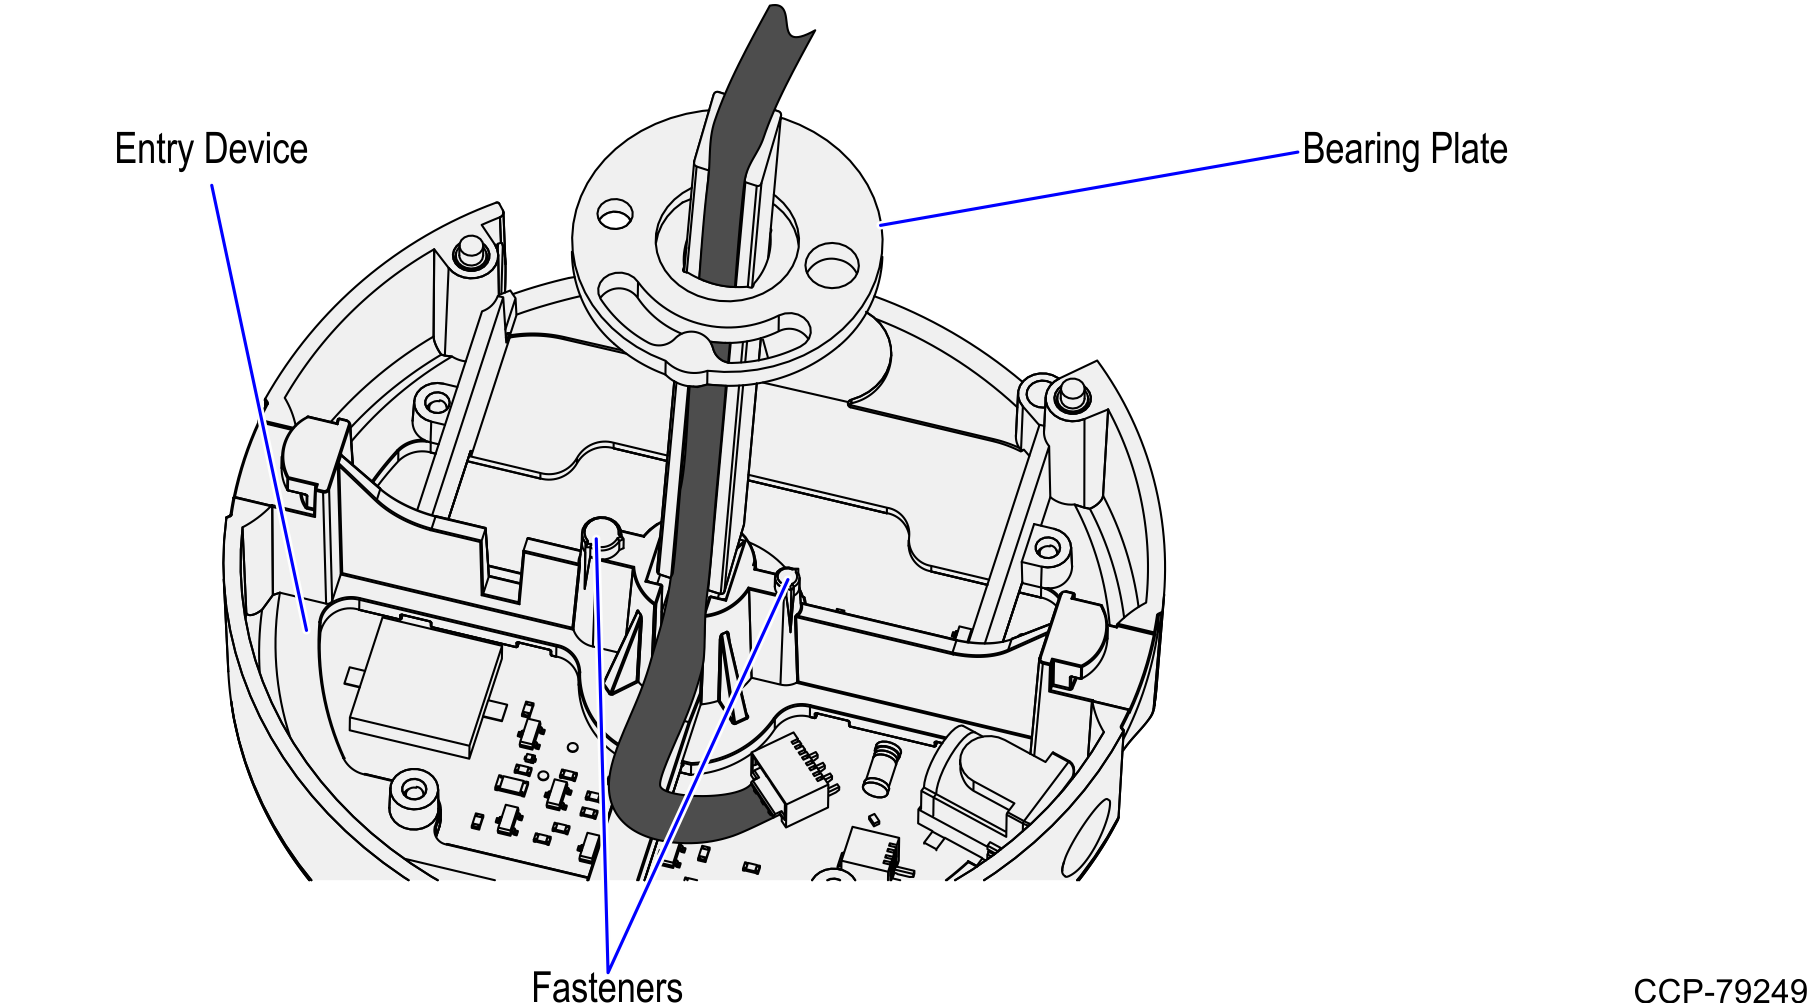
Slide the Bearing Plate over the cable and spindle and then press onto the fasteners of the Entry Device.
- Insert the Spindle into the Entry Device and ensure that it is fully seated in the slot.
- Feed the Entry Device Assembly cable through the Spindle hole, as shown in the image below.

- Secure the Entry Device Assembly to the Dial Plate on Security Door by doing the following:
- Rotate the Entry Device approximately 30° counterclockwise to engage its bushings into the large openings of the Dial Plate, as shown in the image below.
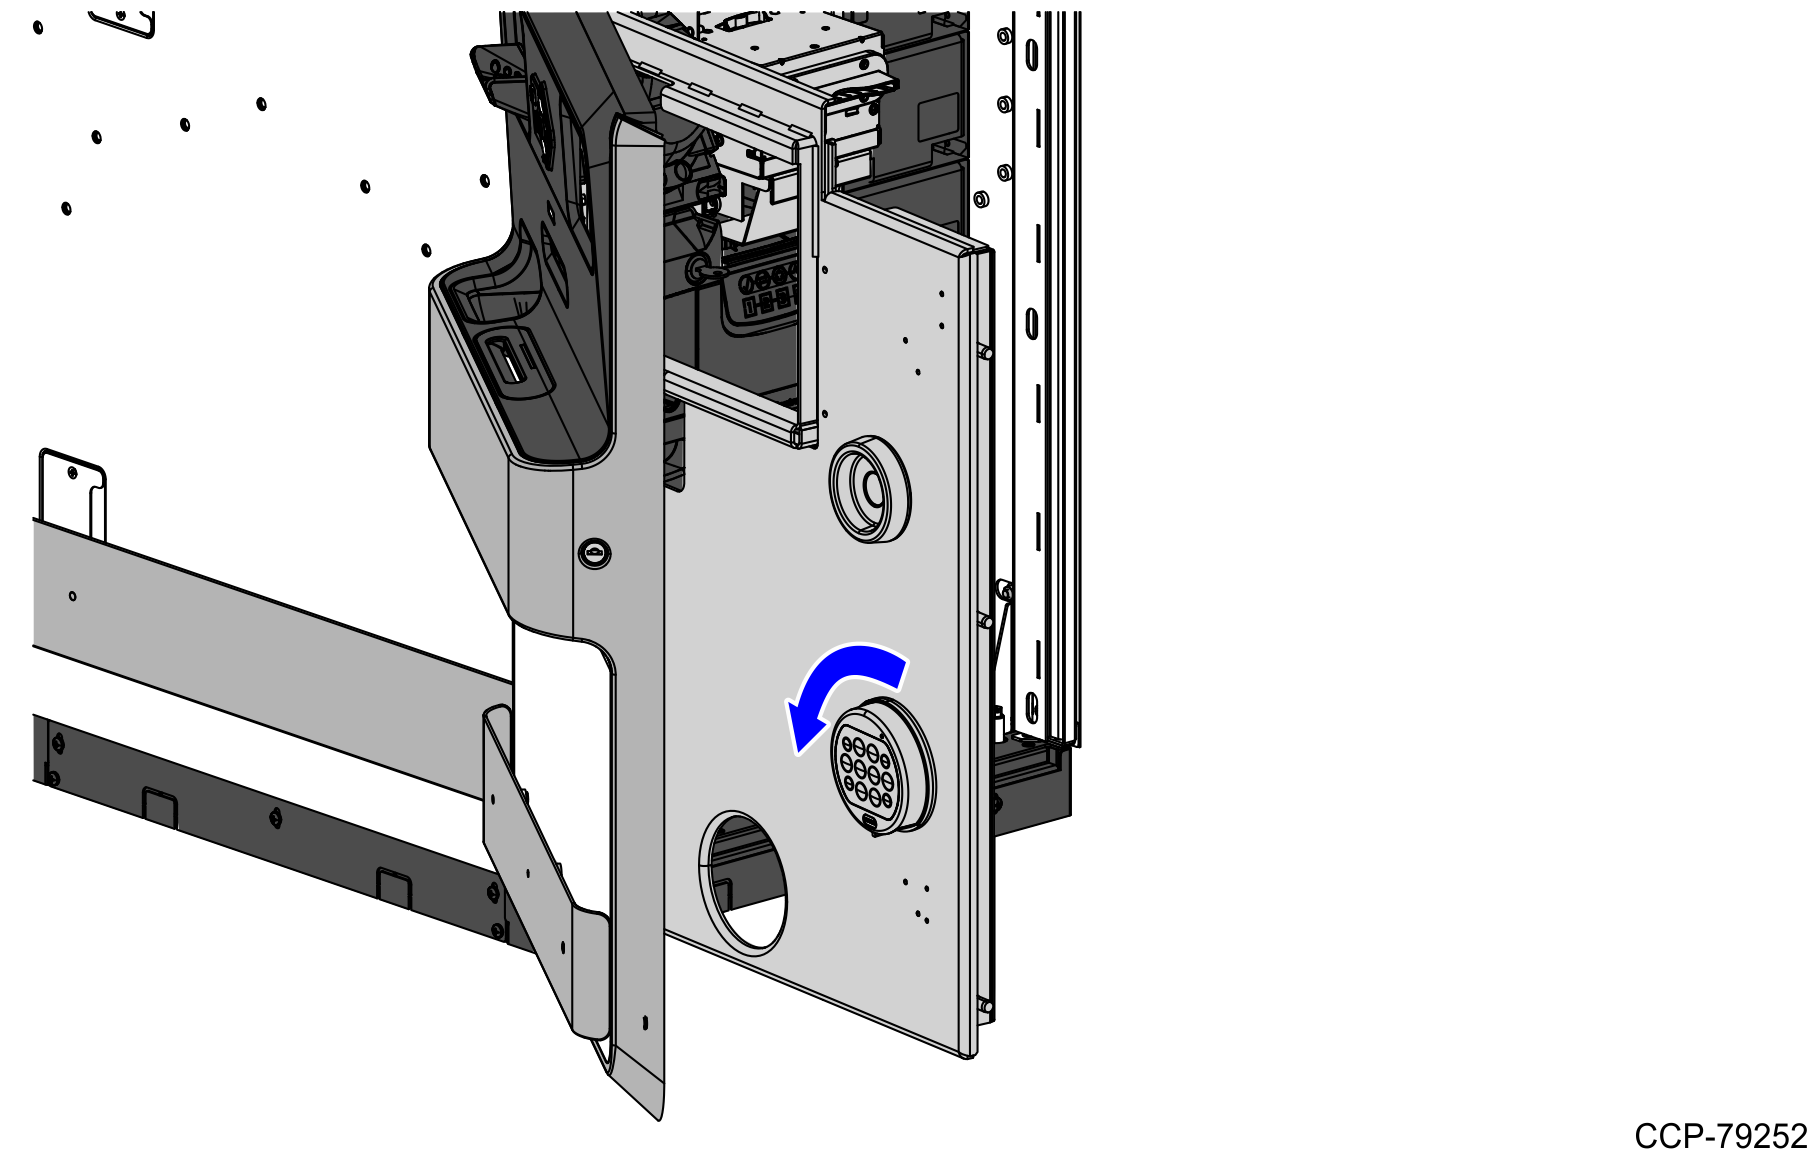
- Turn the Entry Device clockwise until it is in vertical orientation.
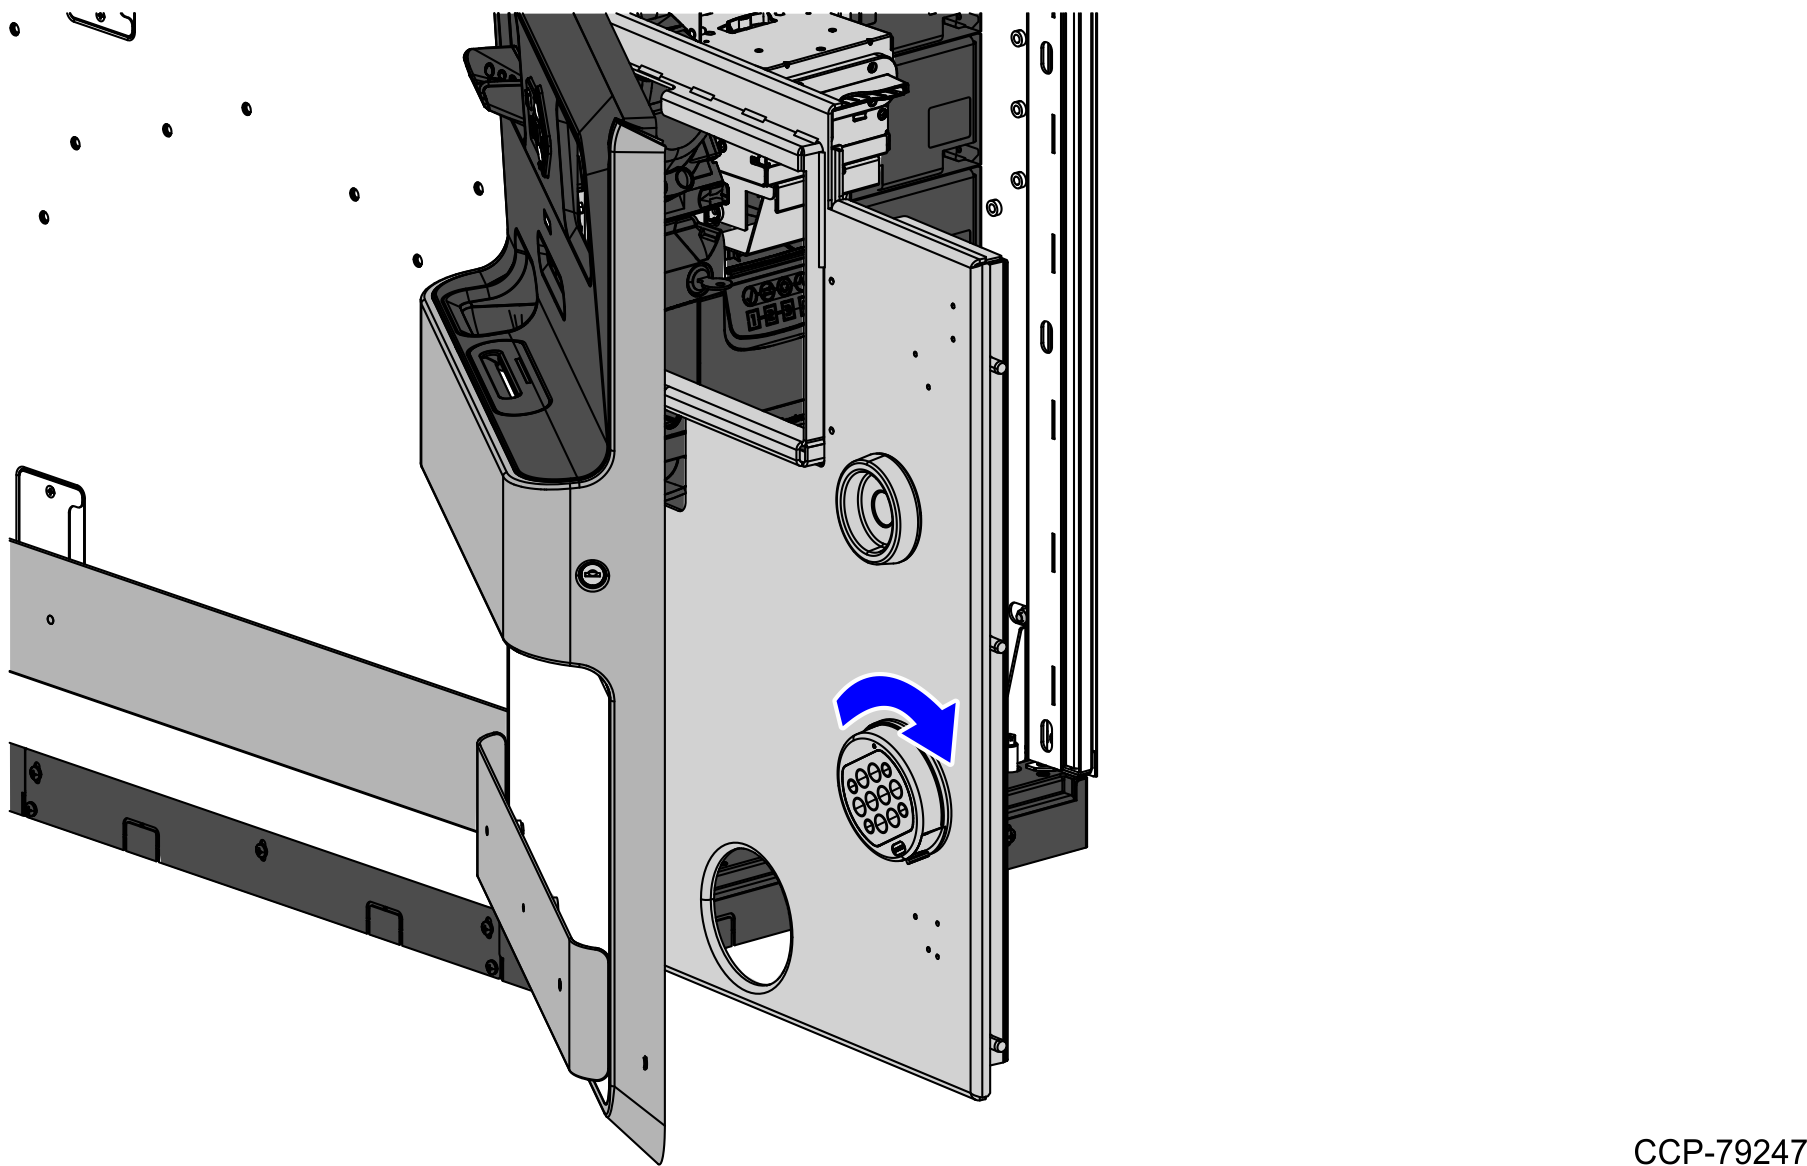
- Rotate the Entry Device approximately 30° counterclockwise to engage its bushings into the large openings of the Dial Plate, as shown in the image below.
- Install the Lock Assembly by doing the following:
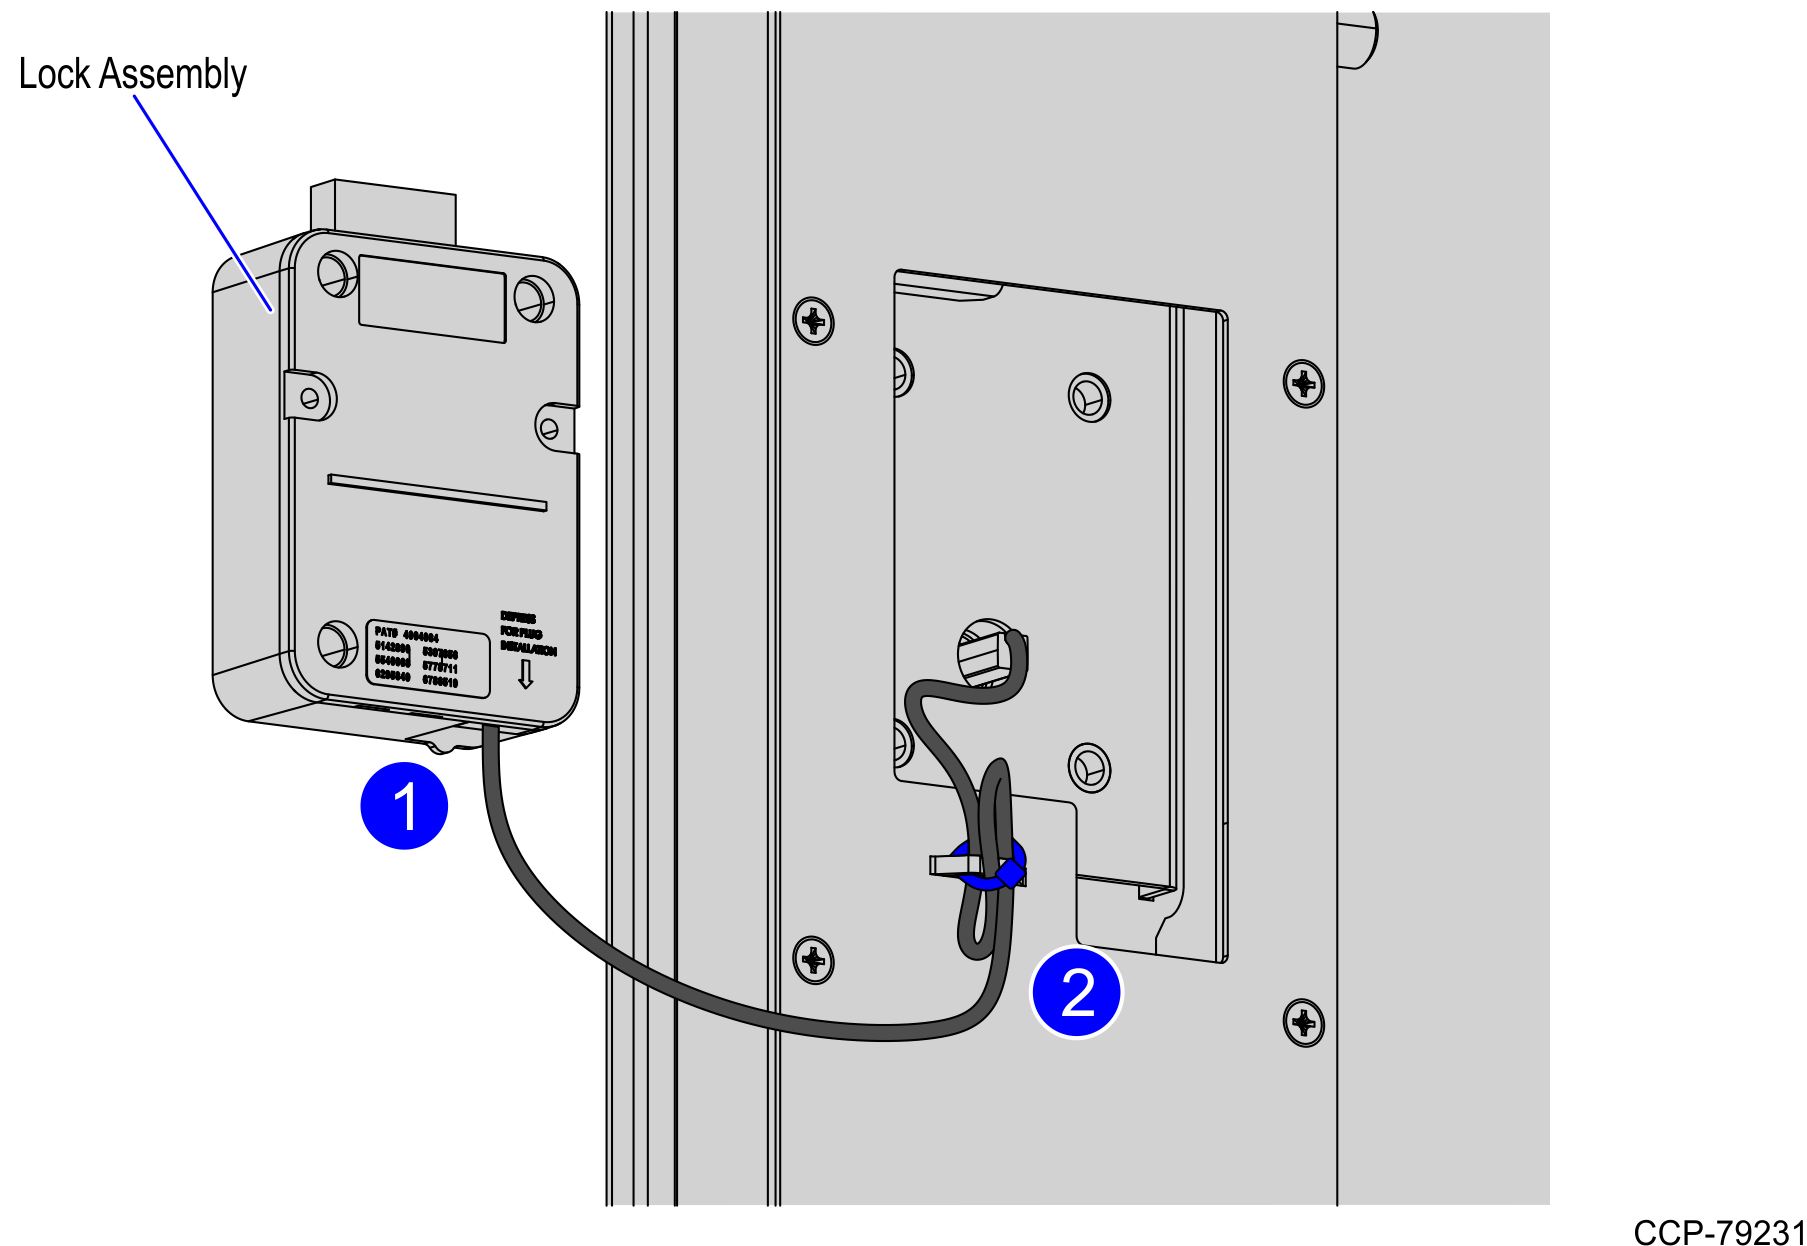
- At the back of the Security Door, pull the cable gently to ensure that there is no excess cable in the Spindle hole.
- Connect the cable to the connector port of the Lock Assembly and then secure the excess cable on the bridge lance of the Security Door.
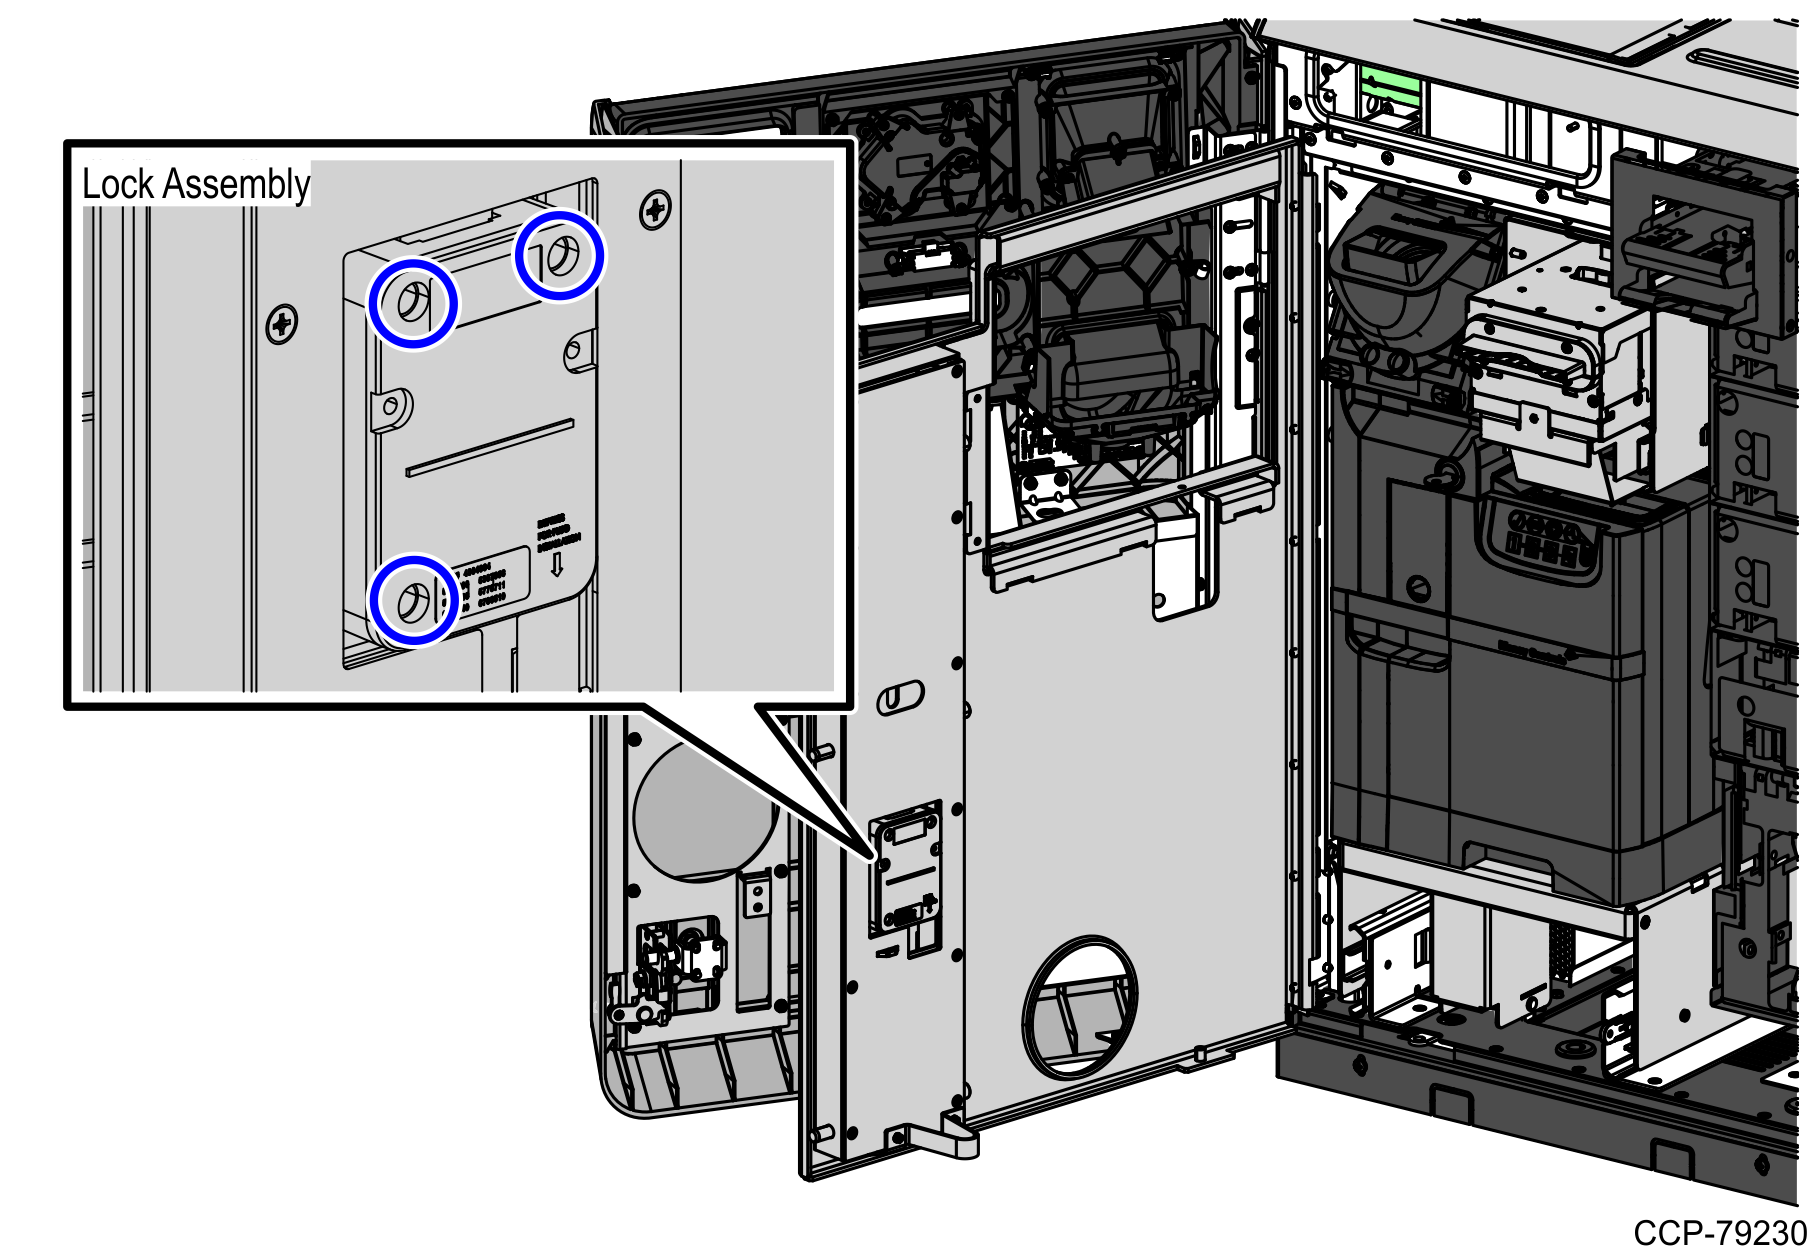
- Align the Spindle hole of the Lock Assembly to the protruding Spindle and then secure the Lock Assembly on the door using three (3) bolts, as shown in the image below.
To change the combination of the Electronic Combination Lock, refer to Changing the Number Combination of the Electronic Lock.