Creating and assigning new help text files
Retailers can create help text files and assign them to customer information collection screens in the POS application. To create a help text file, follow these steps in the following components:
POS terminal
- Go to the %PROGRAMFILES%\NCR\AdvancedStore\POS\Help\Base directory.
- Create a new .txt file inside the Base folder.
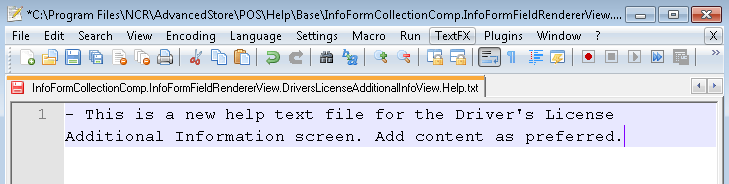
- Name the file using this format: InfoFormCollectionComp.InfoFormFieldRendererView.[preferred alternate name].Help.txt.Note
Provide and configure the file’s alternate name as preferred. For more information, refer to Creating the alternate name of help text files.
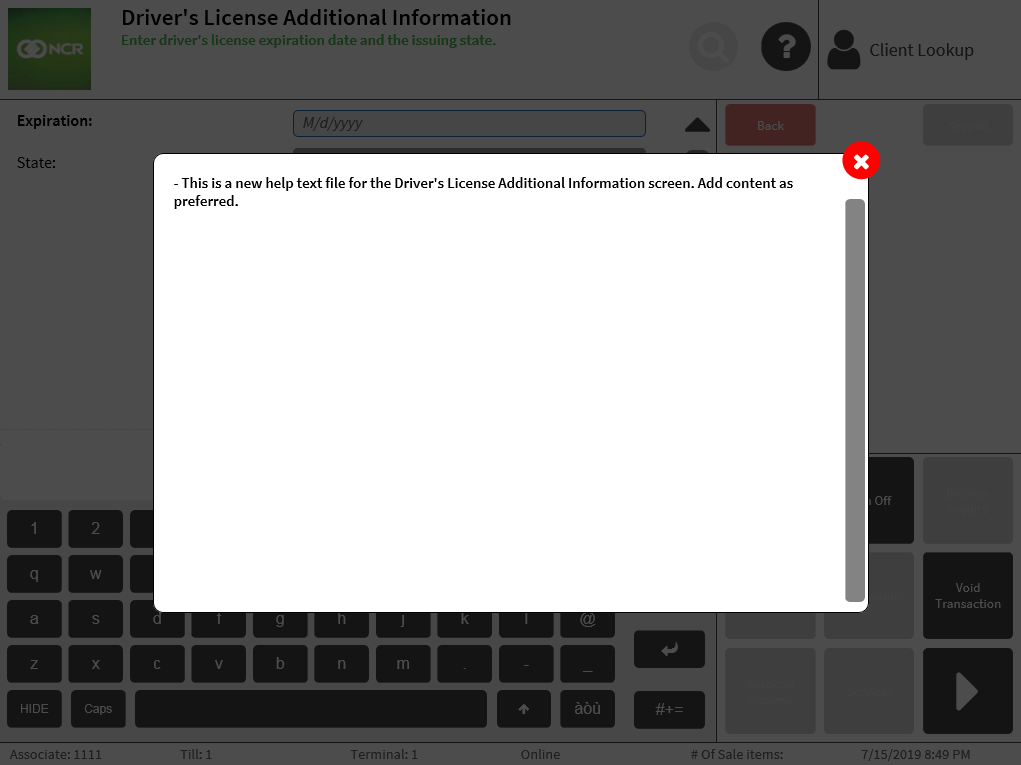
- Open the file using a text editor. In this example, a new help text file assigned to the Driver’s License Additional Information screen has been created and modified.
- Add the help content as preferred.
- Save the changes in the file.
EOM application
Assign the new help text file to the preferred screen in the POS application. For more information, refer to the following sections:
Verifying the changes
Verify that the changes have been applied. In the following sample image, a new help text has been assigned to the Driver’s License Additional Information screen.