Store Data Push Utility
Retailers can apply data to the database and schedule the data push to the stores. The Store Data Push utility can be run at any time necessary. For example, retailers can use the Store Data Push utility to update item prices in the database immediately for a clearance sale. Retailers can also schedule the utility to push the price change data to the stores for a future sales tax holiday.
This utility also includes the option to run the EOM Parameter Staging service, which reduces the database load incurred when a large number of POS terminals reload parameters at the same time. For more information, refer to EOM Parameter Staging.
The Store Data Push utility is included in the utilities installed from the NCR DSR Enterprise Server.msi installer. NCR recommends installing the utilities on the Enterprise Messaging Server. For more information, refer to Installing the NCR DSR Enterprise Server Utilities on the Messaging Server.
The Store Data Push utility can be run on the Enterprise Messaging Server using one of the following methods:
- User interface
- Windows Task Scheduler
The utility can also be run using the command line. For more information, refer to Store Data Push Command.
Through the user interface
This task uses the following file.
| File name | Folder |
|---|---|
| Ncr.Retail.Setup.StoreDataPush.exe | %PROGRAMFILES(X86)%\NCR\DSREnterprise\Utilities |
To run the Store Data Push utility through the user interface, follow these steps:
- On the Enterprise Messaging Server, run the Ncr.Retail.Setup.StoreDataPush.exe program. The application displays the Store Data Push screen.
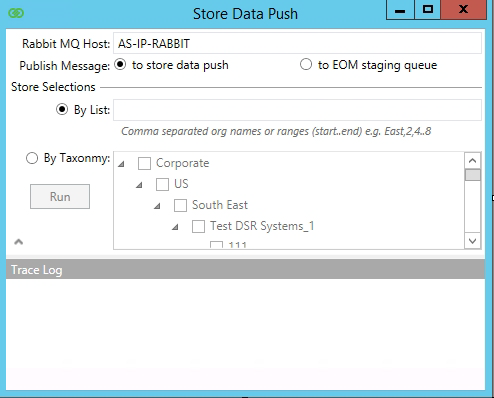
- Enter the Enterprise Messaging Server host name or IP address.
- Select to store data push.
- Do one of the following:
- Select By List and enter the comma-separated store numbers to receive the data push.
- Select By Taxonomy and select the store hierarchy to receive the data push.
- Select Run. The application displays a confirmation message.
- Select Yes to continue. The application completes the data push and displays the Store Data Push screen.
Through the Windows Task Scheduler
To run the Store Data Push utility through the Windows Task Scheduler, follow these steps:
- On the Enterprise Messaging Server, open the Windows Task Scheduler.
- Select Create Task. The application displays the Create Task window.
- On the General tab, enter a name for the task in the Name field.
- On the Triggers tab, select New and specify when to run the utility.
- On the Actions tab, select New. The application displays the New Action window. By default, the action is set to start a program.
- In the Program/script field, browse for the Store Data Push program.Note
The default location for the utility is %PROGRAMFILES(X86)%\NCR\DSREnterprise\Utilities.
- In the Add arguments field, enter the following script:
-storename <Store Name> -rabbitserver <Enterprise Messaging Server host name or IP address> -silent
Example-storename 111 -rabbitserver 153.59.106.220 -silent
- Select OK to close the windows. The Task Scheduler runs the Store Data Push utility at the selected trigger.
Verifying the store data push
To verify that the data was successfully pushed to the stores, do one of the following:
- Check the size of the LevelDB folder on the POS. Compare the folder size before and after the data push. A successful data push increases the size of the folder. The default location of the folder is %PROGRAMDATA%\NCR\AdvancedStore.
- Check the RabbitMQ on the Enterprise Messaging Server and on the POS.
- On the Overview tab, change the Queued messages chart to view traffic for the last hour. The spike on the chart indicates that the messages were sent from the server to the POS.
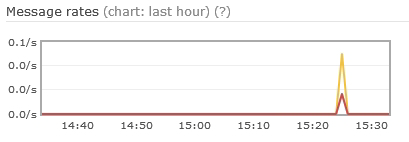
- If there is no spike, check RabbitMQ setup for errors.
- On the Overview tab, change the Queued messages chart to view traffic for the last hour. The spike on the chart indicates that the messages were sent from the server to the POS.
- Check if the actual data on the POS shows the updates from the data push. For example, the price for an item has been changed.