Installation Procedure
To upgrade the 7360 unit with a 7895 Scanner/Scale, follow these steps:
- Turn off the SelfServ Checkout software and hardware systems.
- Remove the existing NCR RealScan 79e (7879) Scanner/Scale. For more information, refer to Removing the Scanner/Scale (7879e).Note
Do not discard the 7879e Scanner/Scale cable. Using a cable tie, secure it in place together with the 7895 Scanner/Scale cable.
-
Install the Color Camera USB cable. For more information. refer to Installing the Color Camera USB Cable.
- Connect cables to their corresponding ports on the Scanner/Scale.
Cable Scanner/Scale Port Camera cable Internal Port NoteTo install the Camera cable in the Scanner/Scale, refer to Installing the Color Camera USB Cable.
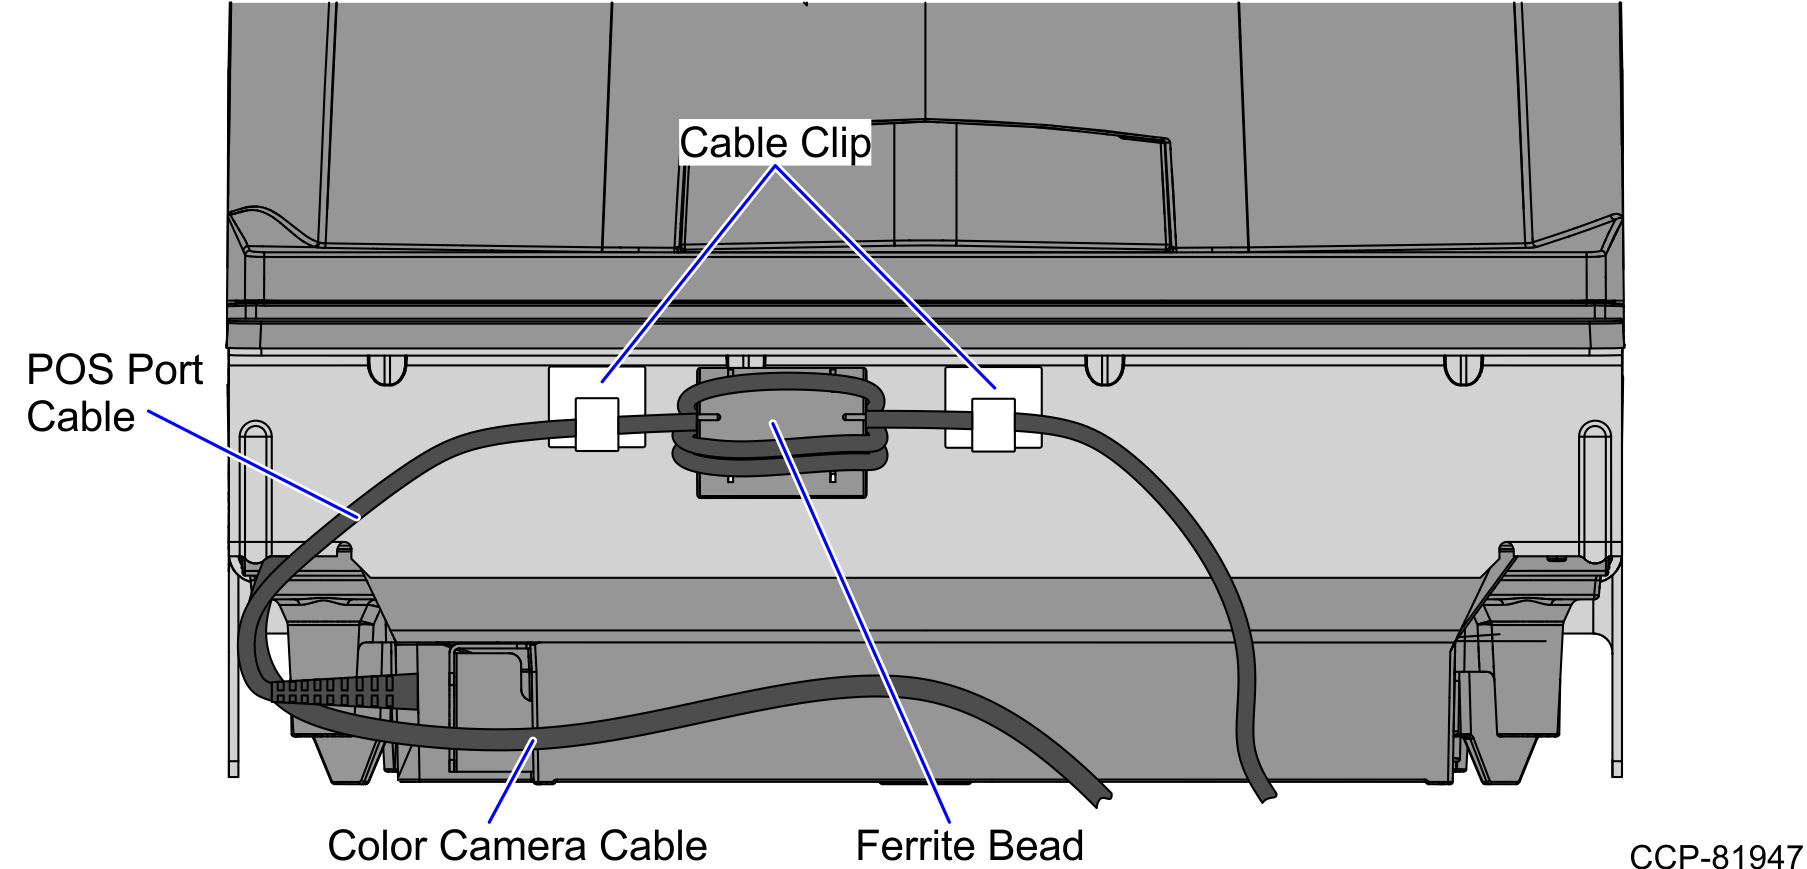
Main cable POS Port - Route the POS Port cable to the back of the Scanner/Scale and secure the cable at each end of the Ferrite Bead to the corresponding cable clips, as shown in the image below.
- Route and secure the scanner cables to the Tower Frame using cable ties, as shown in the image below.
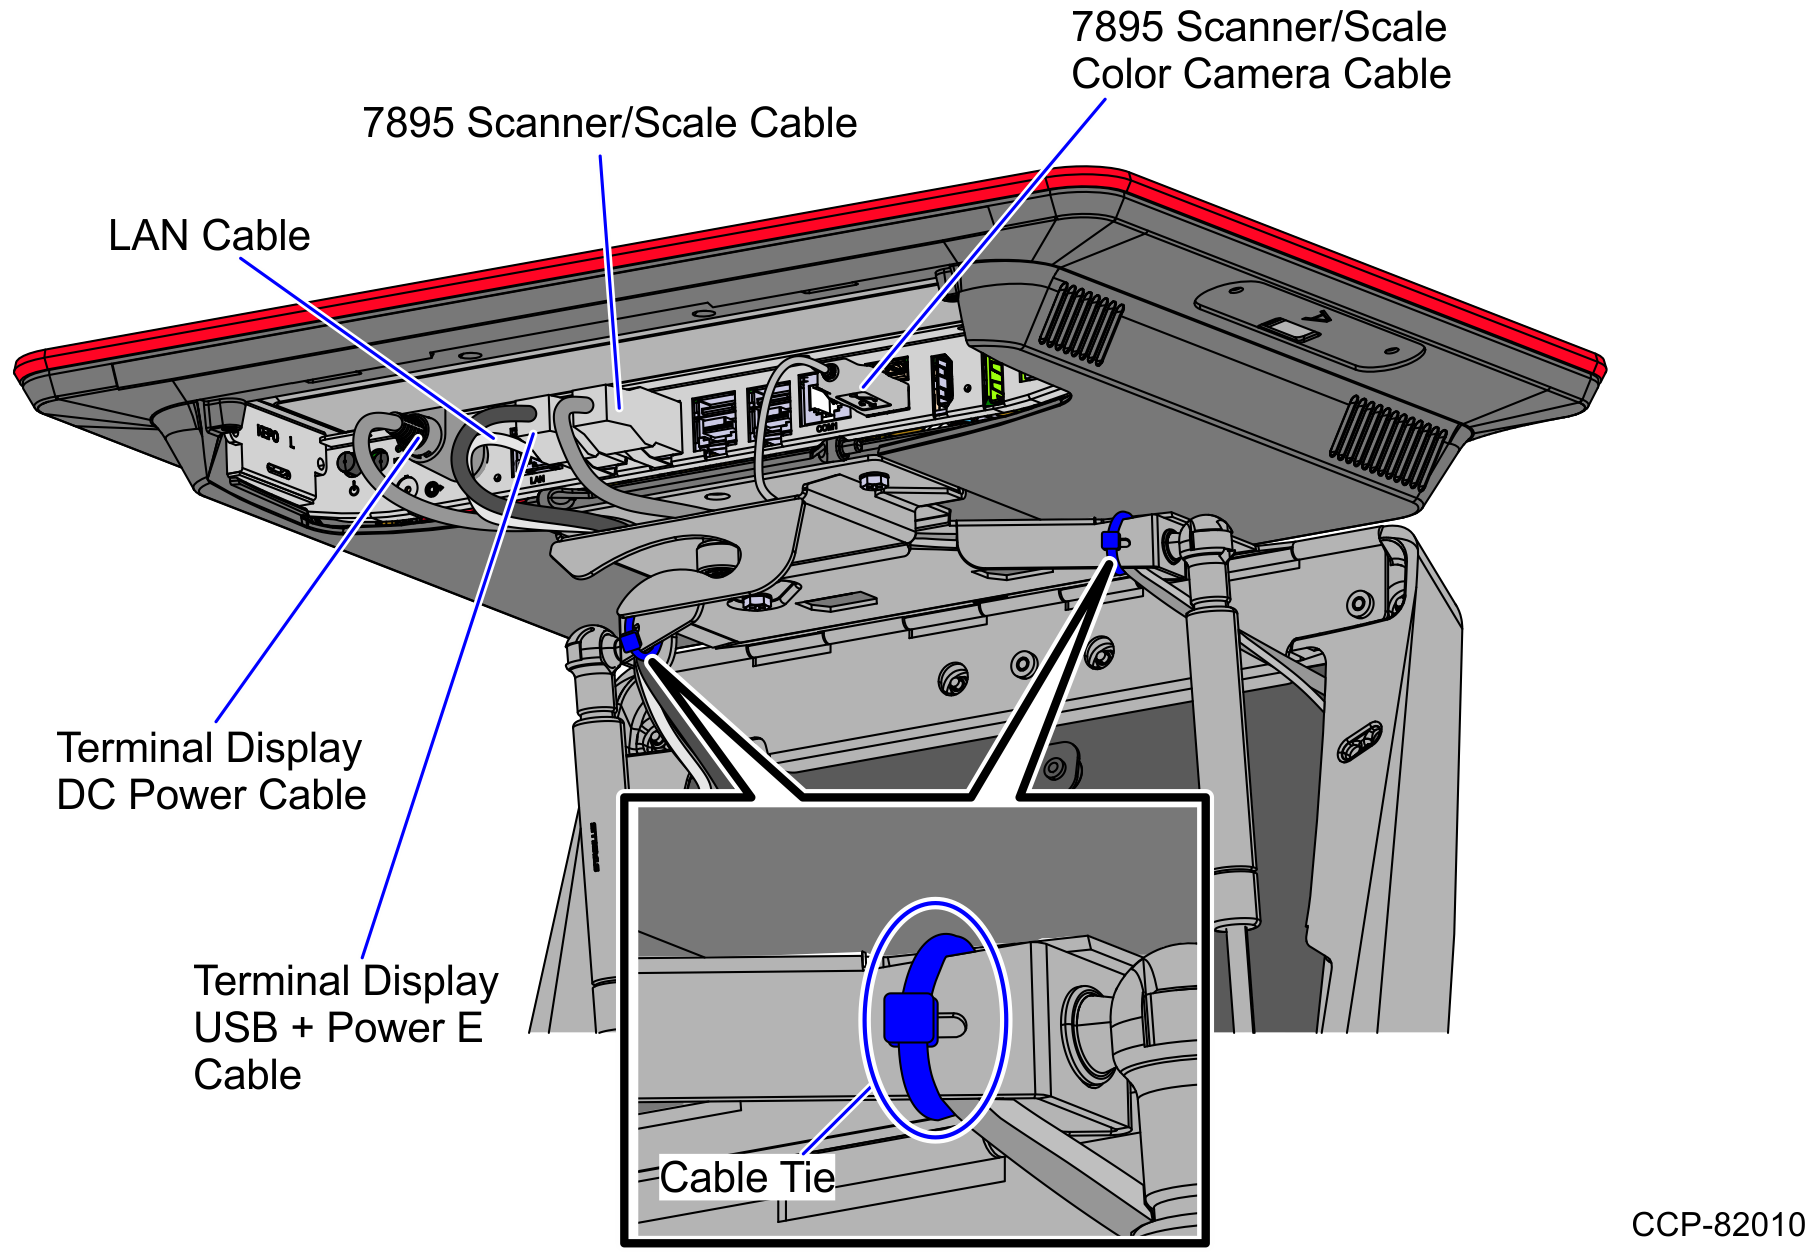
- Connect the other end of the scanner cables to the corresponding ports in the Terminal Display.
Cable Terminal Display Port Camera cable USB Type B 3.0 Port Main cable USB Power Port C +12V - Place the Scanner/Scale in the scanner bucket by doing the following:
- Hold the support handles on the front and back of the Scanner/Scale.
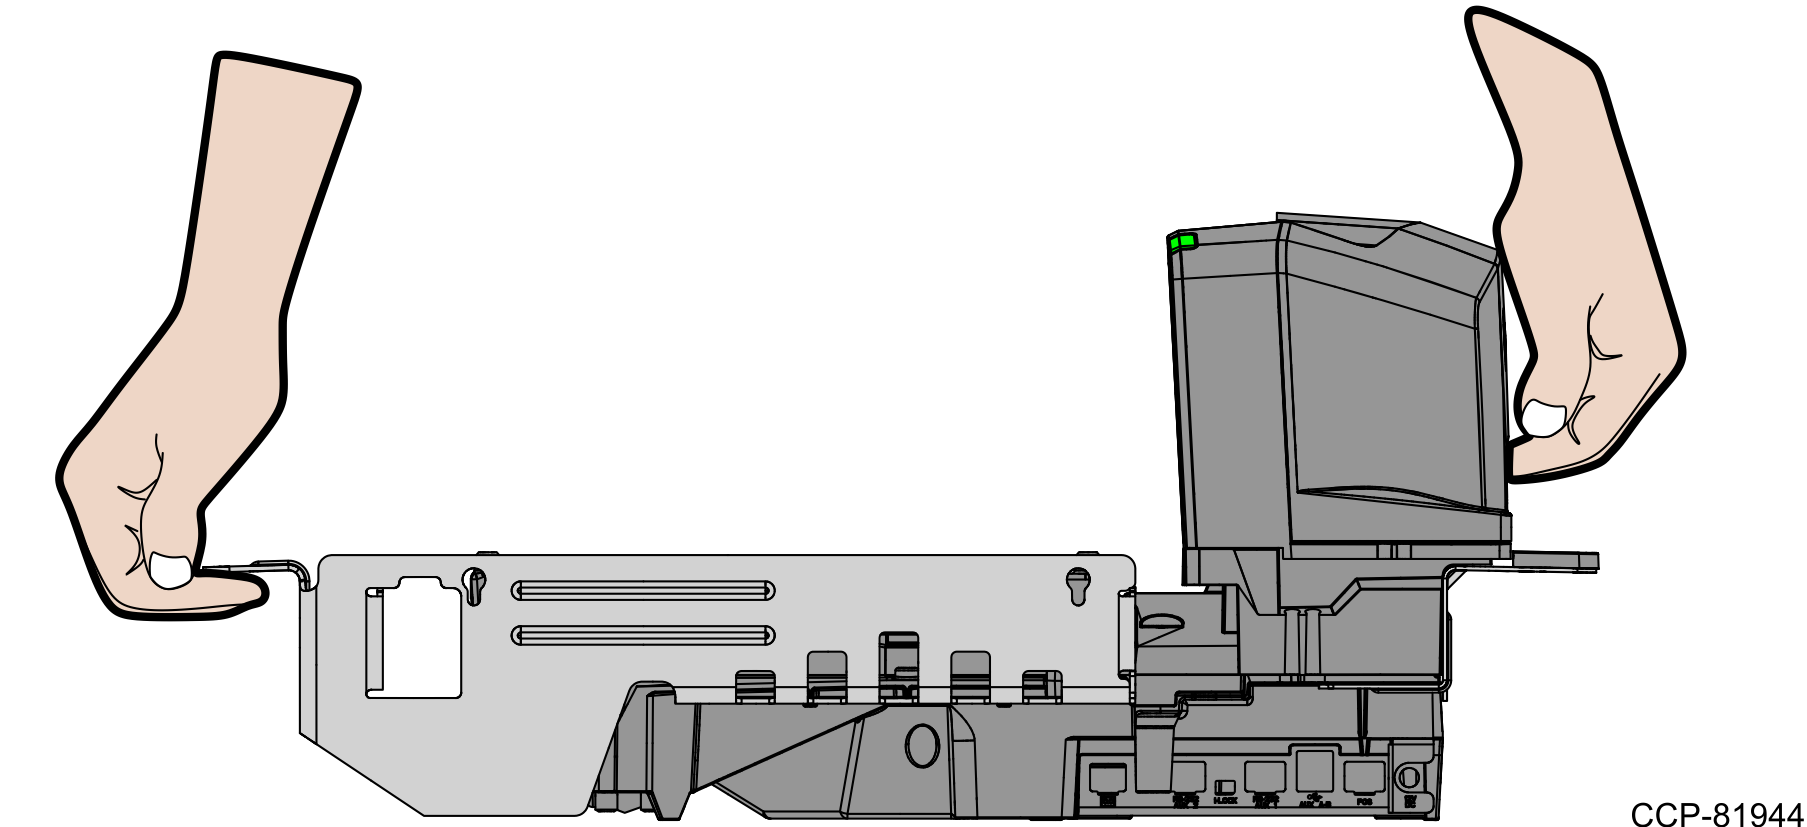
- Slightly tilt the Scanner/Scale while placing it in the scanner bucket.
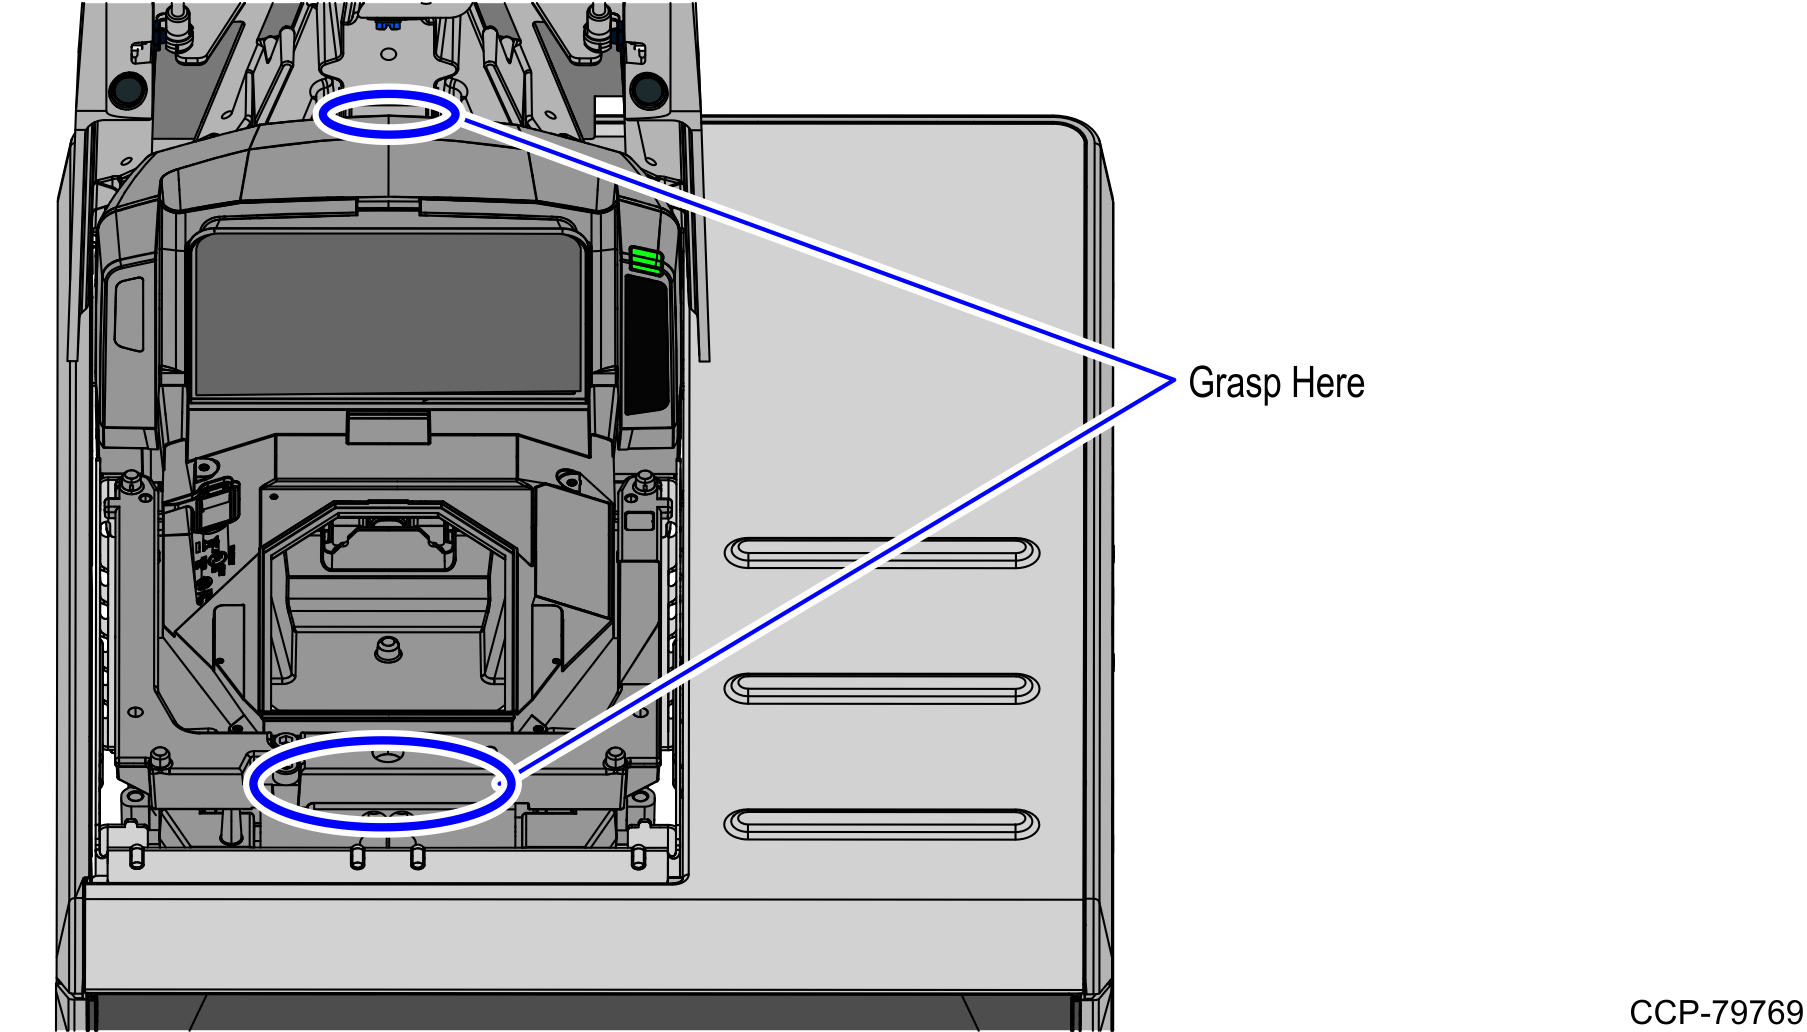
- Hold the support handles on the front and back of the Scanner/Scale.
- Install the Scanner/Scale Top Plate. For more information, refer to Installing the 7895 Scanner/Scale Top Plate.
- Attach the Shroud to the Scanner/Scale by engaging it into the slots on the Tower Frame, as shown in the image below.
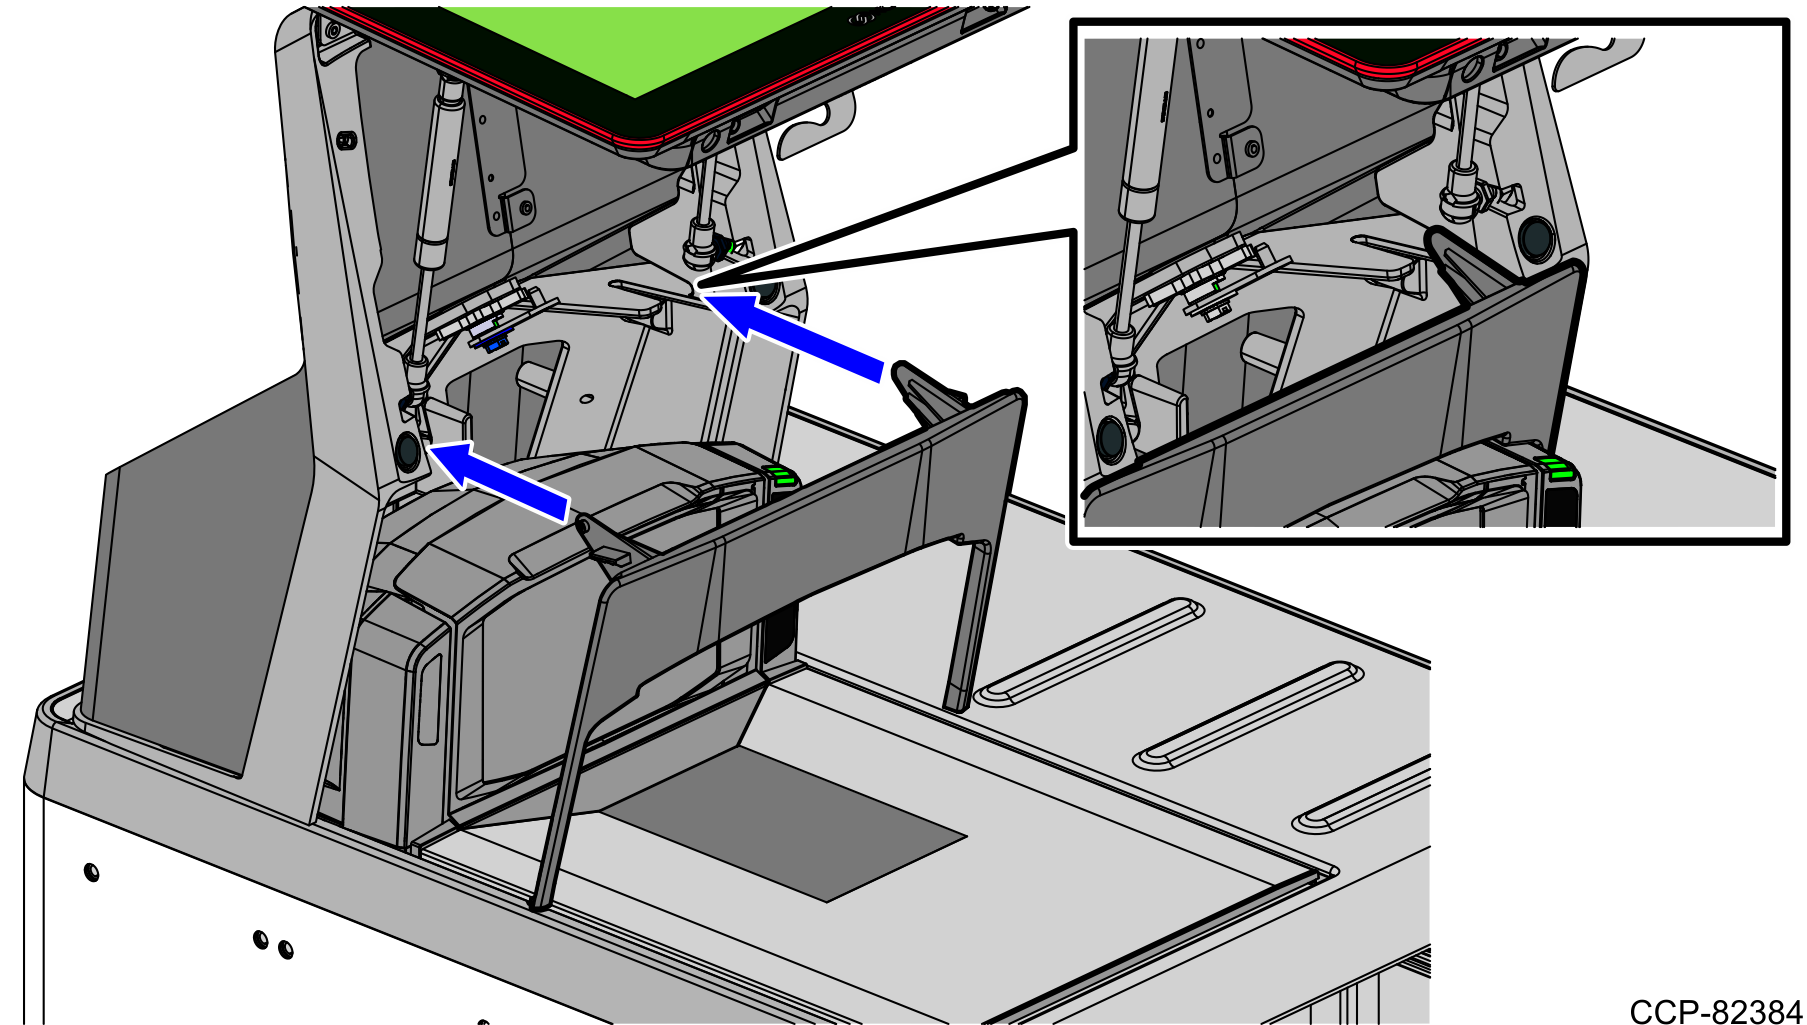 Note The Scanner/Scale must be calibrated before the system goes live. For more information, refer to NCR 7895 Scanner/Scale Installation Guide (BCC5-0000-5507) .