Installing the 7360 Tri-Light/Lane Light Assembly (Optional)
To install the Tri-Light/Lane Light assembly, follow these steps:
Note: Complete this procedure if replacing the R5 Tri-Light/Lane Light assembly with the R6 Tri-Light/Lane Light assembly.
1. Remove the existing Tri-Light/Lane Light assembly, if necessary. For more information, refer to Removing the Tri-Light /Lane Light Assembly and Pole.
2.Install the 7360 Tri-Light/Lane Light pole by doing the following:
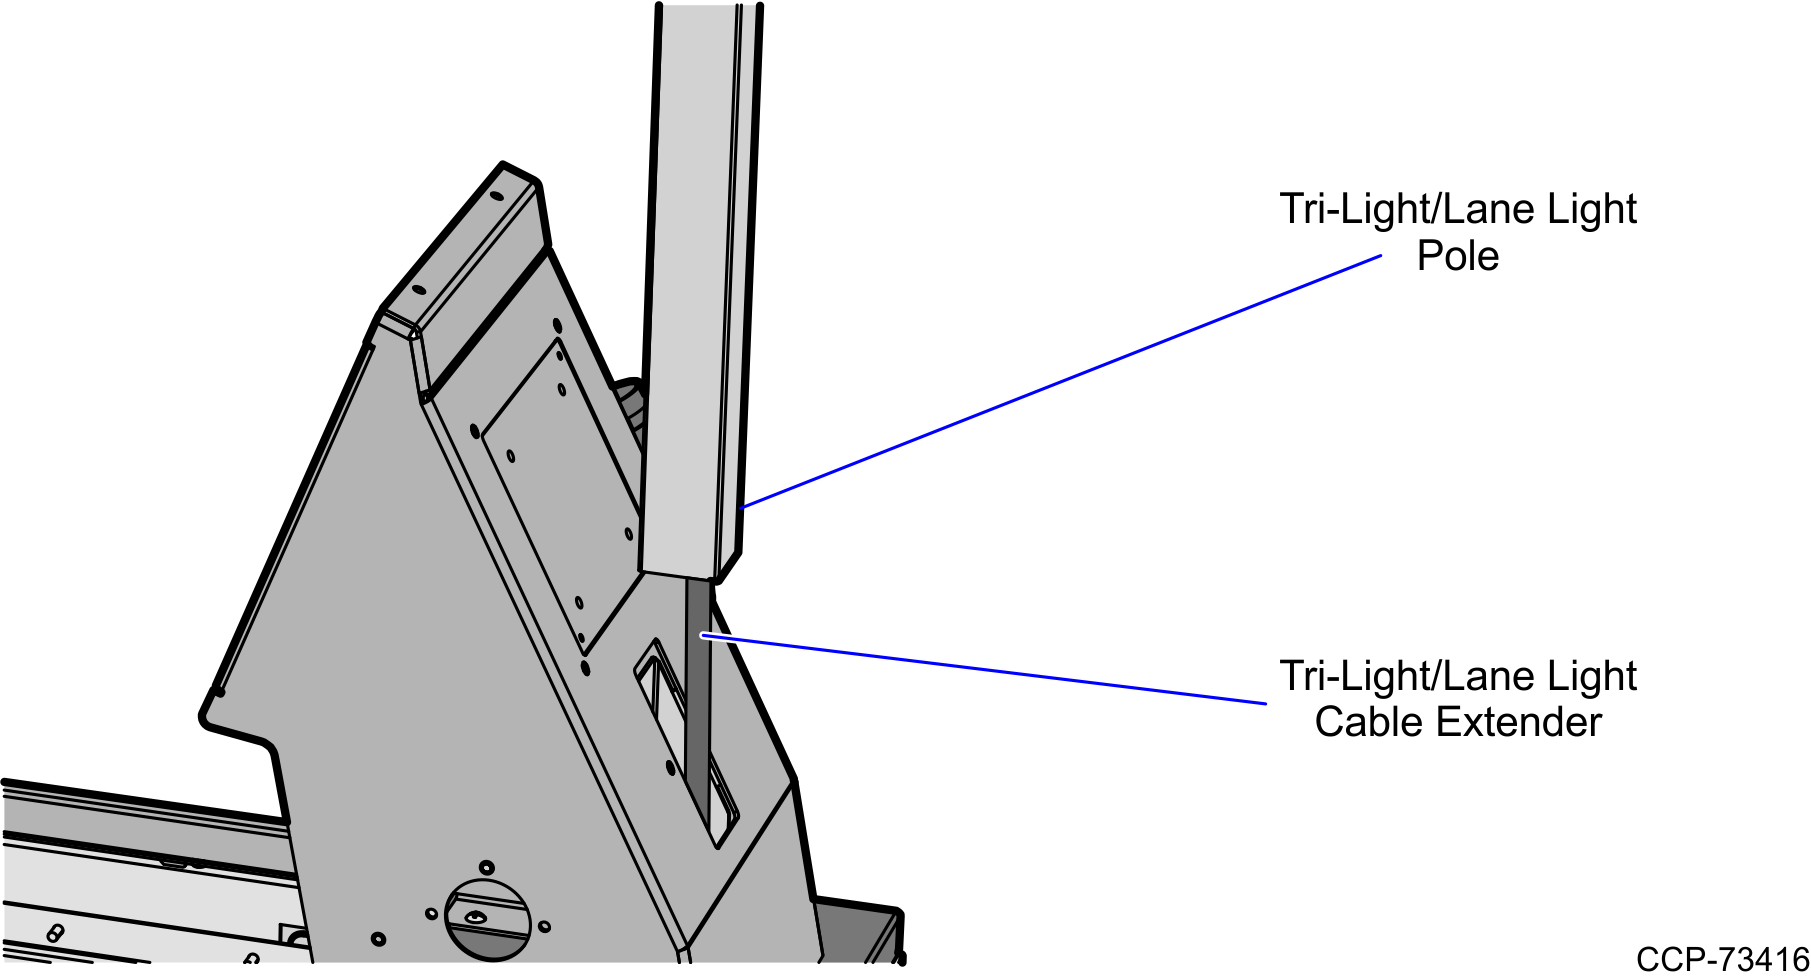
a.Insert the Tri-Light/Lane Light cable extender through the Tri-Light/Lane Light pole.
Tip: To make routing the cable extender through the pole easier, first attach a weight (for example, a large bolt) to a long piece of string and drop the weighted end of the string through the Tri-Light/Lane Light pole (starting at the top-end). Once the string is threaded through the pole, tie the non-weighted end of the string around the cable connector and then pull the cable extender through the pole.
b.Carefully insert the pole into the hole on the back of the display tower of R6 Lite Narrow Core unit.
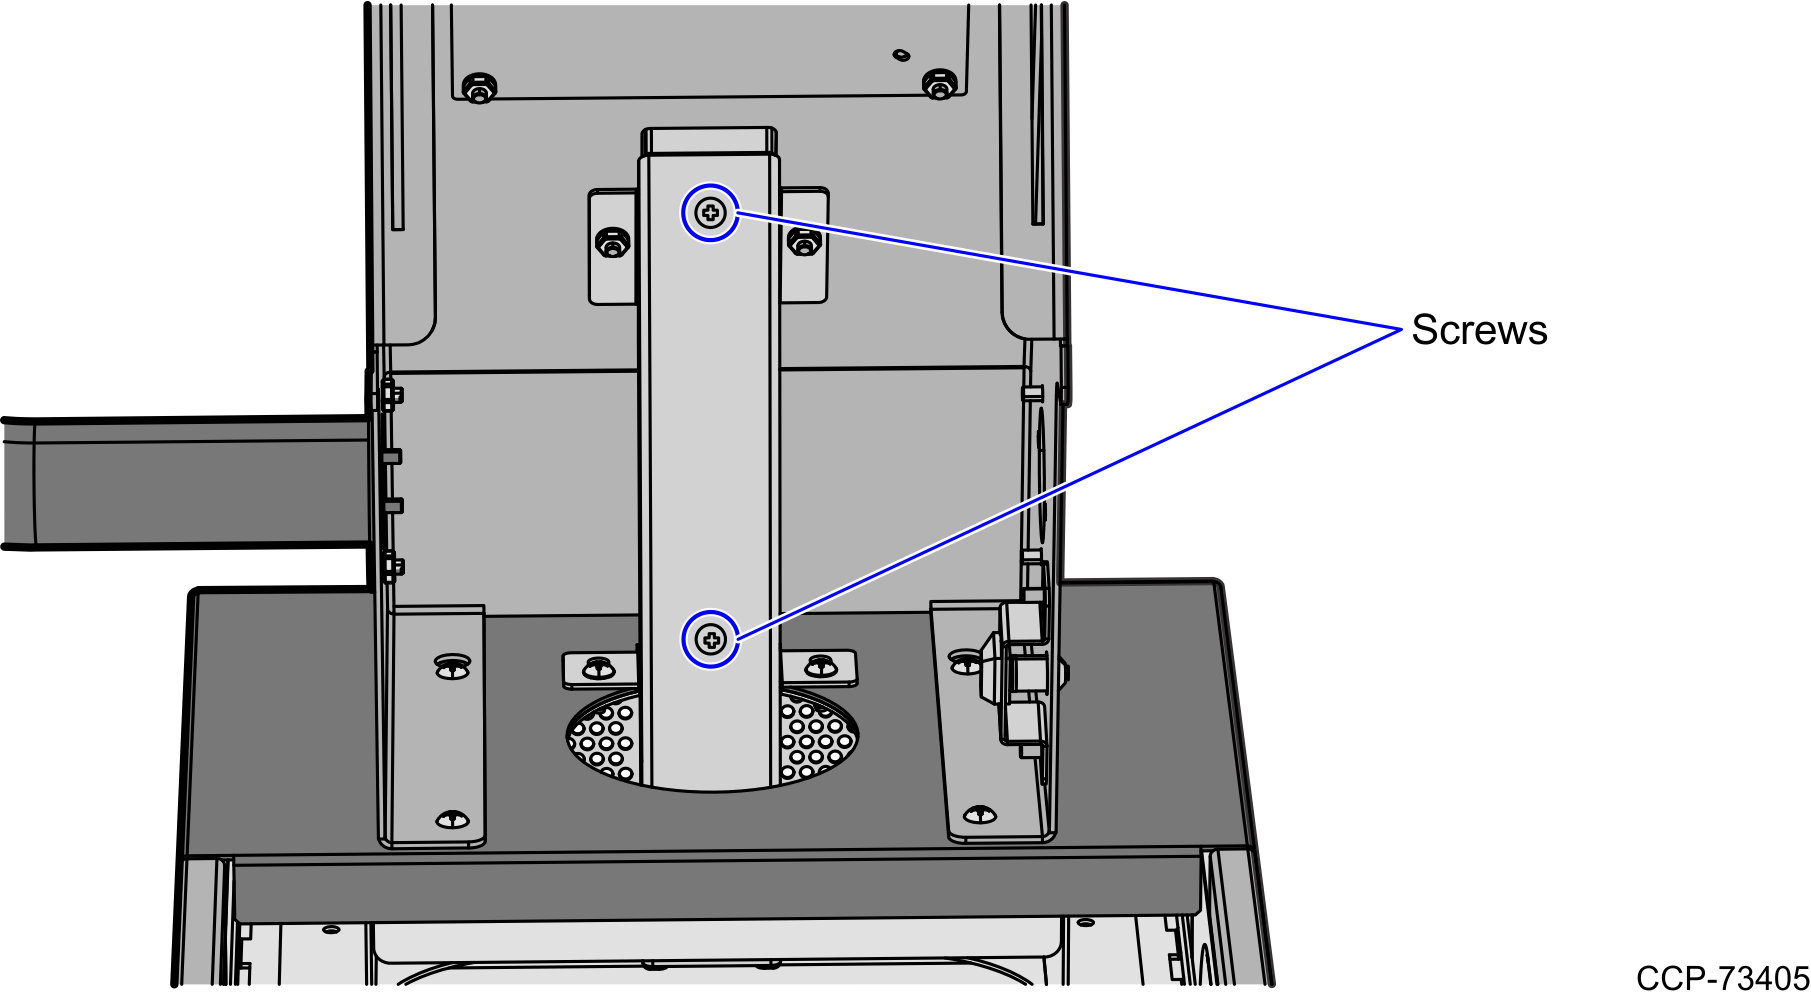
c.Secure the pole to the core using two screws.
3.Install the Tri-Light/Lane Light assembly by doing the following:
a.Connect the Tri-Light/Lane Light assembly cable with the cable extender in the pole.
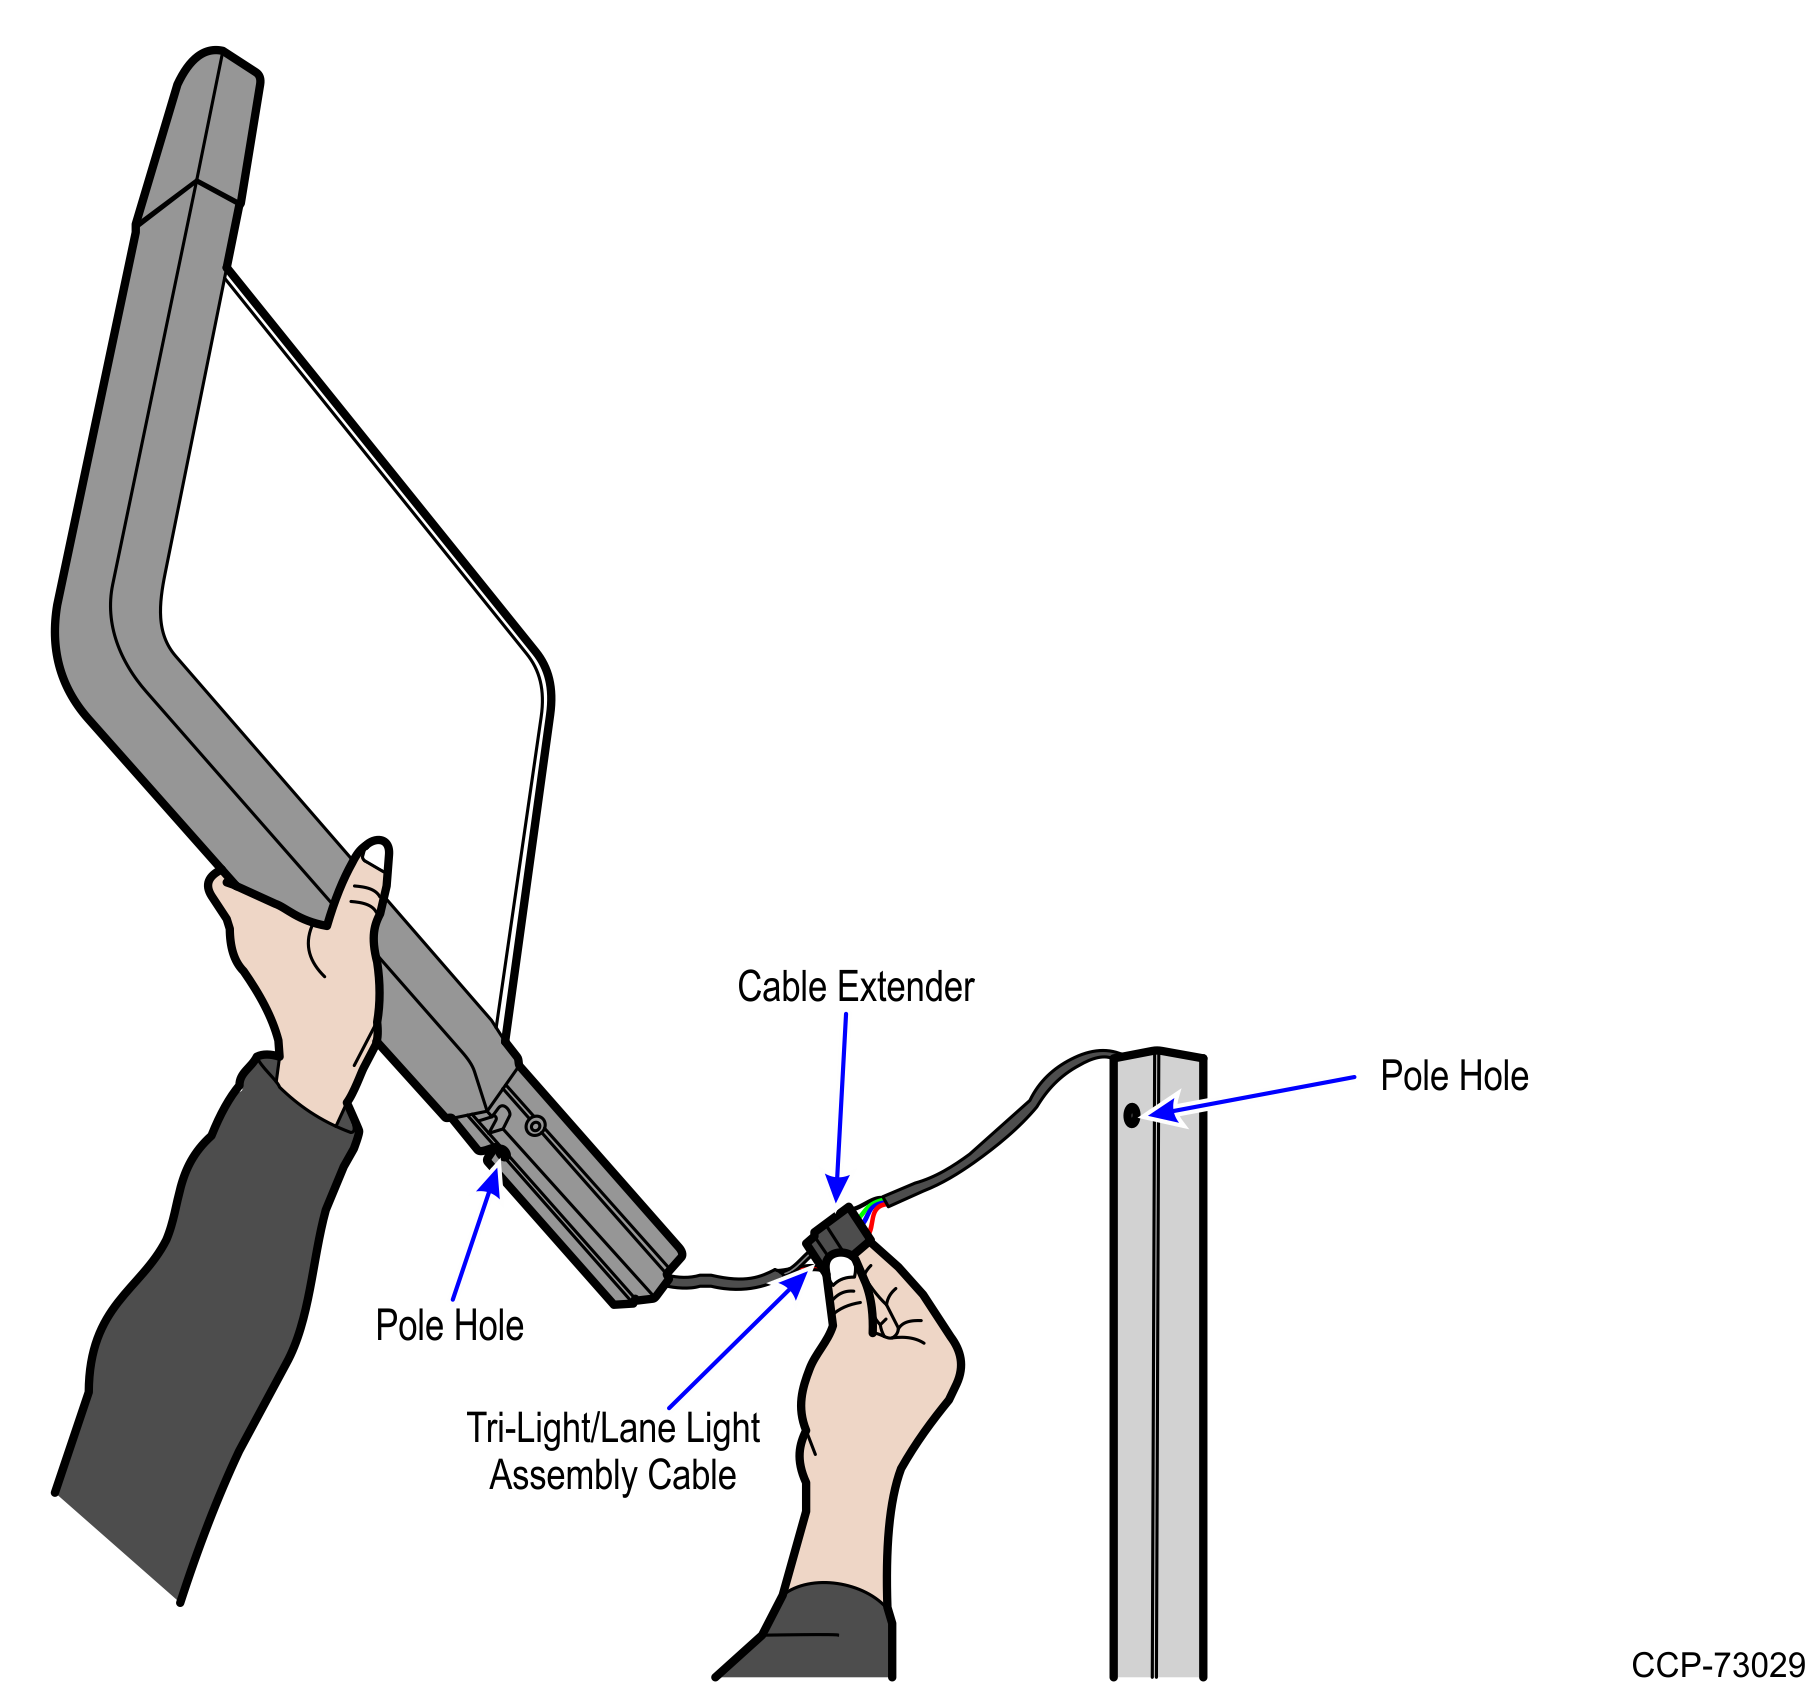
b.Orient the Tri-Light/Lane Light assembly so that the Lane Light faces the front of the unit.
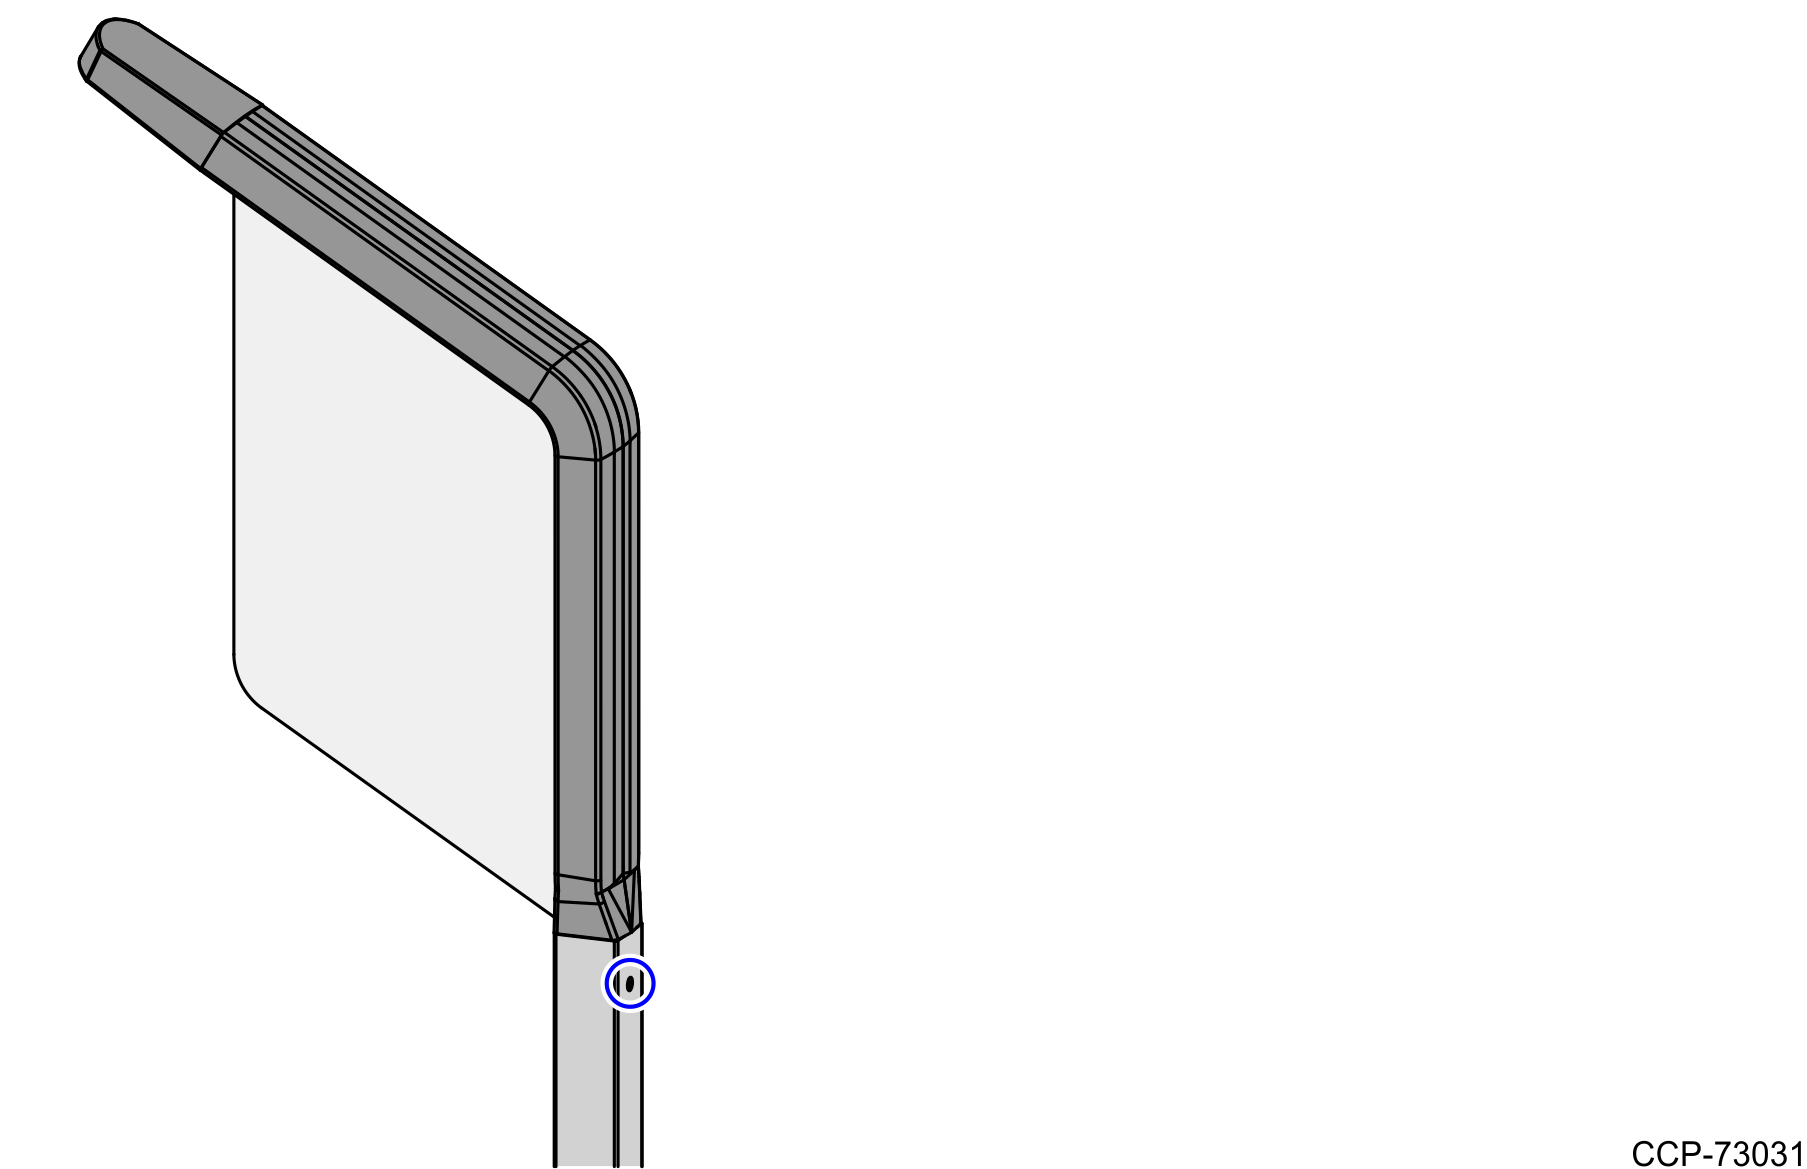
c.Insert the Tri-Light/Lane Light assembly into the Tri-Light/Lane Light pole. Ensure that the pole holes are aligned.
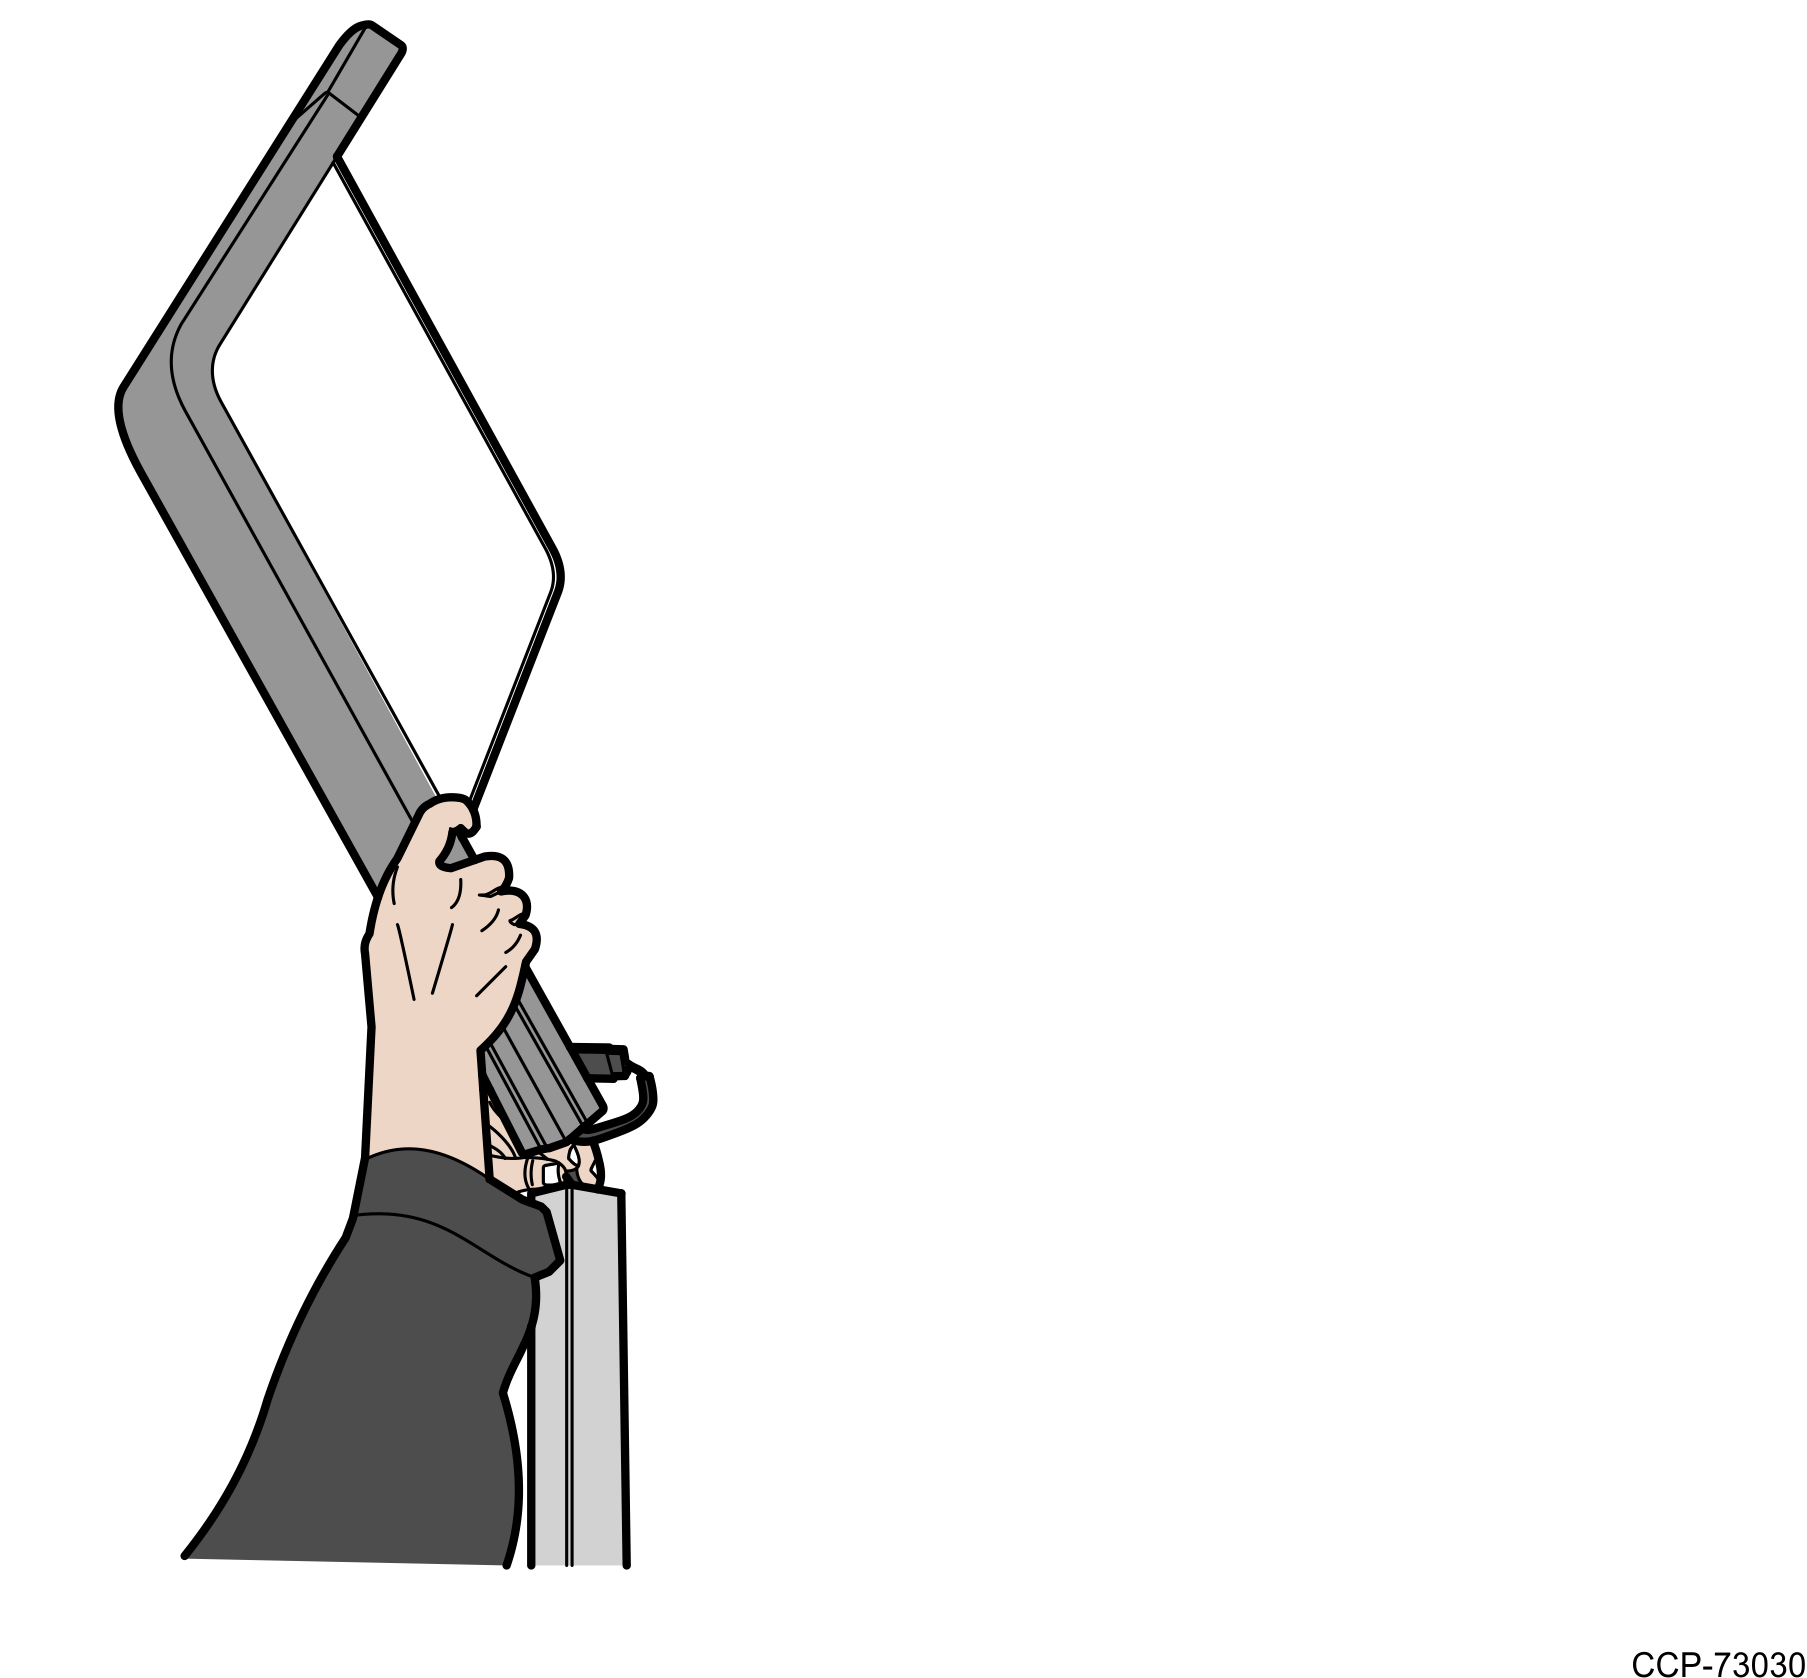
d.Secure the Tri-Light/Lane Light assembly to the pole with a screw.
4.Connect and route the Tri-Light/Lane Light cable extender to the I/O Box. For more information, refer to following procedures: