Accepting additional tenders
Retailers can enable the More Tender Options to accept customer payments. The POS can be configured to process payments as credit transactions and can process card-not-present transactions.
Configurable features
The POS application can be configured with the following features.
- Enable Credit Only to accept dual credit or debit cards as credit. For more information, refer to Tender Modifiers.
- Enable Card Not Present when the card magnetic stripe or chip is damaged or when a customer does not have the card during a sales transaction. For more information, refer to Tender Modifiers.
- Collect additional customer details when the card is not present. For more information, refer to the following sections:
- Enable the information message to pay at PIN pad after selecting the tender type. For more information, refer to Tender Setup.
- Mask personal identification numbers and customer details. For more information, refer to Information Field Definitions.
- Specify a threshold for when payment plans are to be offered. The Payment Plan screen is displayed only when the tender amount is equal to or greater than the specified threshold. Refer to the following option:
- Payment Plans > Payment Plan Threshold
When enabled, the More Tender Options button is displayed on the Tender Menu.
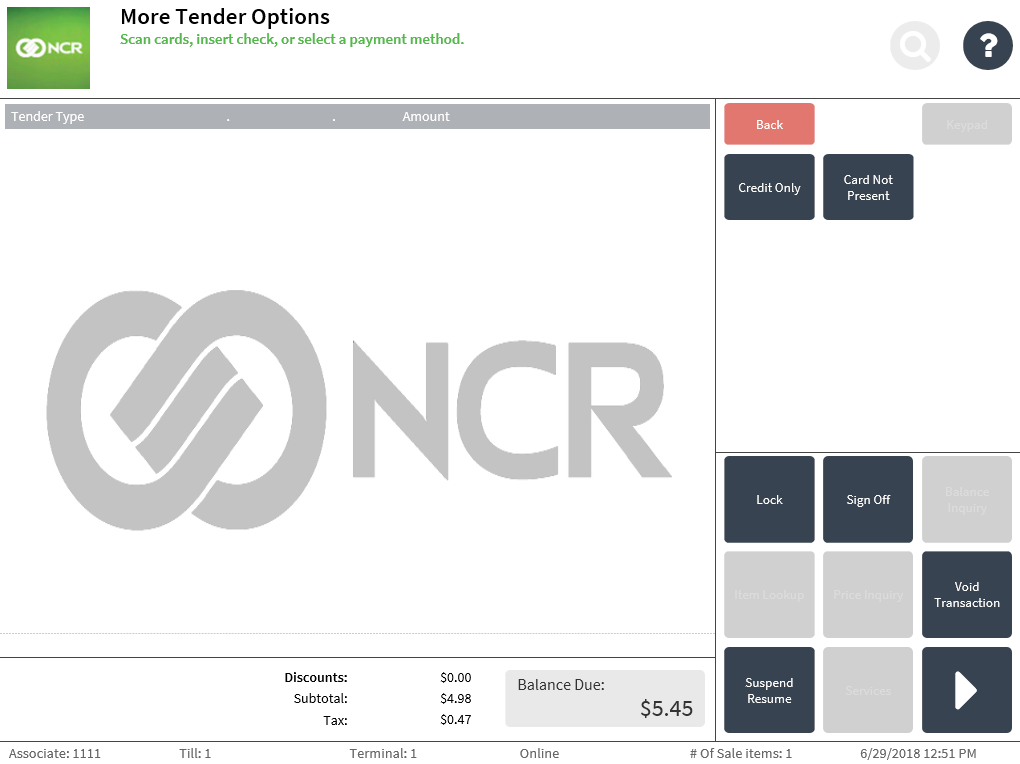
Credit Only
When accepting dual credit/debit cards and the customer prefers not to enter debit PIN, the POS application can process the payment as a credit transaction.
Select Credit Only. For more information, refer to Accepting credit cards.
Card Not Present
The POS can also process payments when the card is damaged or defective or when the customer does not have the card during the sales transaction.
To accept payments when the card is not present, follow these steps:
- On the More Tender Options screen, select Card Not Present. When enabled, the application displays the Customer Information screen.
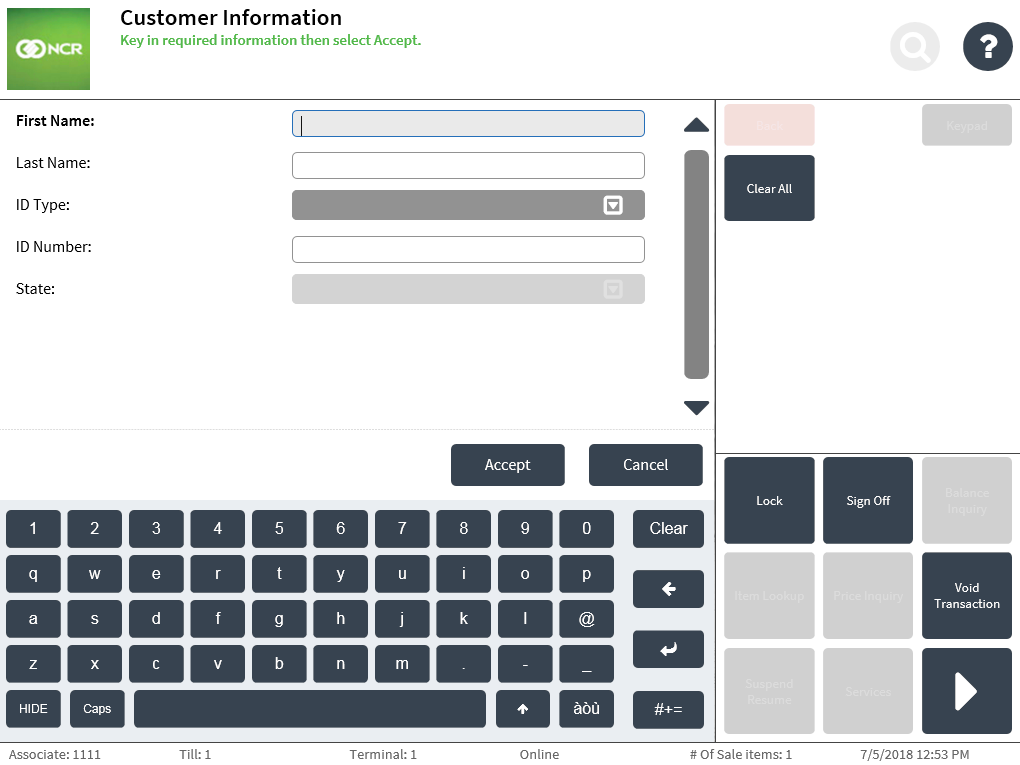
- Do one of the following:
- Enter the customer details. When enabled, the POS application can mask the customer details when required.
- Scan a valid ID when the POS application is integrated with IDScan.net. The customer information is then populated on the screen.
- For more information, refer to Entering and Validating Customer Information.
- Select Accept. The application displays the Card Amount screen.
To complete the transaction, refer to the following sections: