Installing the System Power Supply on Bracket
To install the System Power Supply, follow these steps:
1.Remove the existing 7350 Narrow Core components that must be replaced. For more information, refer to Installation Procedures.
2.Attach the System Power Supply to the Power Supply mount and then secure with a locking screw.
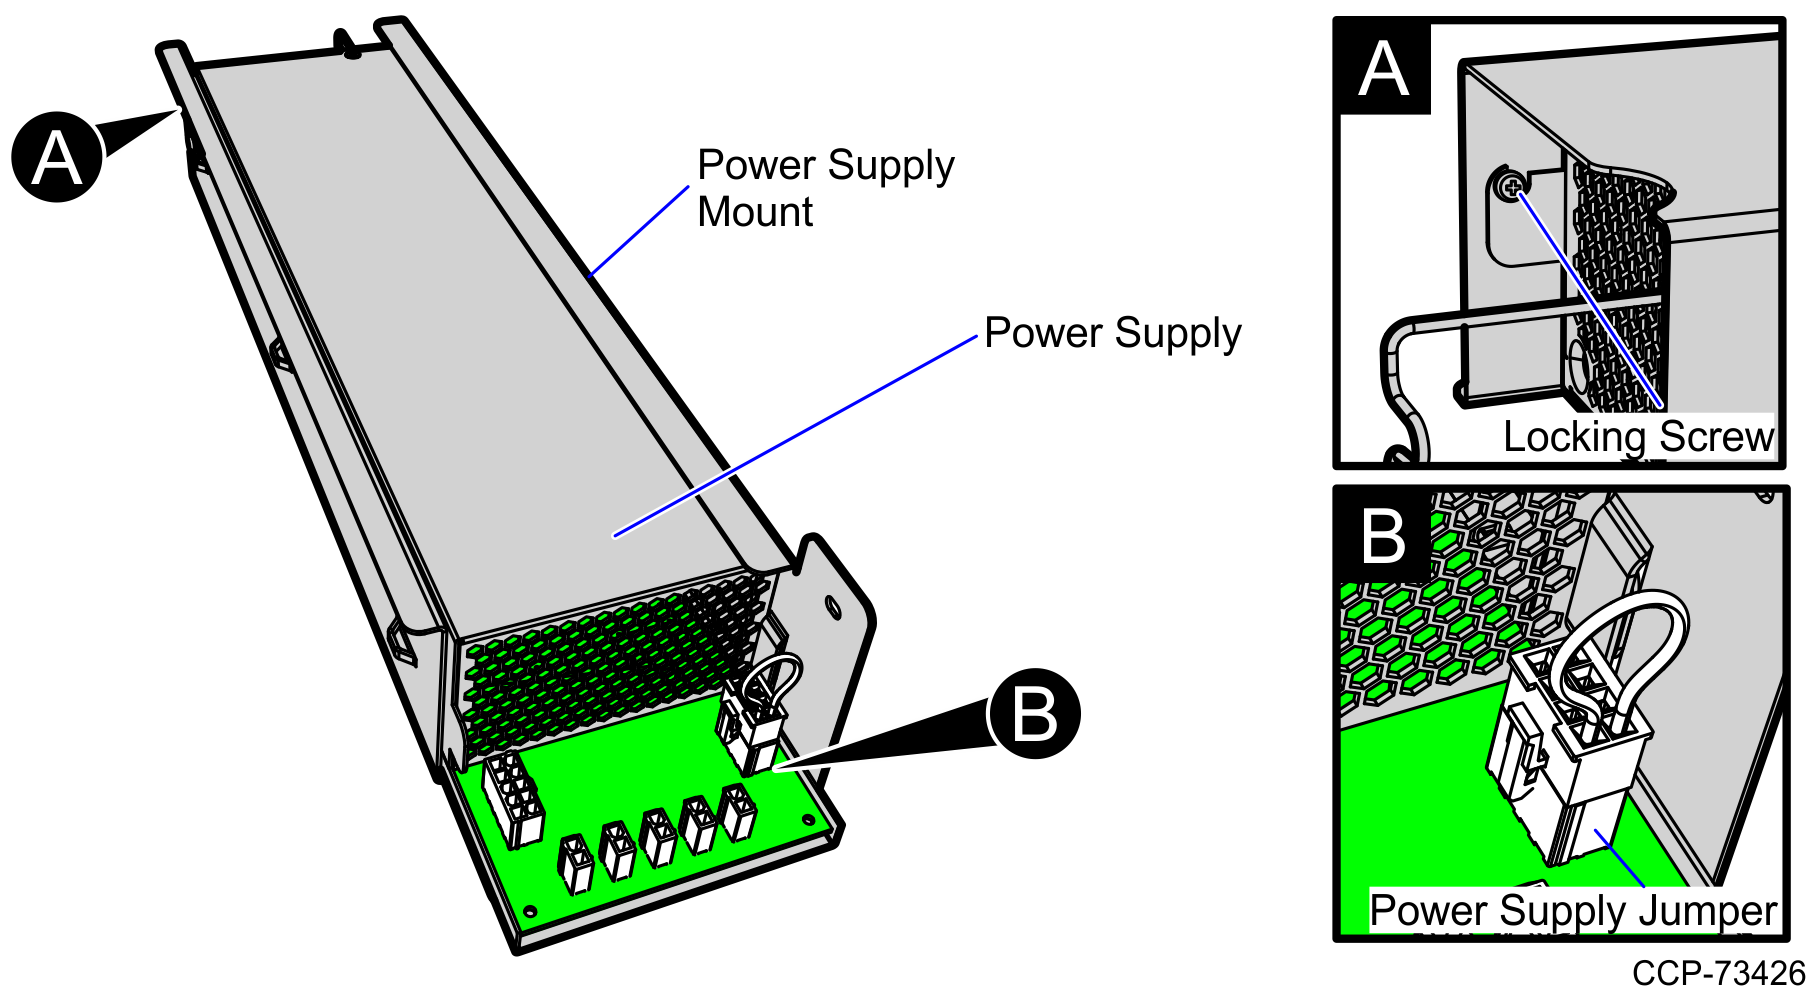
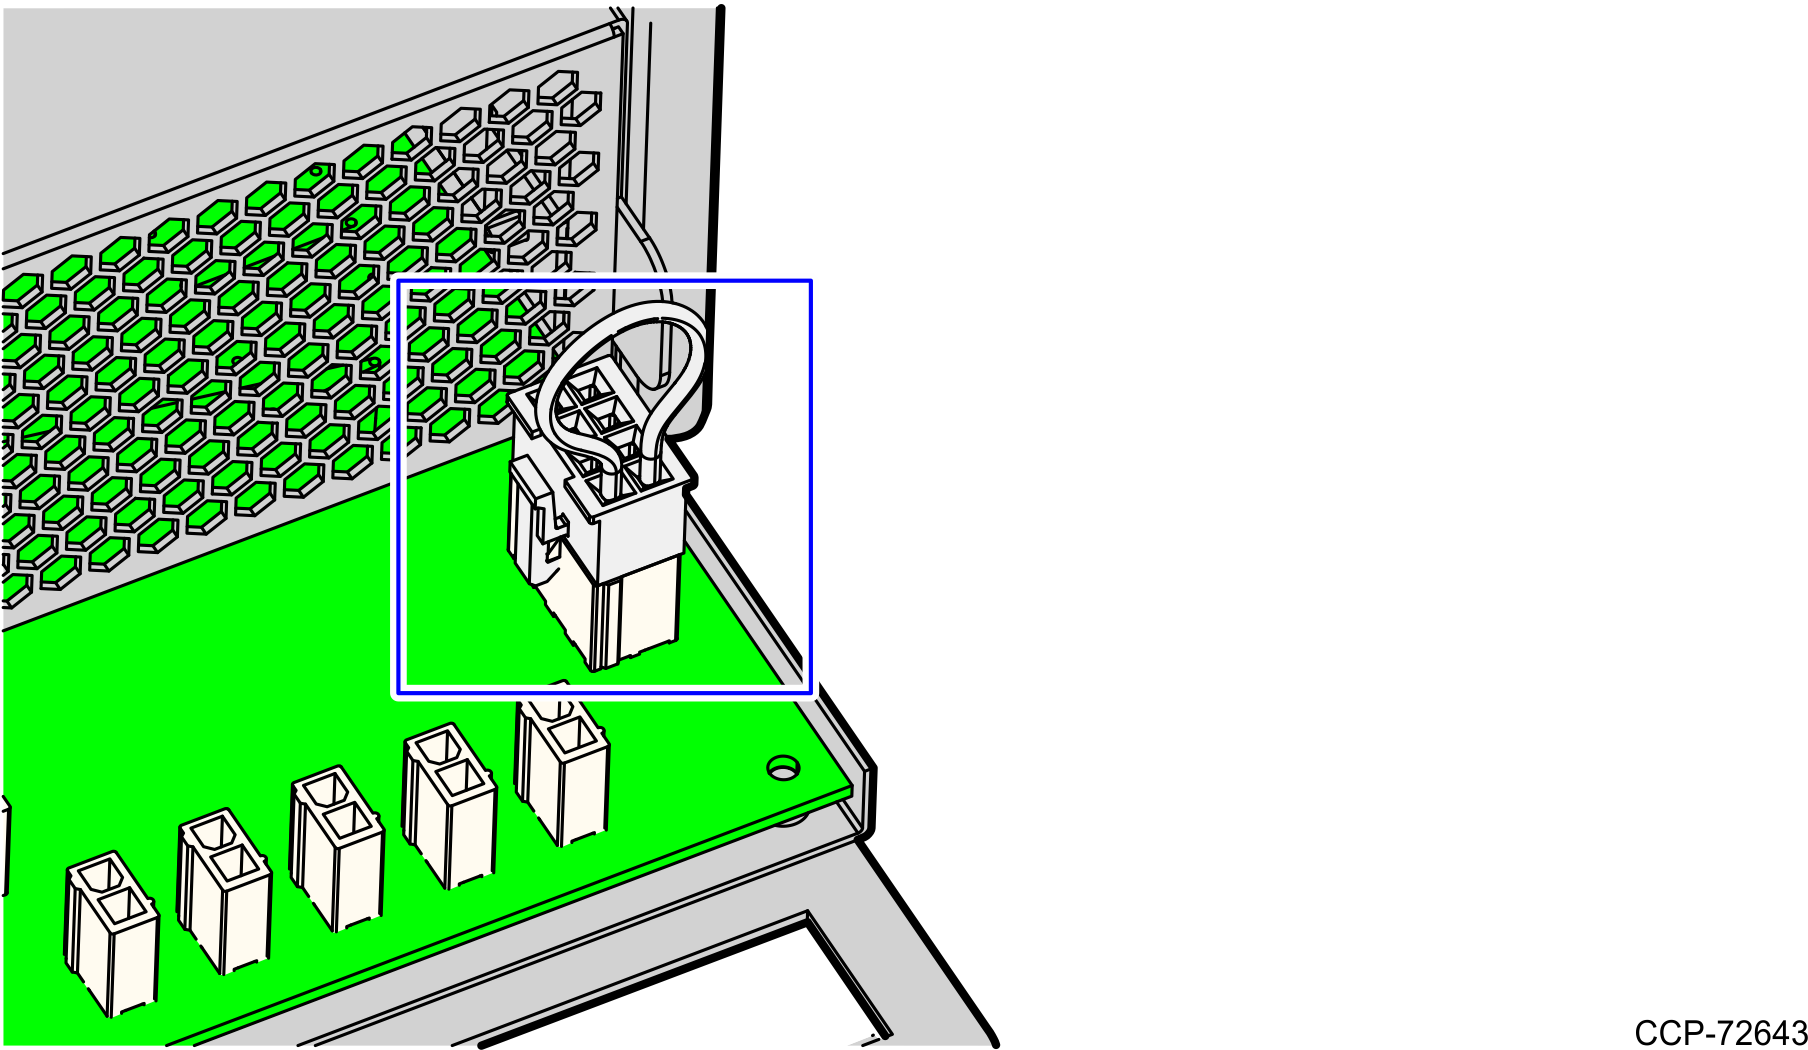
3.Connect the jumper to the System Power Supply.
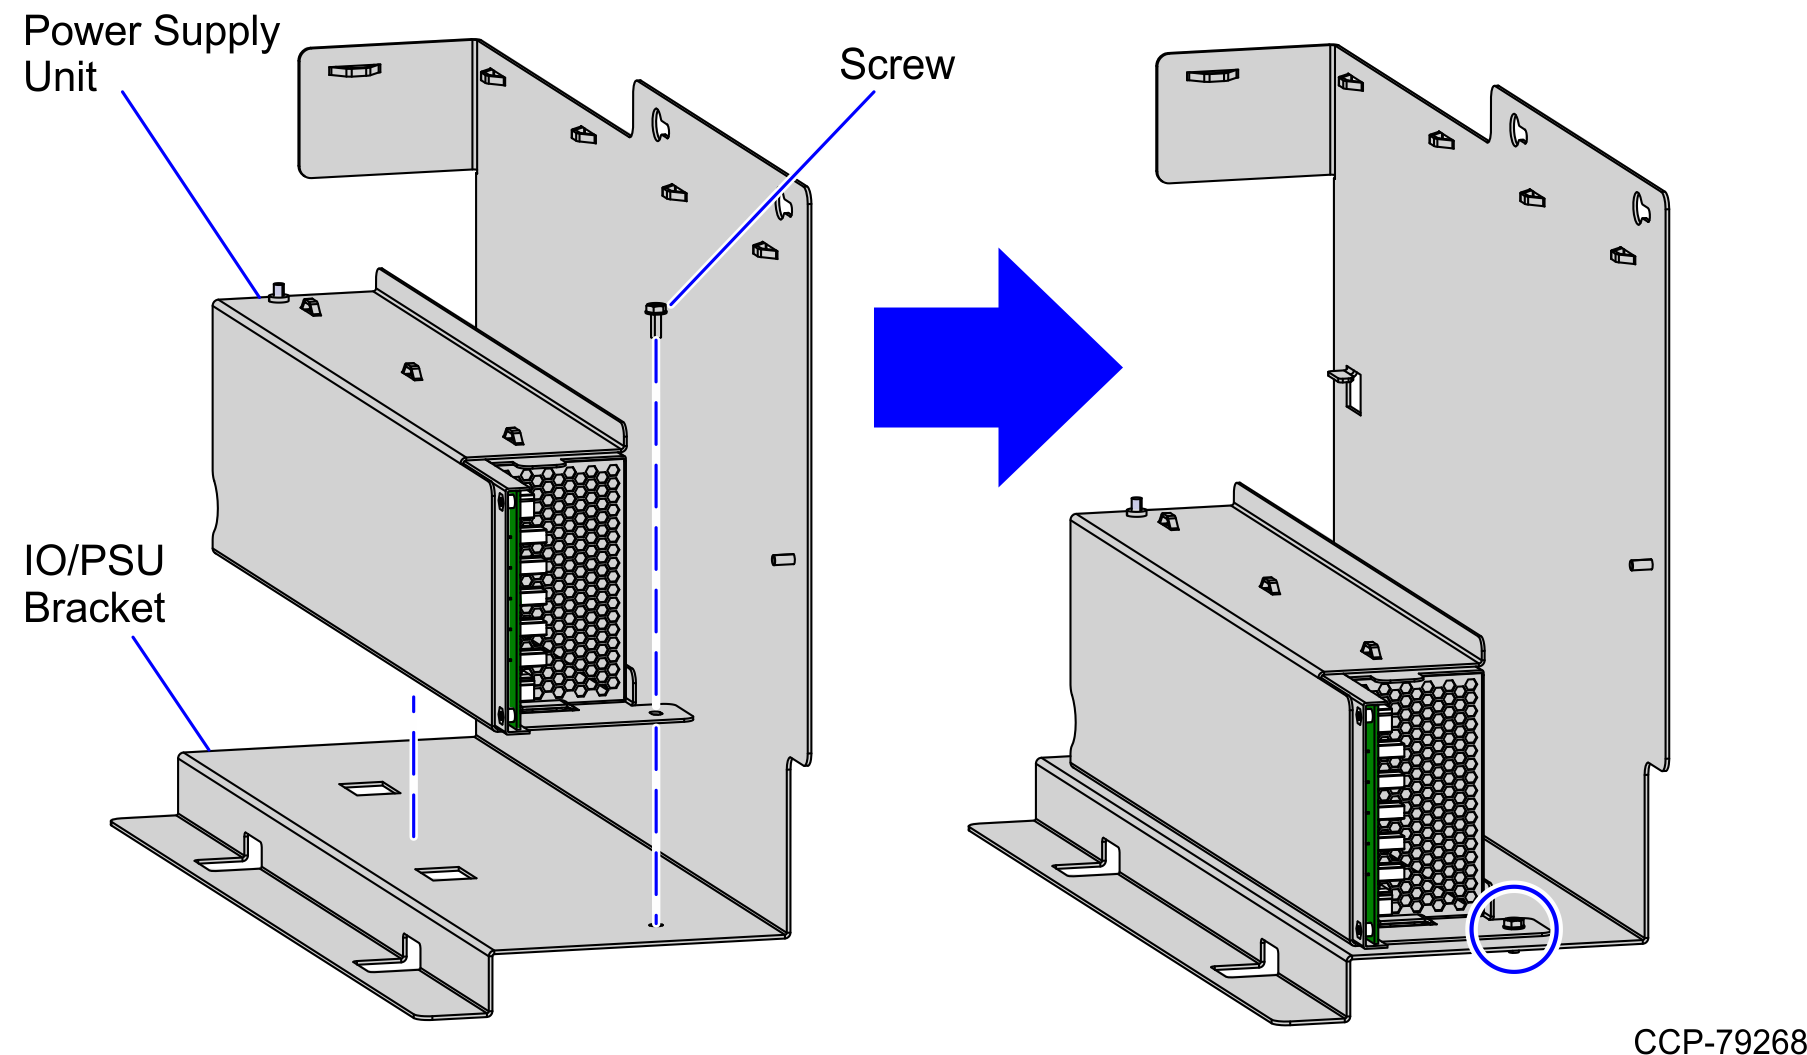
4.Align the hooks of the power supply assembly to the I/O Box-PSU bracket to lock the assembly in place and secure using one screw.
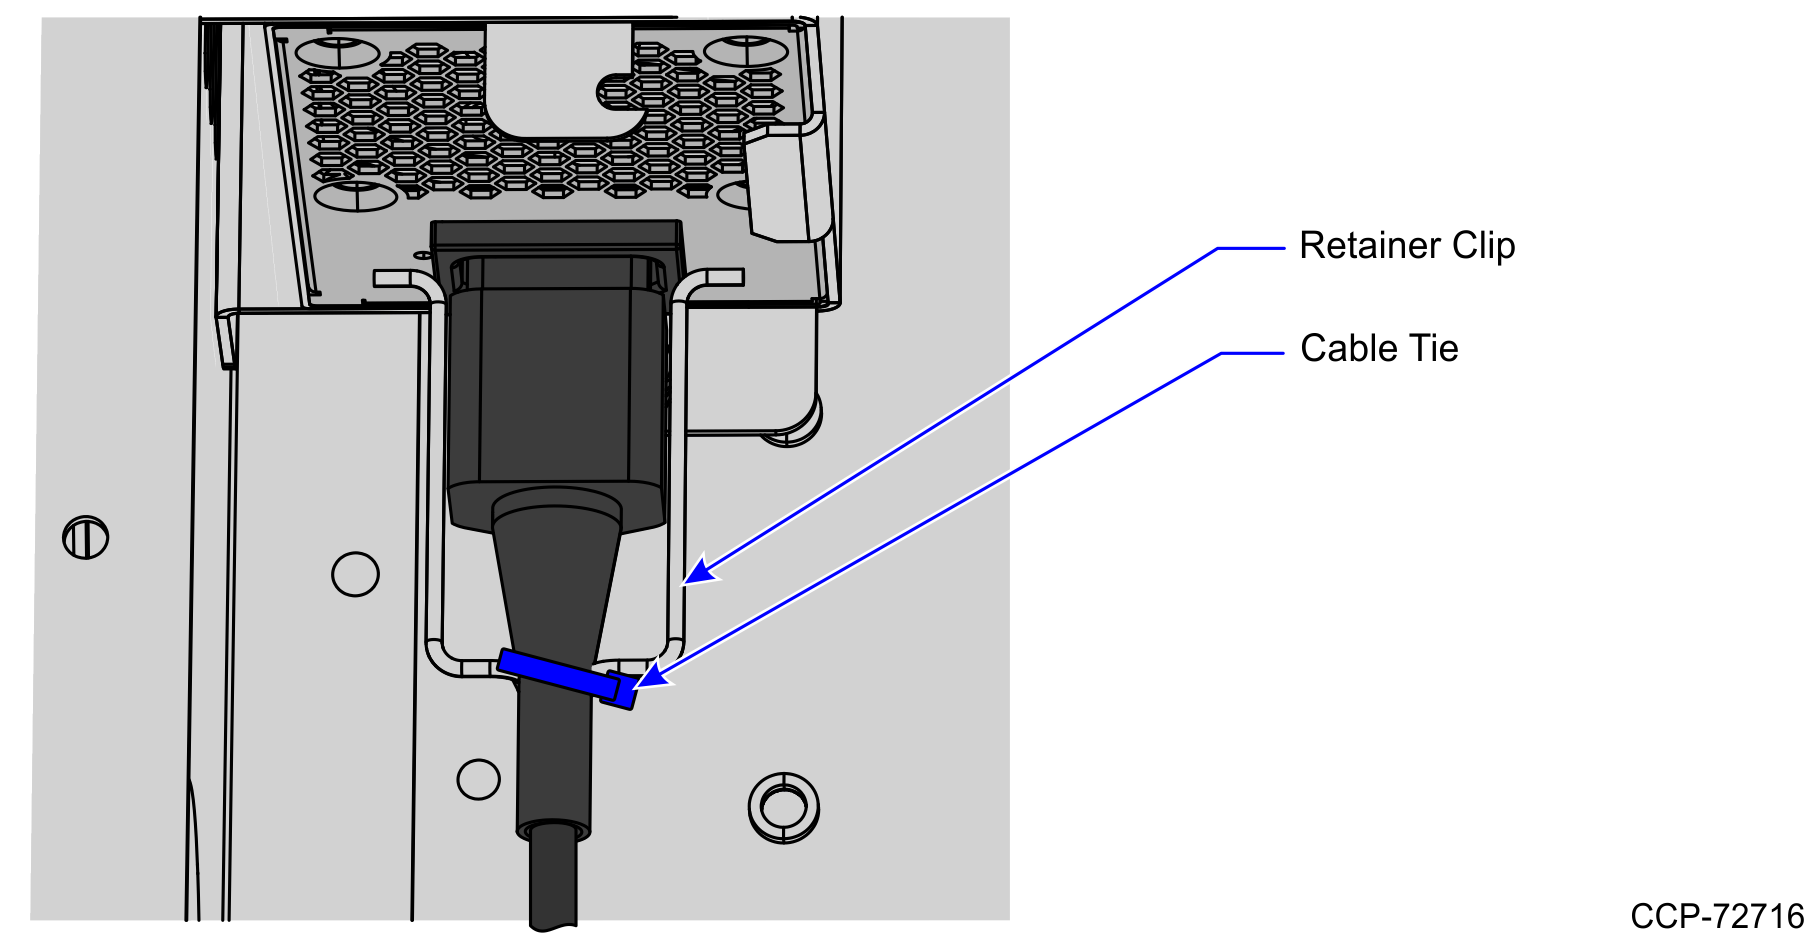
5.At the back of the System Power Supply, connect the power cable. Ensure the cable is secured to the Retainer Clip.
6.Connect the 7702 Terminal Display Power and I/O Power cables to the System Power Supply.
7.Do the following:
•Install the I/O Box, if not yet installed. For more information, refer to Installing the I/O Box on Bracket.
•Install the I/O Box - PSU bracket to the core wall. For more information, refer to Installing the I/O Box and Power Supply Bracket.
8.Route the System Power supply cables. For more information, refer to Routing System Power Supply Cables.
Note: For more information about routing cables, refer to SCO R6 Lite (Narrow Core) Routing Instructions (497-0520486).