Installation Procedures
To install the Security Upgrade Kit in an NCR SelfServ™ Checkout (7350) unit, follow these steps:
1.Turn off the NCR SelfServ Checkout software and hardware systems.
2.Remove the following components:
|
# |
Component |
Related Task/Information |
|---|---|---|
|
a. |
Lower Bumper |
|
|
b. |
Bulk Coin Recycler |
For more information, refer to NCR SelfServ™ Checkout (7350) Hardware Service Guide (B005-0000-1827). |
|
c. |
Note Acceptor Cashbox |
|
|
d. |
Note Acceptor Module |
|
|
e. |
Note Acceptor Chassis |
|
|
f. |
Note Dispenser |
|
|
g. |
Uninterruptible Power Supply (UPS) |
|
|
h. |
Core Door Hinge |
|
|
i. |
Upper and Lower Fixed Bracket |
|
|
j. |
Hook Bracket |
3.Install the following components:
|
Component |
Related Task/Information |
|---|---|
|
Core Door Hinge |
|
|
Upper and Lower FIxed Bracket |
|
|
Hook Bracket |
Note: Ensure that the Core Door closes smoothly and that its locking action works well before proceeding to the next step.
4.Remove the currency devices and Uninterruptible Power Supply (UPS) that were temporarily installed during the installation of the Core Door Hinge and Fixed Brackets.
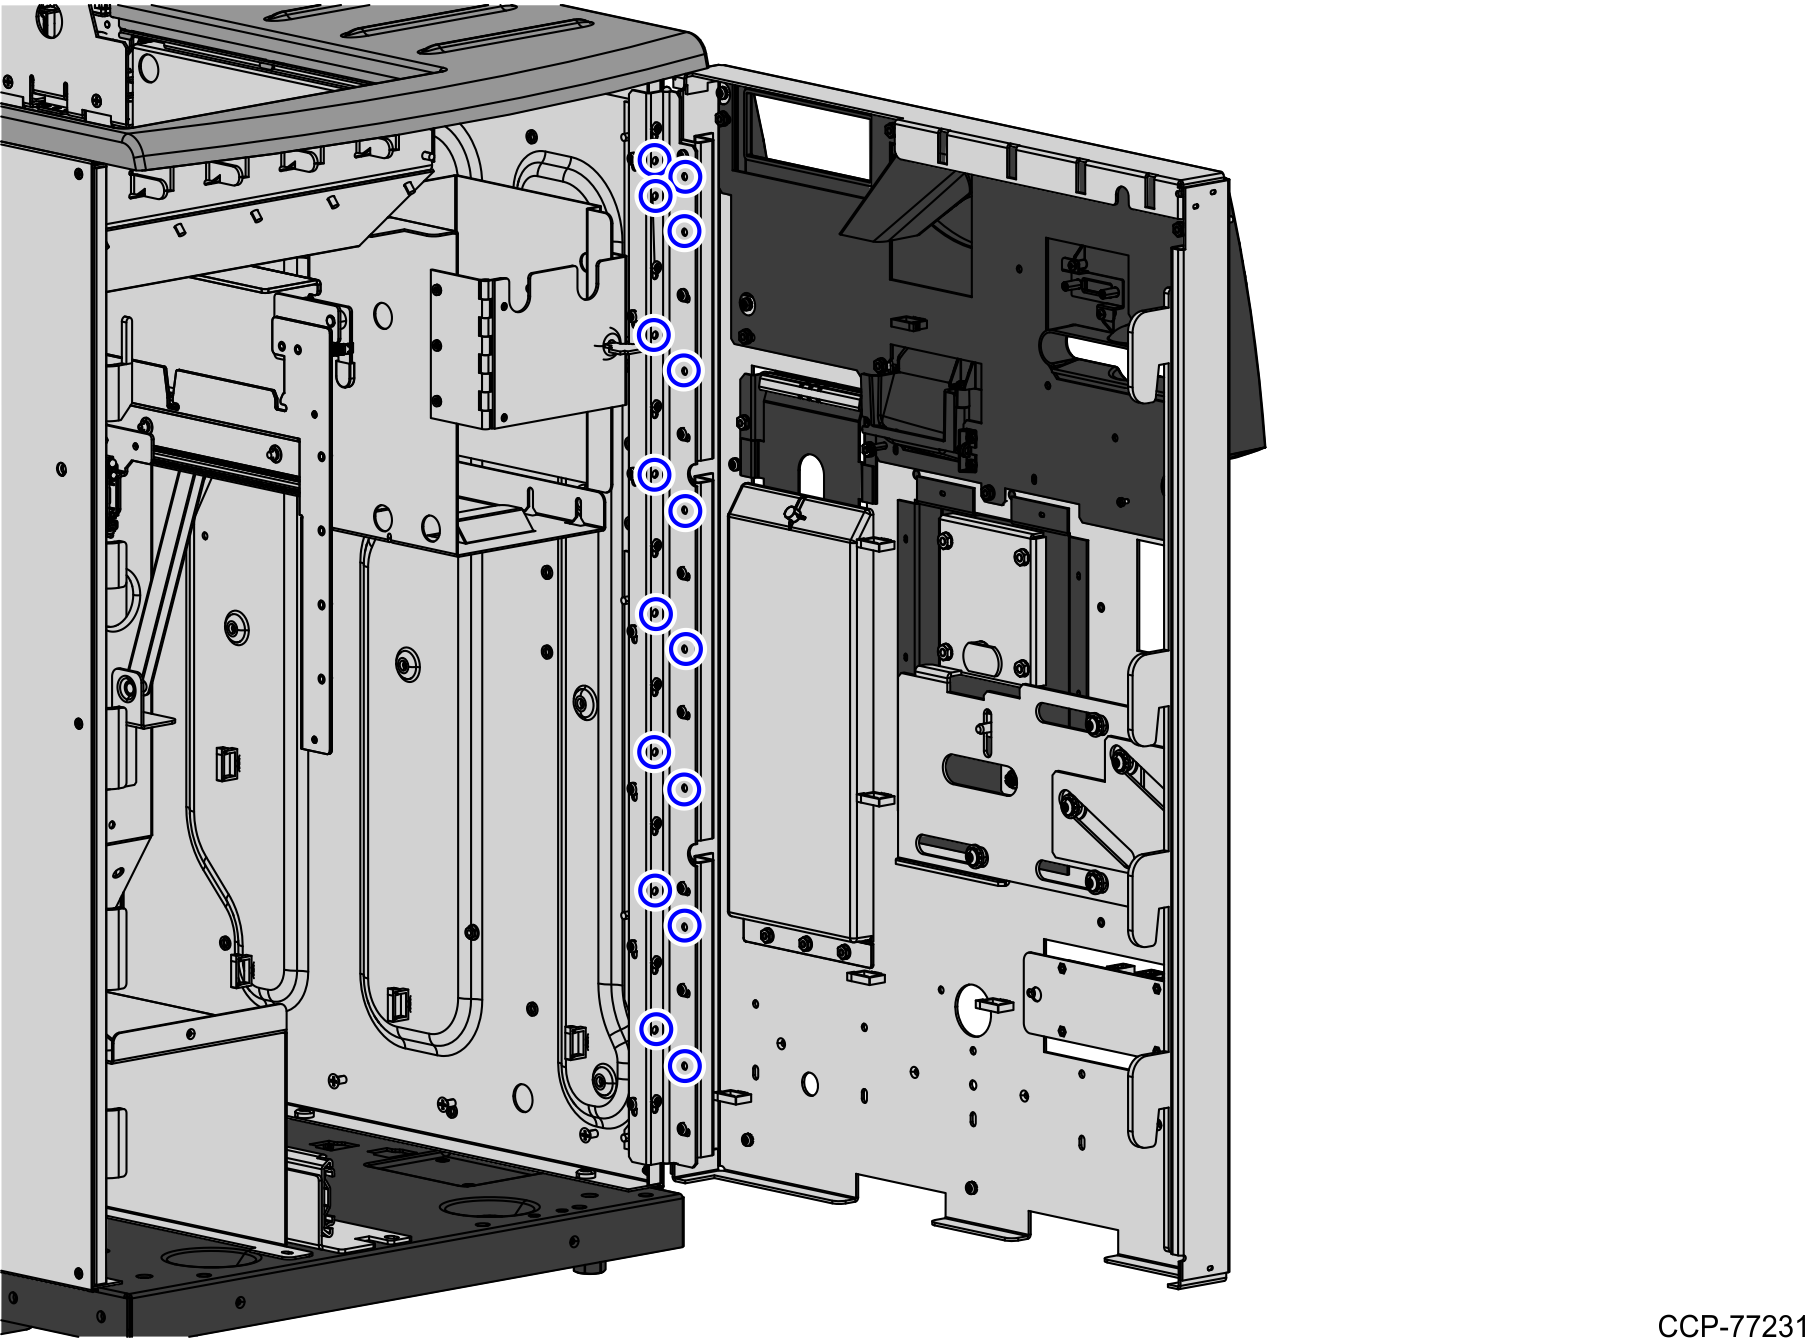
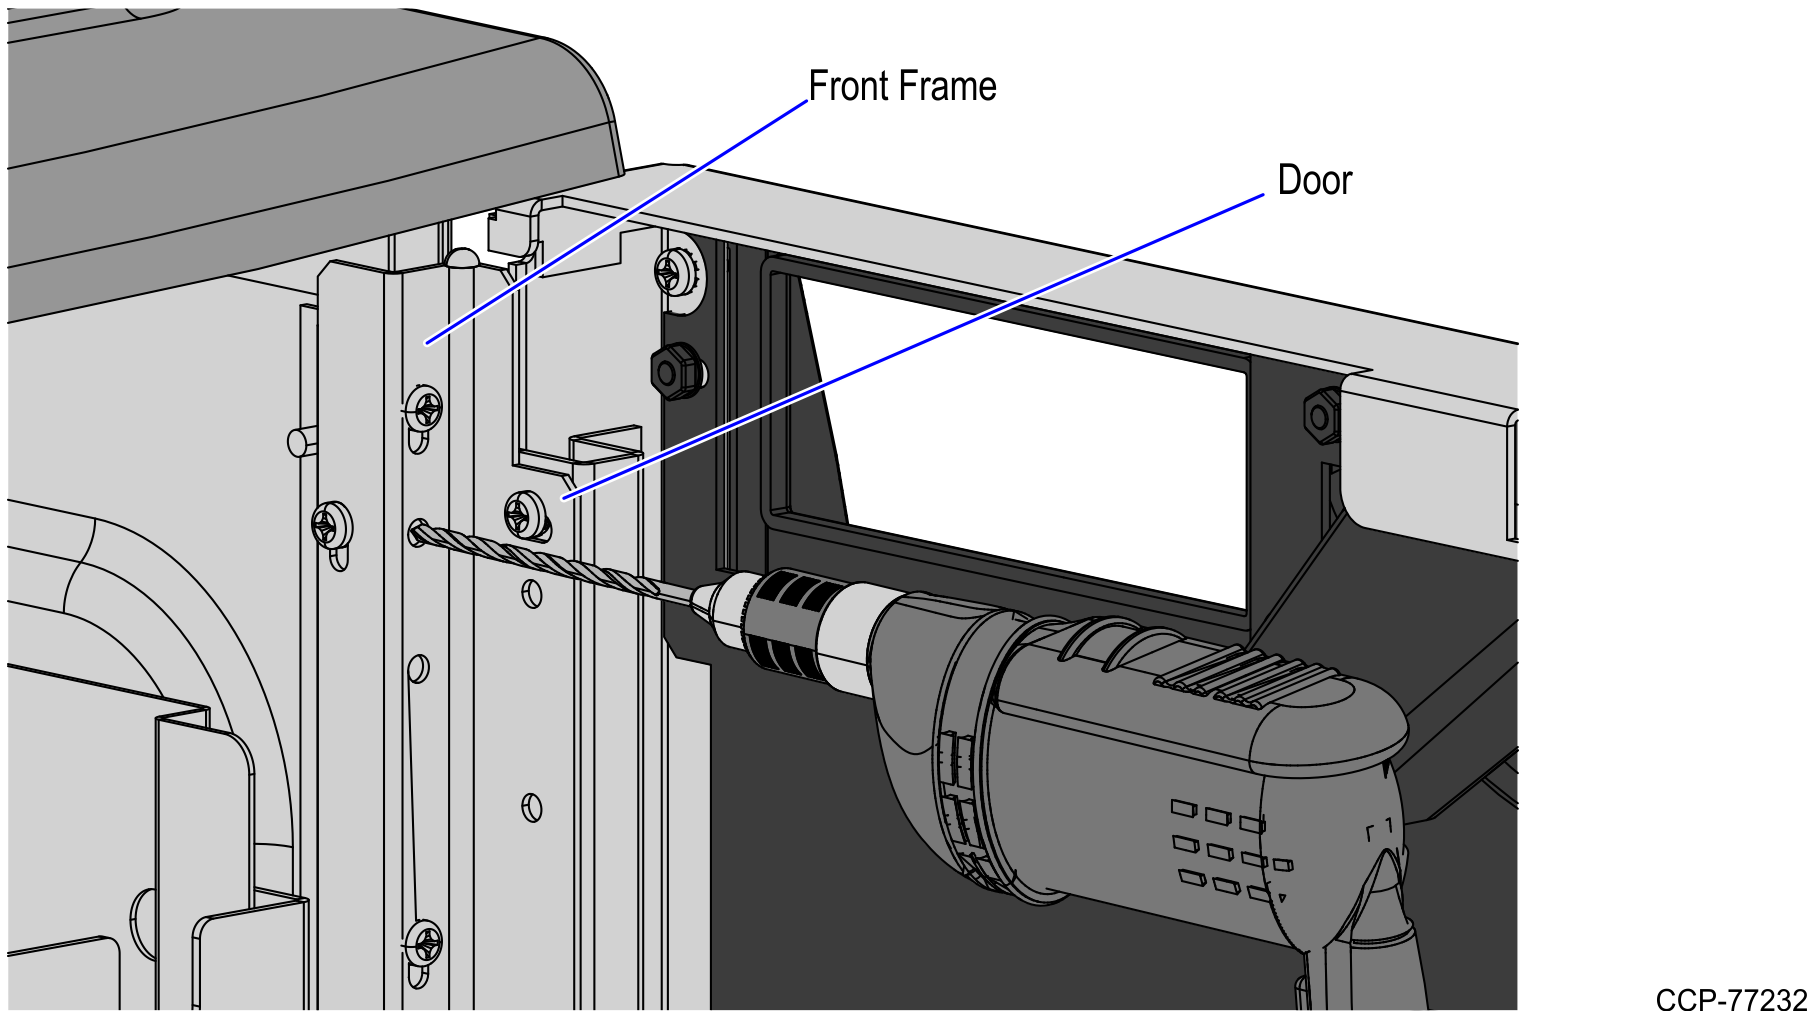
5.Locate the sixteen (16) screw slots on the front frame and door surface for the new hinge.
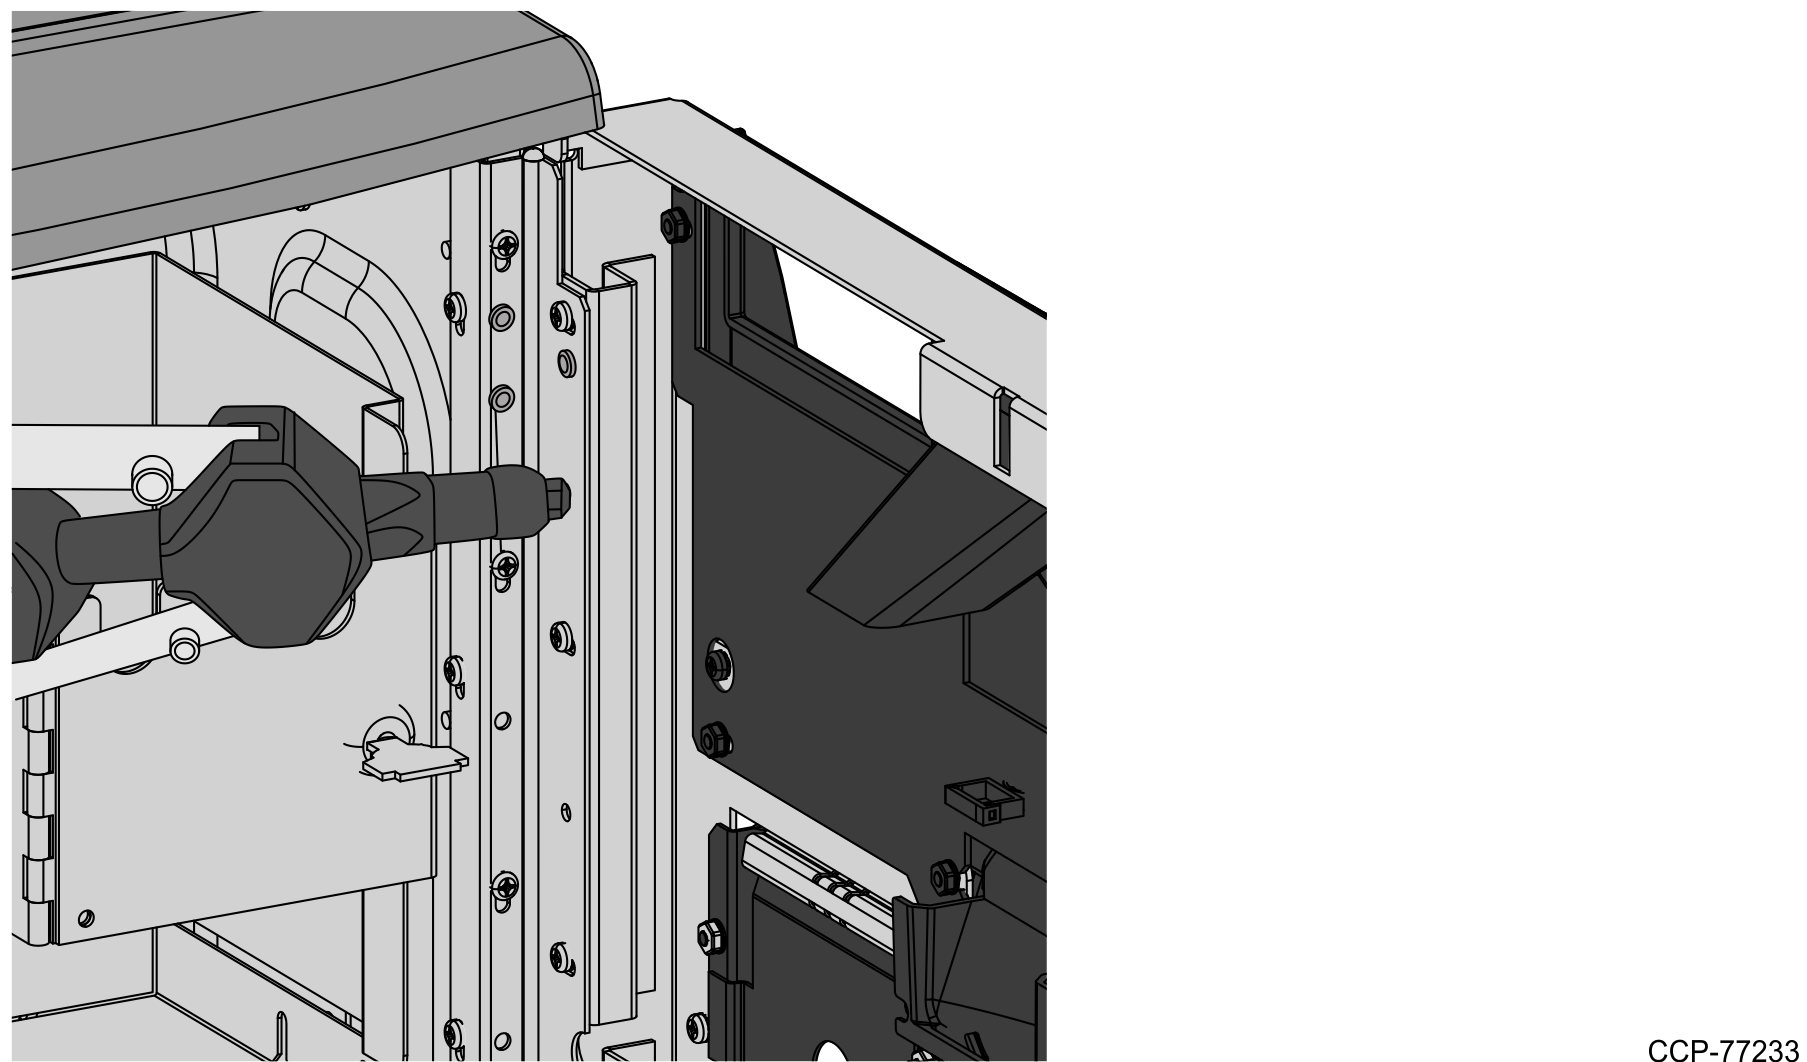
6.Drill into the sixteen (16) holes using a #10 (0.1935 in) or 4.90 mm drill bit.
Note: The diameter of the drilled holes should be between 0.192 in—0.196 in.
7.Install the sixteen (16) 3/16 in Stainless Steel rivets into the newly drilled holes.
Note: Ensure to use a Riveting Tool that is rated for installing 3/16 in-sized Stainless Steel rivets.
8.Install the following components:
|
# |
Component |
Related Task/Information |
|---|---|---|
|
a. |
Bulk Coin Recycler |
For more information, refer to NCR SelfServ™ Checkout (7350) Hardware Service Guide (B005-0000-1827).
|
|
b. |
Note Acceptor Cashbox |
|
|
c. |
Note Acceptor Module |
|
|
d. |
Note Acceptor Chassis |
|
|
e. |
Note Dispenser |
|
|
f. |
Uninterruptible Power Supply (UPS) |
|
|
g. |
Lower Bumper |
For more information, refer to 7350-K600/K601/K602 Lower Bumper Kit Instructions. |
9.Clean the station to remove metal shavings from drilling.