Installing the Input Belt assembly
To install the Input Belt assembly to the SelfServ Checkout unit with the Input Belt Adapter, follow these steps:
This procedure shows images of a Right-Hand unit for illustration purposes only. The steps are the same for a Left-Hand unit.
- Do the following:
- Remove the Conveyor Belt from the Input Belt assembly. For more information, refer to Removing the Conveyor Belt assembly.
- Remove the Input Belt assembly from either the NCR SelfServ™ Checkout (7350) or NCR FastLane SelfServ™ Checkout (7358) R6L Plus. For more information, refer to Removing the Input Belt assembly.
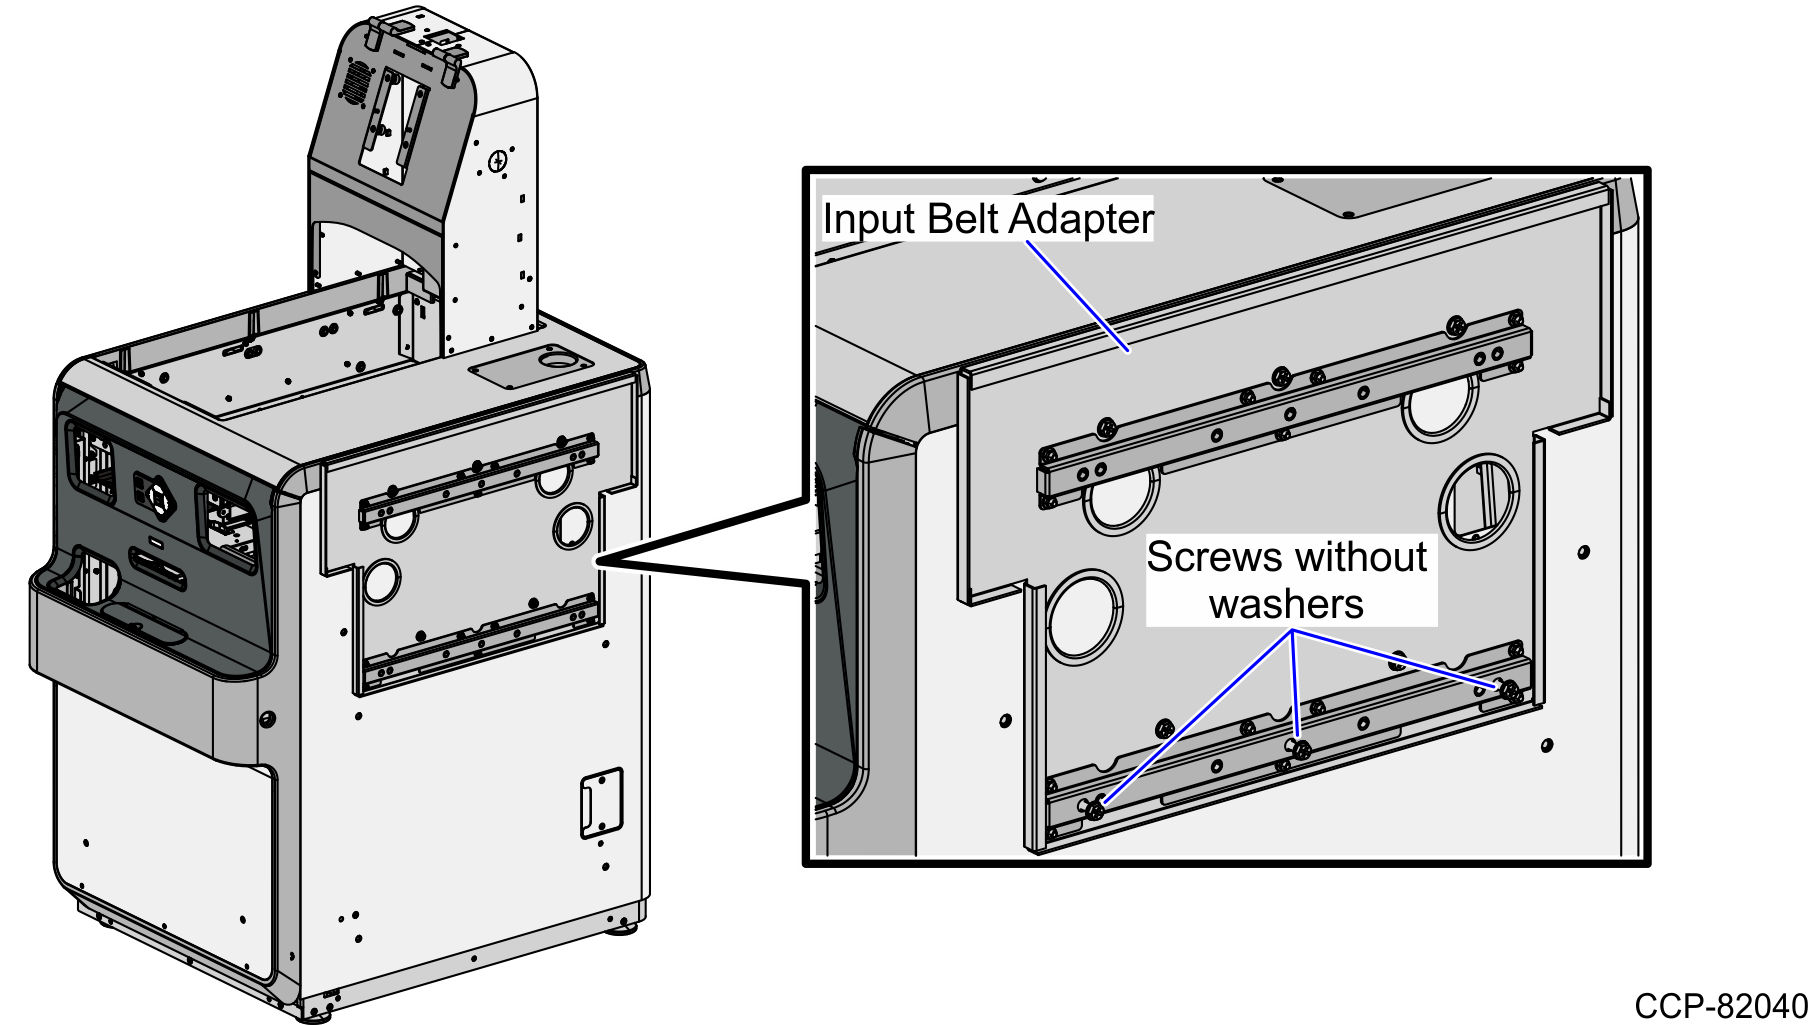
- Insert three (3) screws into the lower U-Channel Input Belt Adapter as an alignment guide. Leave at least ¼ inch of the screw threads visible.
- Move the Input Belt assembly near the SelfServ Checkout Core Cabinet with the Input Belt Adapter.Note
Do not join the Input Belt assembly to the Input Belt Adapter because the cable access holes do not align.
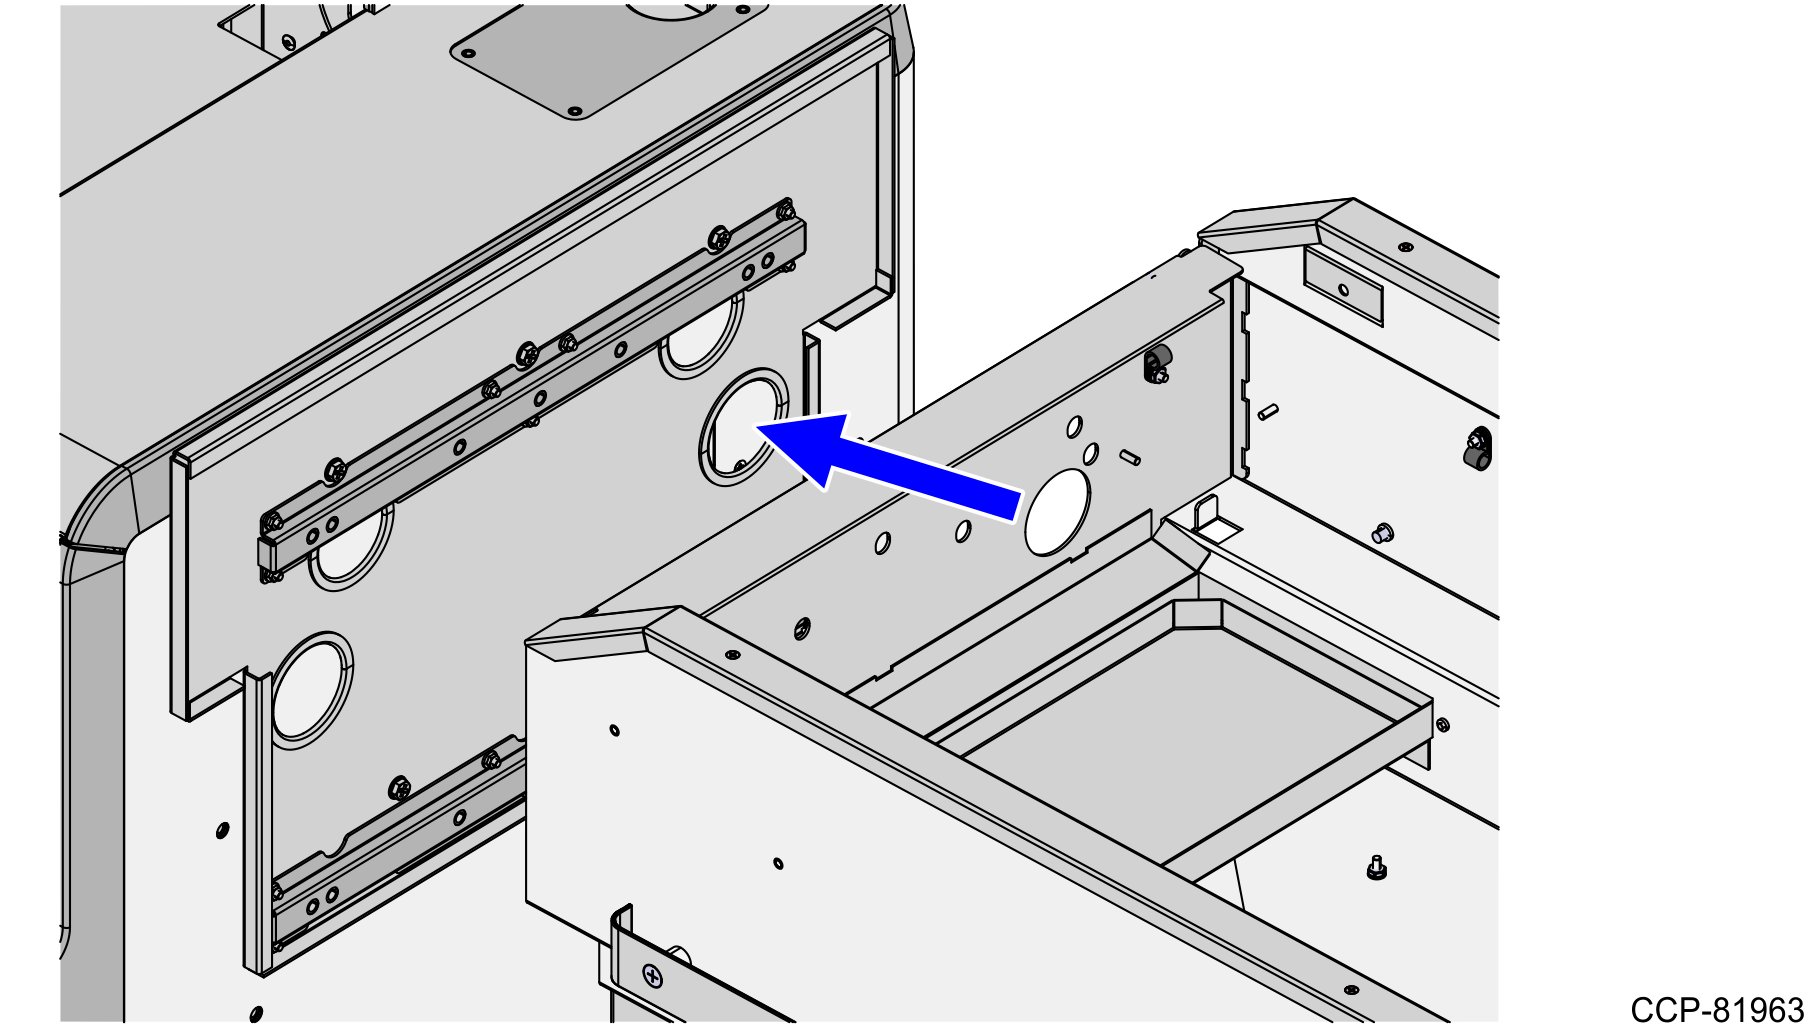
- Insert the cables from the Input Belt frame through the SelfServ Checkout Cable Plate.
 Note
NoteEach opening of the Input Belt frame is used for either Left-hand (LH) orientation or Right-hand (RH) orientation of SelfServ Checkout units.
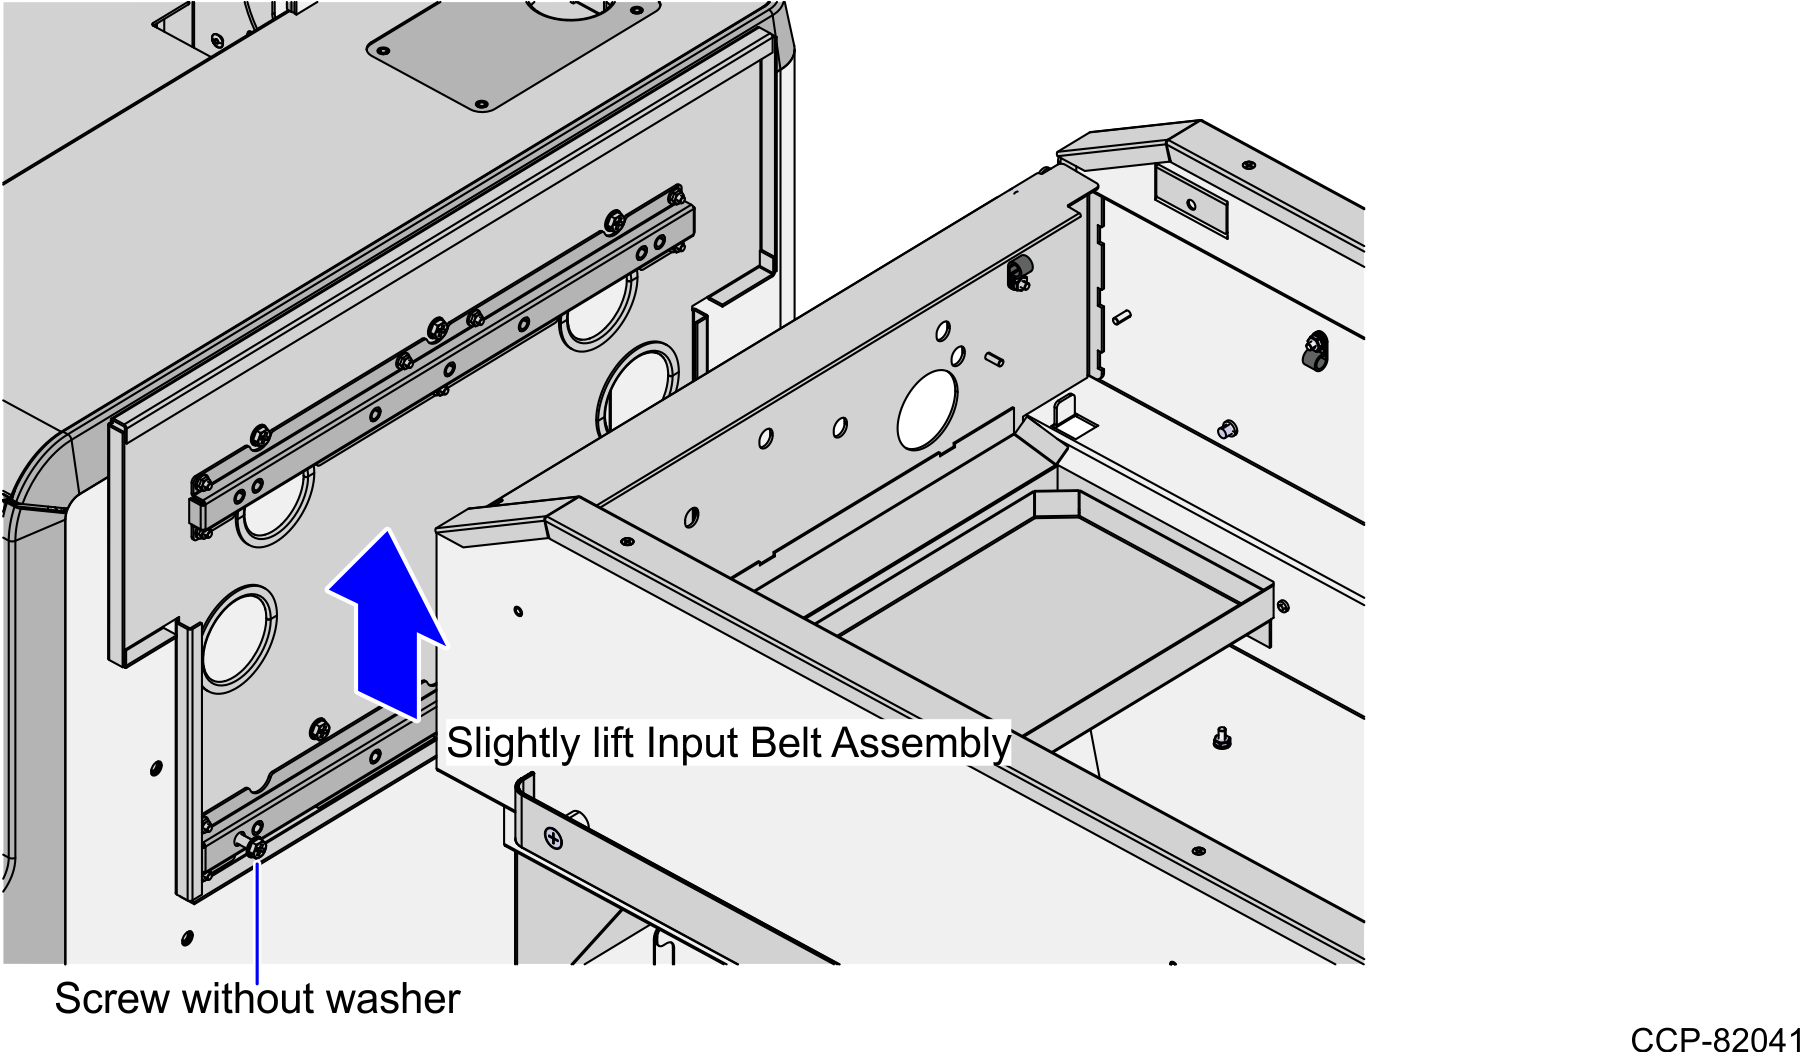
- Slightly lift the Input Belt assembly to align with the alignment screws and then slide the assembly down onto the screws.
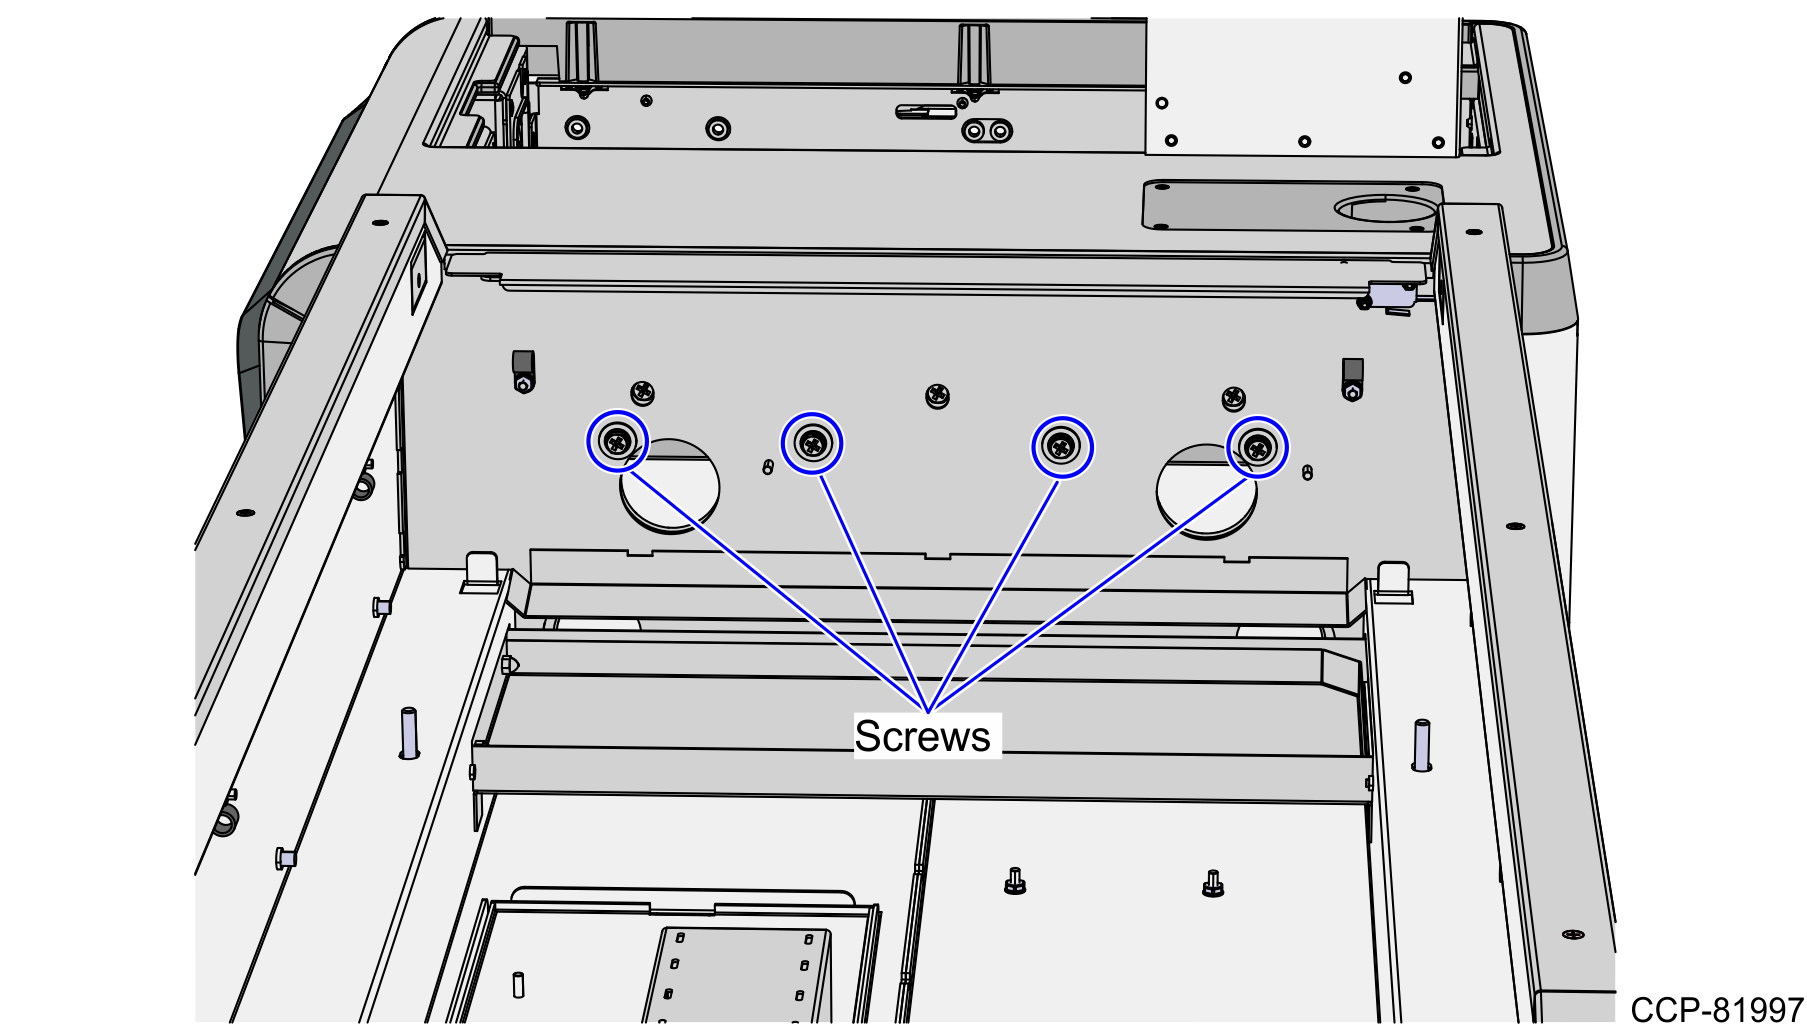
- Secure the Input Belt assembly to the Core Cabinet using four (4) screws, as shown in the image below. Ensure that the Input Belt assembly is higher than the Input Belt Adapter and SelfServ Checkout Top Plate.
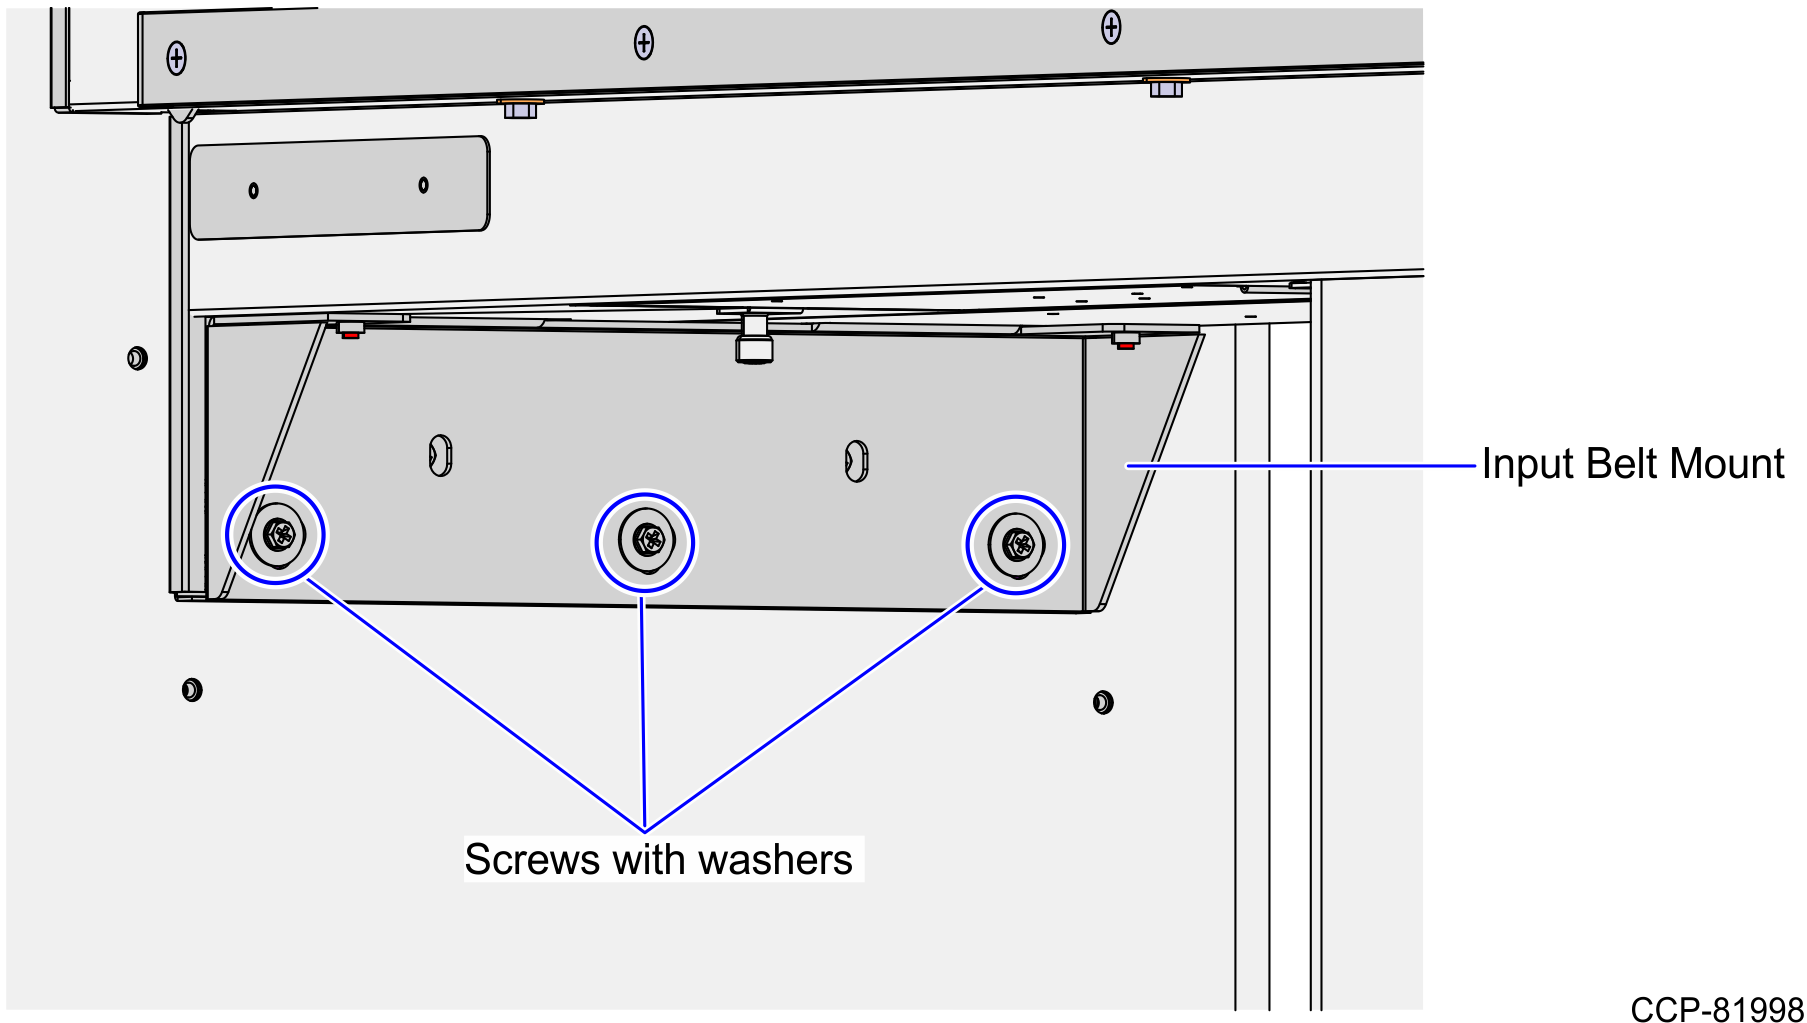
- Remove the screws on the Input Belt Mount one-by-one and add a washer to each screw.
Route the Input Belt cables in the SelfServ Checkout Core Cabinet. For more information, refer to Routing Input Belt Cables.
Do the following:
- Level the SelfServ Checkout unit, if necessary. For more information, refer to corresponding Installation Guide of the SelfServ Checkout onto which the Input Belt is installed.
- Level the Input Belt.
- Tighten the three (3) screws with washers to secure the Input Belt assembly to the Core Cabinet. Ensure that the Switch Plate and the Top Plate of the SelfServ Checkout unit are aligned.
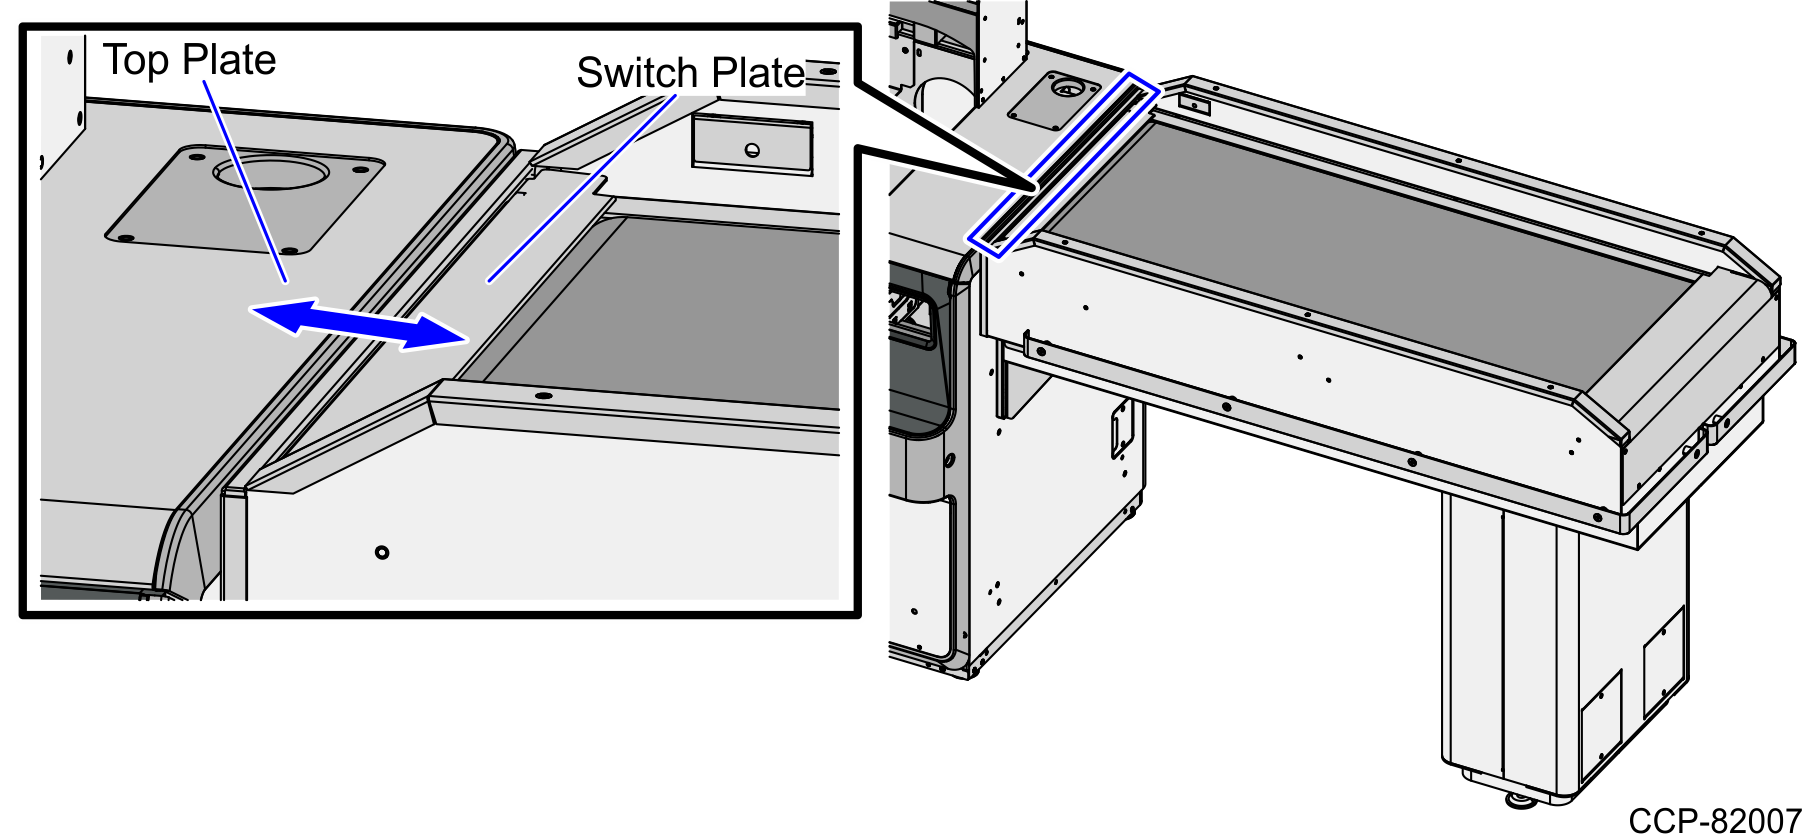
- Install a teardrop-shaped Gasket to prevent crumbs from filling up the tapered area around the perimeter of the Top Plate.
- Do the following:
- Turn on the Input Belt power. For more information, refer to Turning On the Input Belt.
- Check the Input Belt Tracking and adjust as needed. For more information, refer to Adjusting the Input Belt Tracking.
NoteAdjusting the Input Belt tracking is required if the Belt moves from right to left; or if the Belt is too tight or too loose. To determine if tracking adjustment is needed, turn on and then run the Input Belt.
