Installing the GSR50 Recycler Module on the GSR50 Note Recycler Unit without Loader Module
To install the GSR50 Recycler Module on the GSR50 Note Recycler without a Loader Module, follow these steps:
- Ensure that the following procedures are done beforehand:
- Unpack and prepare the new GSR50 Note Recycler Module to be installed. For more information, refer to Unpacking the GSR50 Recycler Module.
- Purge the notes from each Recycler drum to the Notebox (Cashbox) to ensure that counts of all recycler drums are "0" in Profile Manager Lite (PML). For more information, refer to Purging Notes from each Recycler Drum to the Notebox (Cashbox).
- Access the GSR50 Note Recycler. For more information, refer to Accessing the GSR50 Note Recycler.
- Remove the Notebox (Cashbox) Module. For more information, refer to Removing Notebox (Cashbox) Module from GSR50 Note Recycler Unit without Loader Cassette Module.
- Hook up the new GSR50 Recycler Module frame to the lowest existing Recycler Module frame. Insert the mounting hooks to its corresponding slots.
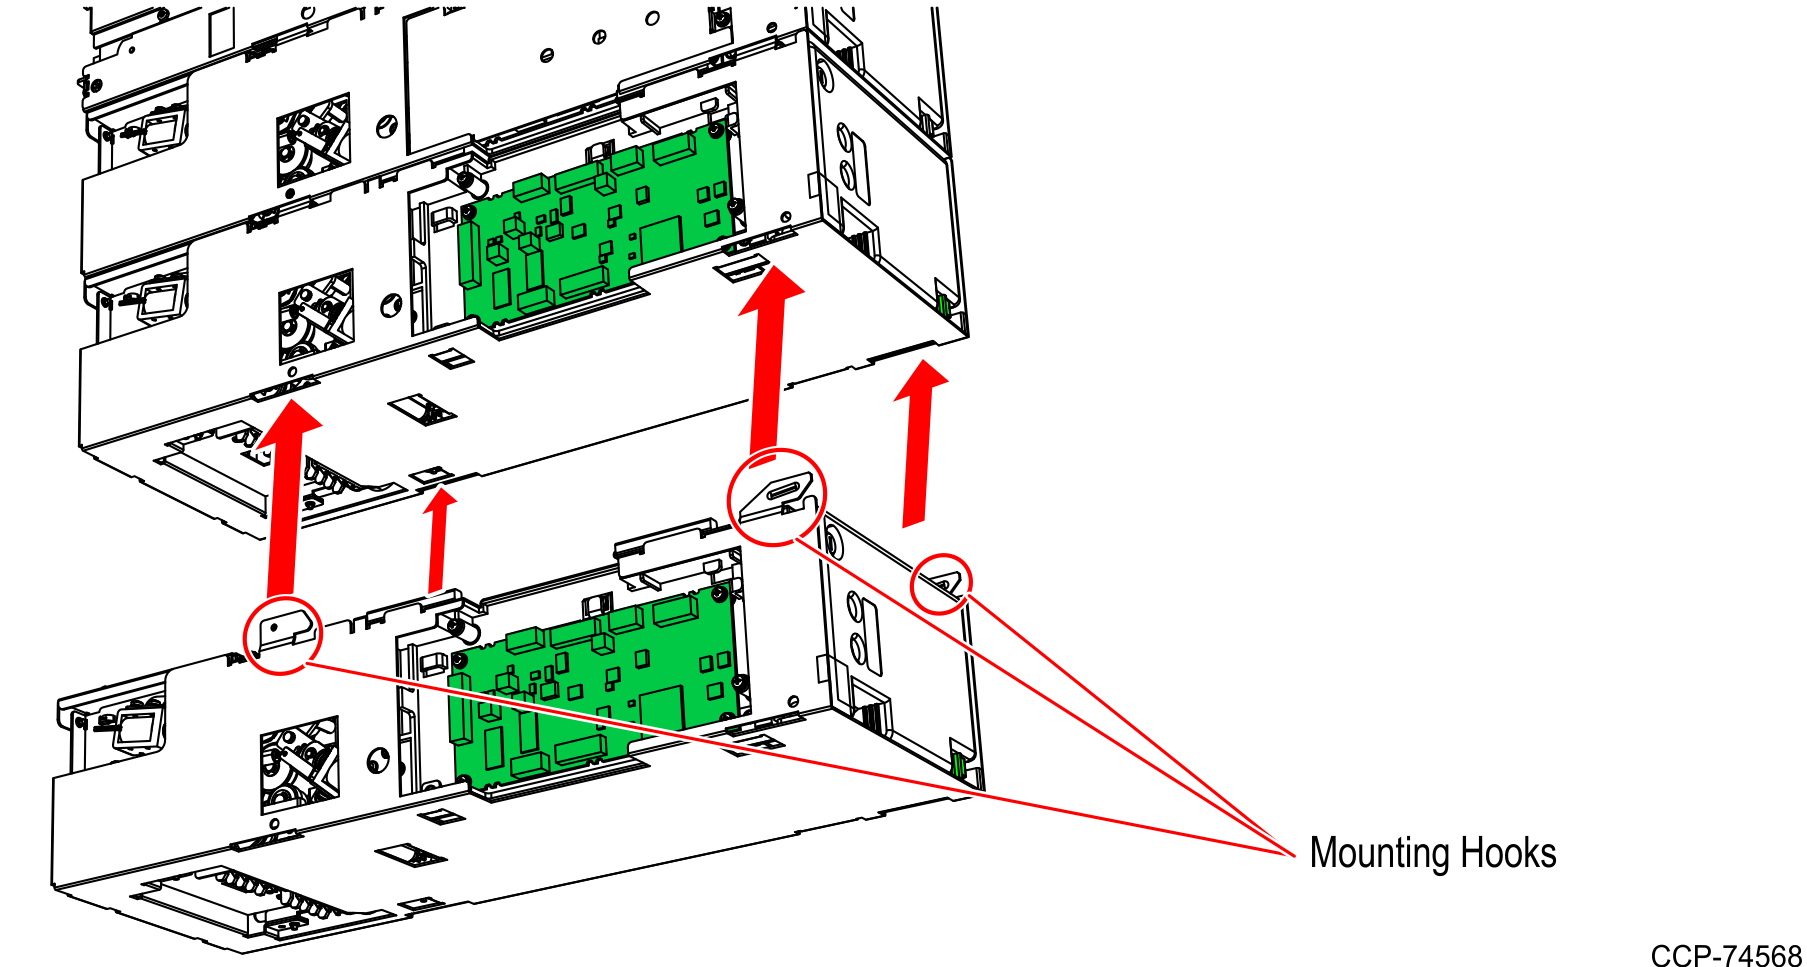
- Slide the GSR50 Recycler Module to the front of the Note Recycler. This engages the mounting hooks of the Recycler frame to the bottom of the other Recycler frame.
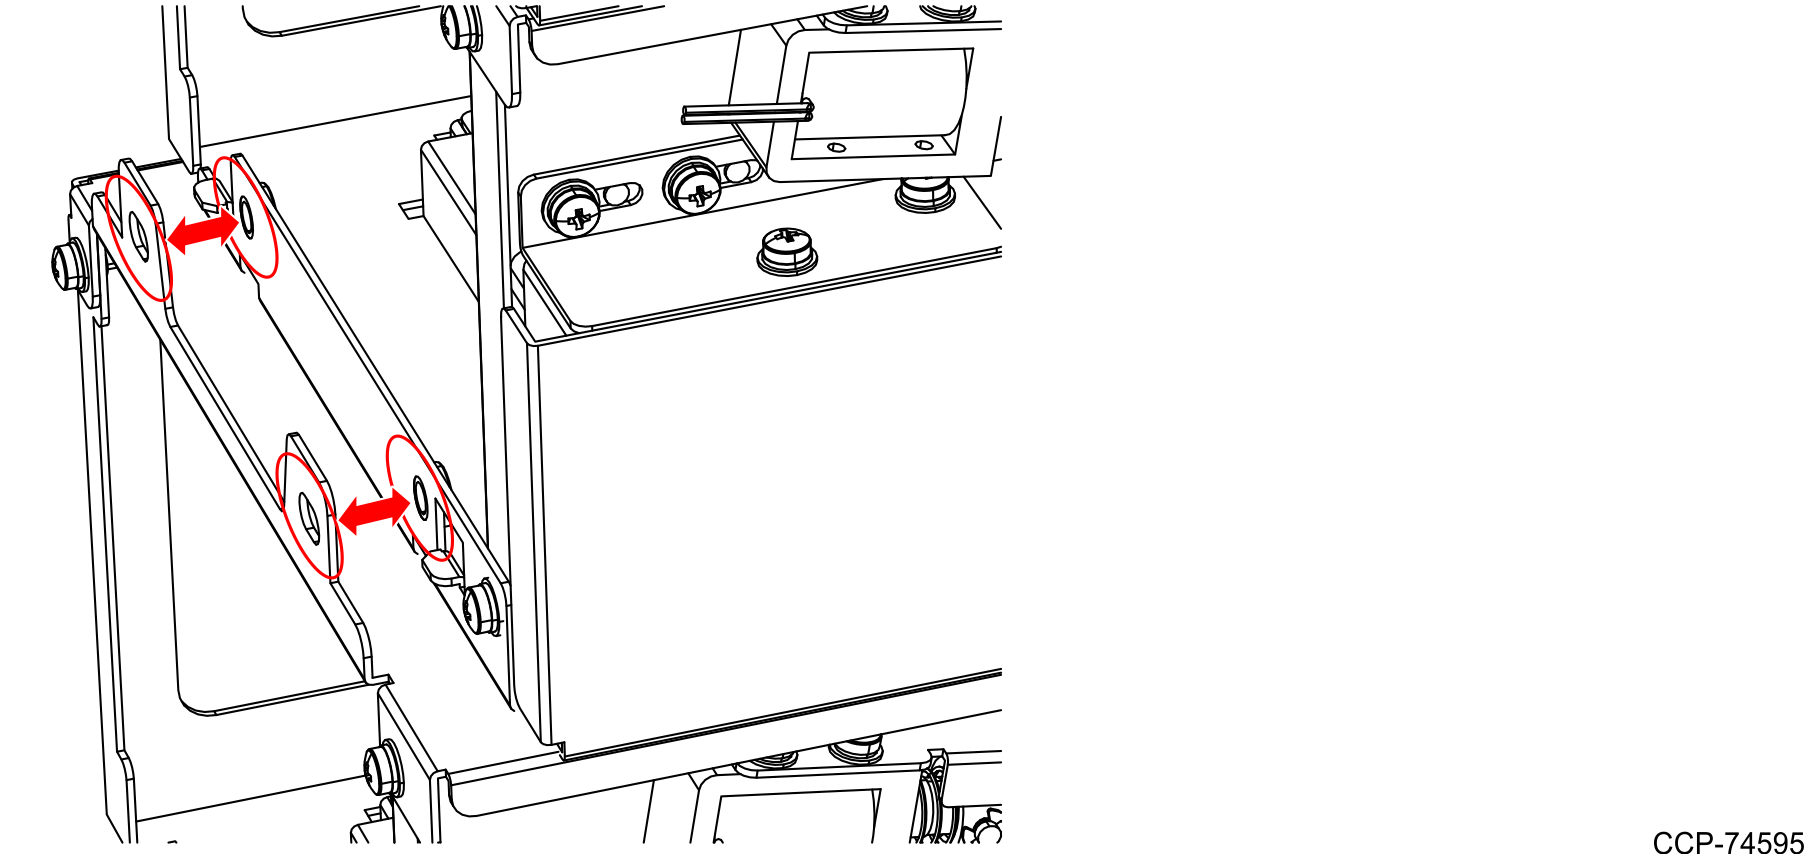
- Ensure that there is NO gap between the two sets of rear mounting tabs by pushing the lower module as far forward as possible.
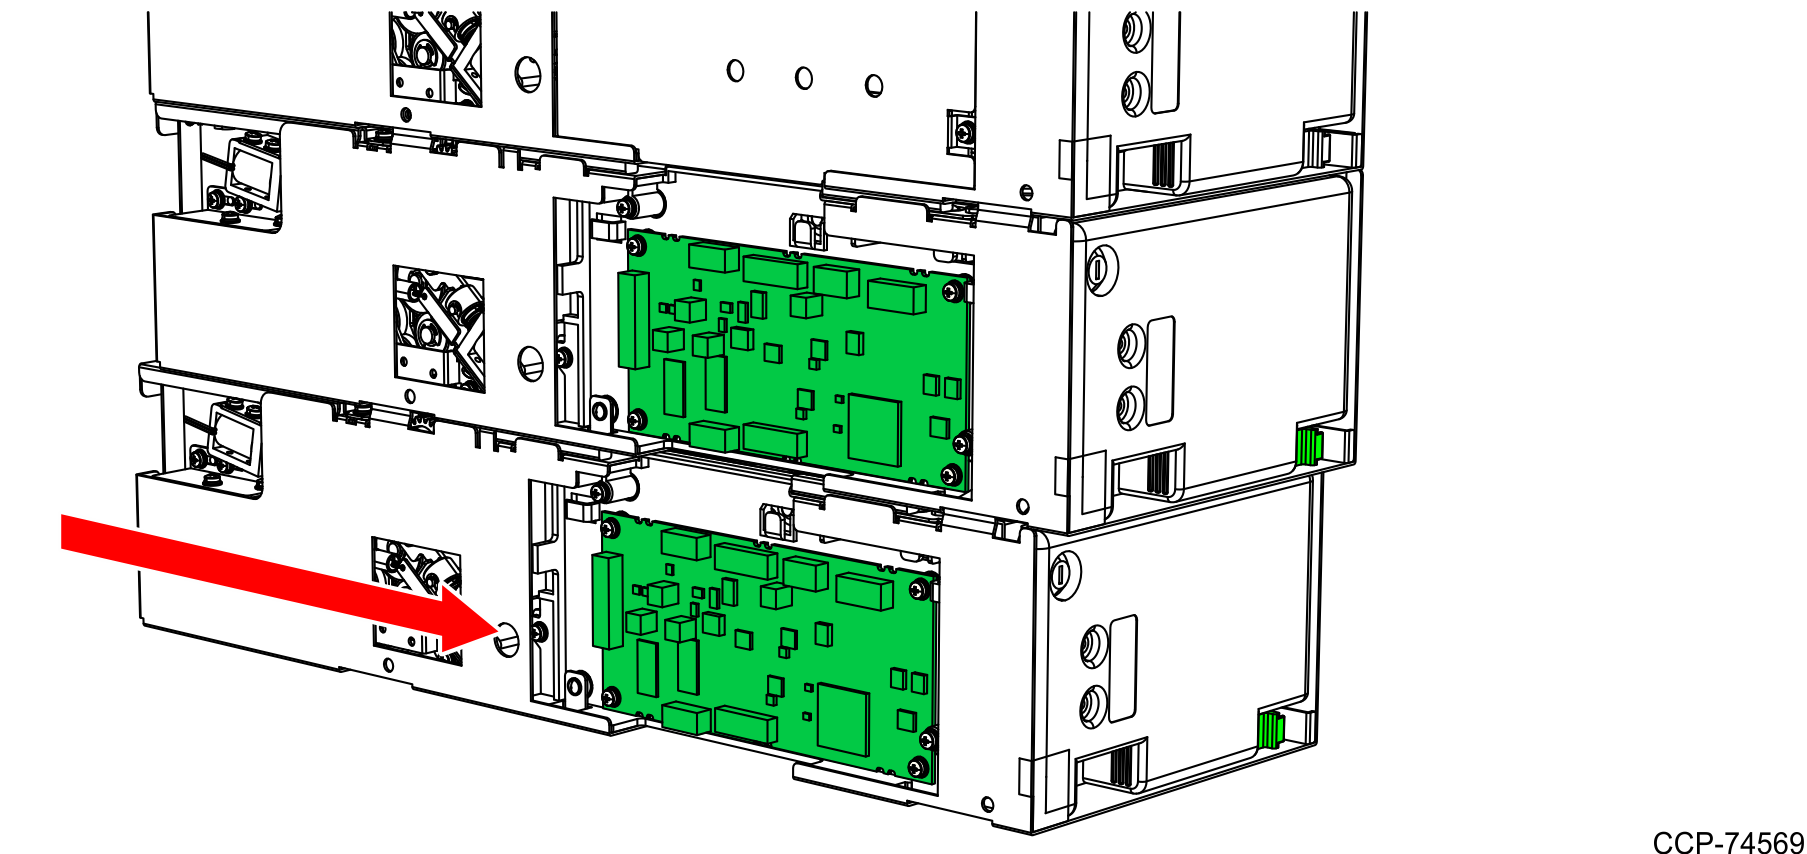
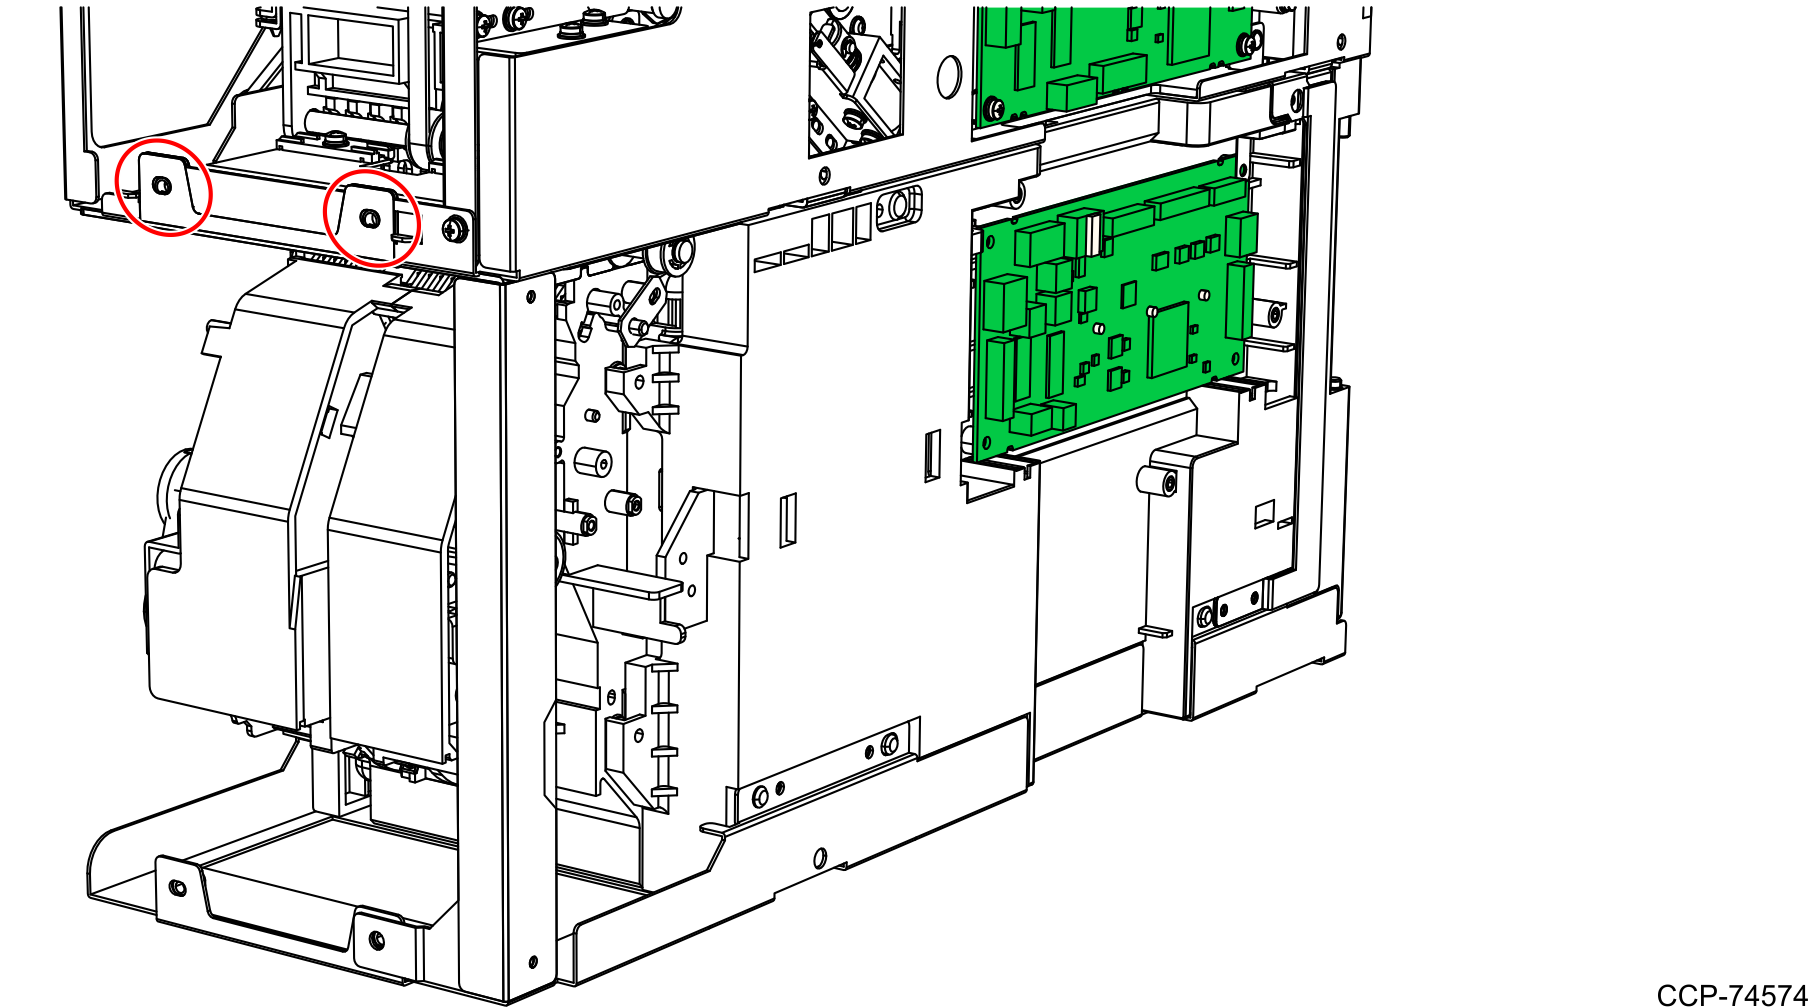
- Secure both Recycler frames with two screws as shown in the image below.
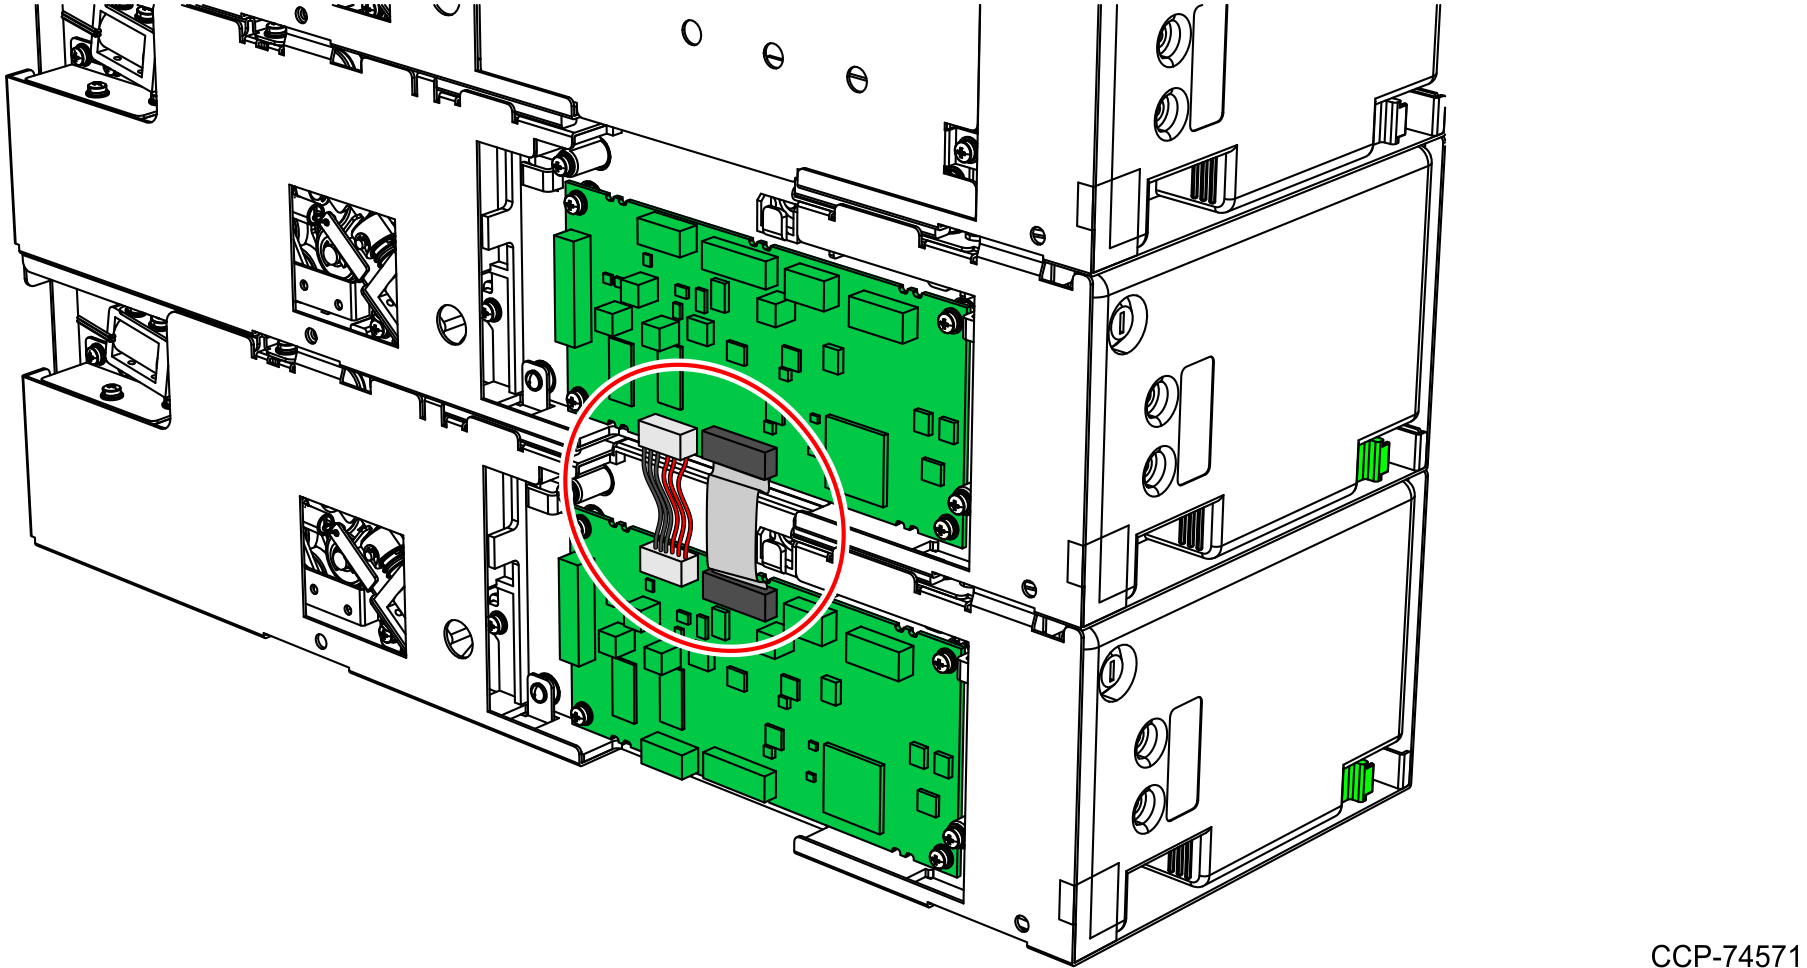
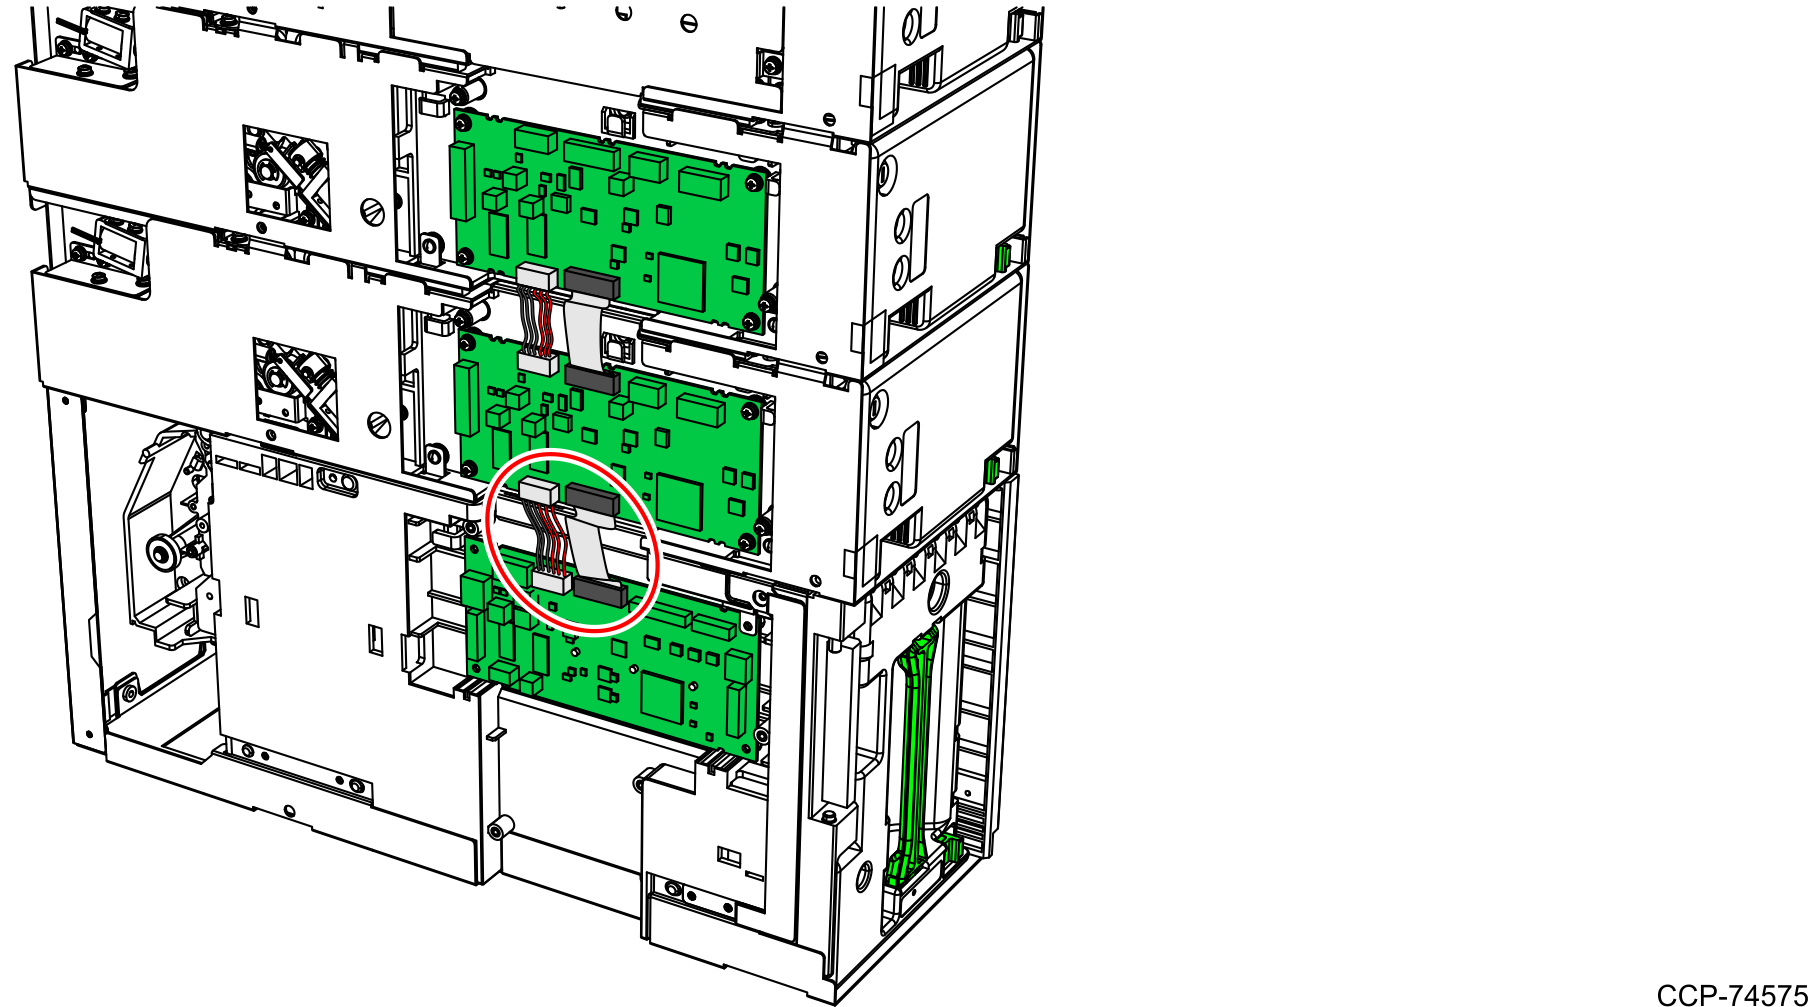
- Connect the communication and power cables on the PCBs, as shown in the image below.Note
In connecting the cables, insert the cables until a "click" sound is heard. It indicates that the cables are properly connected to the PCBs.
- Hook up the Notebox (Cashbox) frame to the GSR50 Recycler frame. Insert the mounting hooks to its corresponding slots.
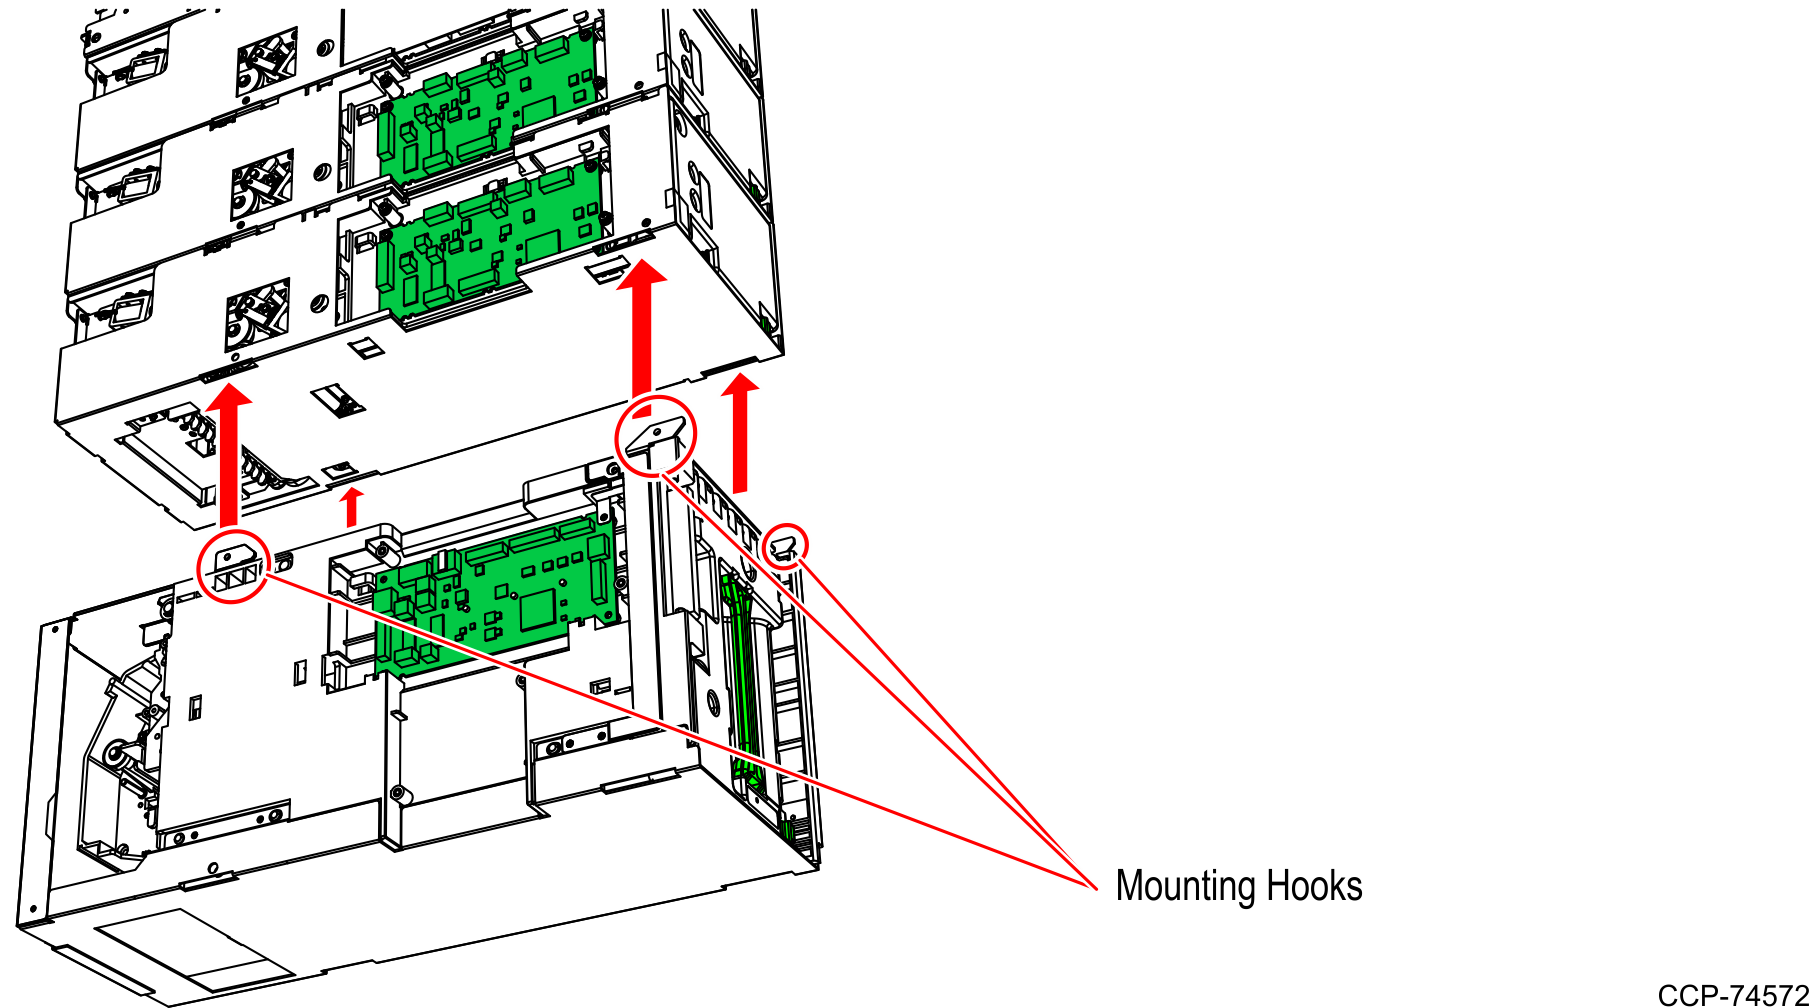
- Slide the Notebox (Cashbox) to the front of the Note Recycler. This engages the mounting hooks of the Notebox (Cashbox) frame to the bottom of the GSR50 Recycler module frame.
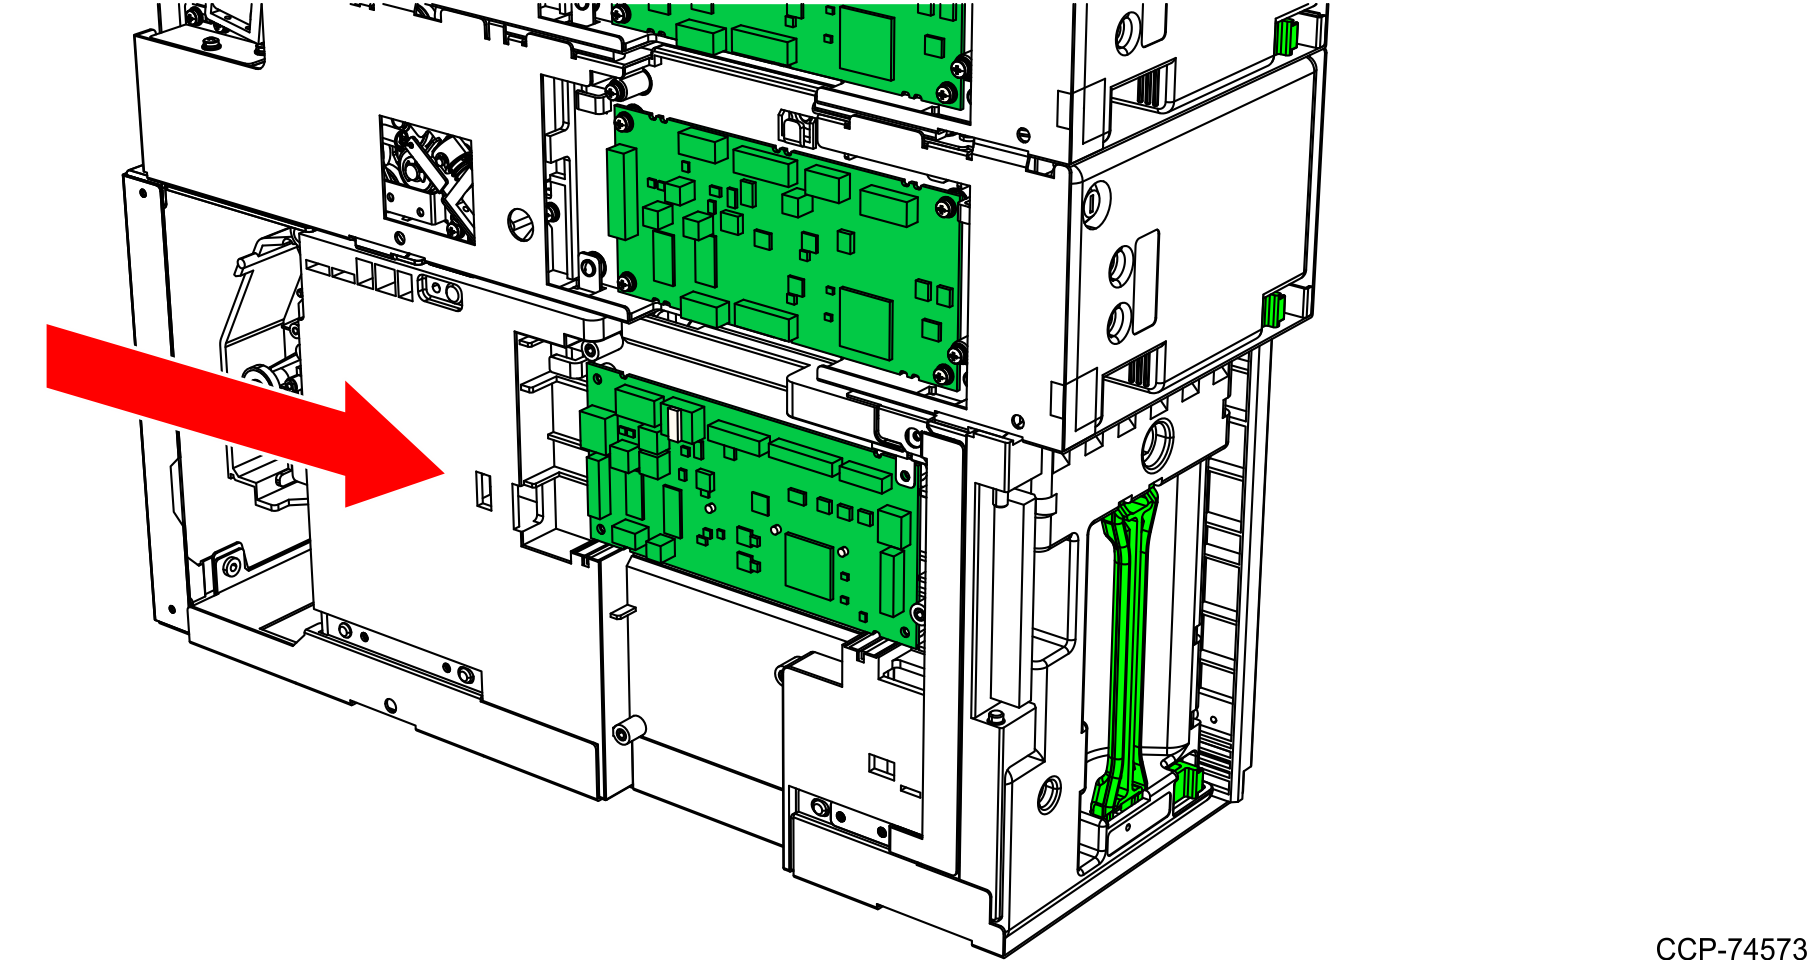
- Ensure that there is NO gap between the two sets of rear mounting tabs by pushing the lower module as far forward as possible.
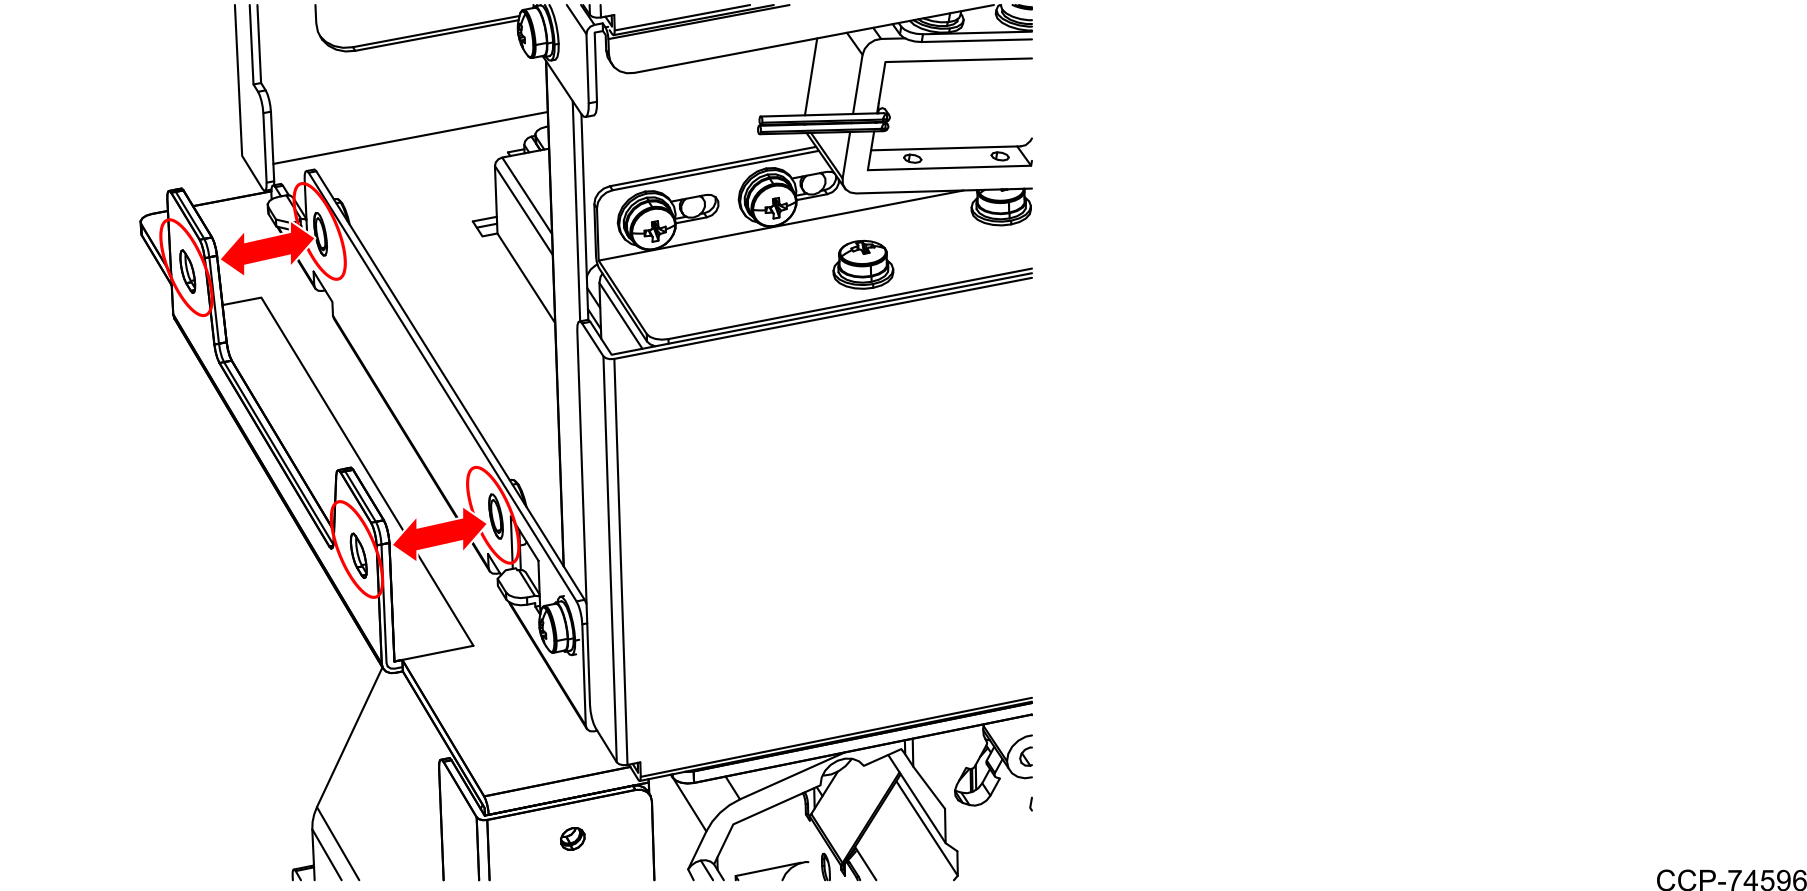
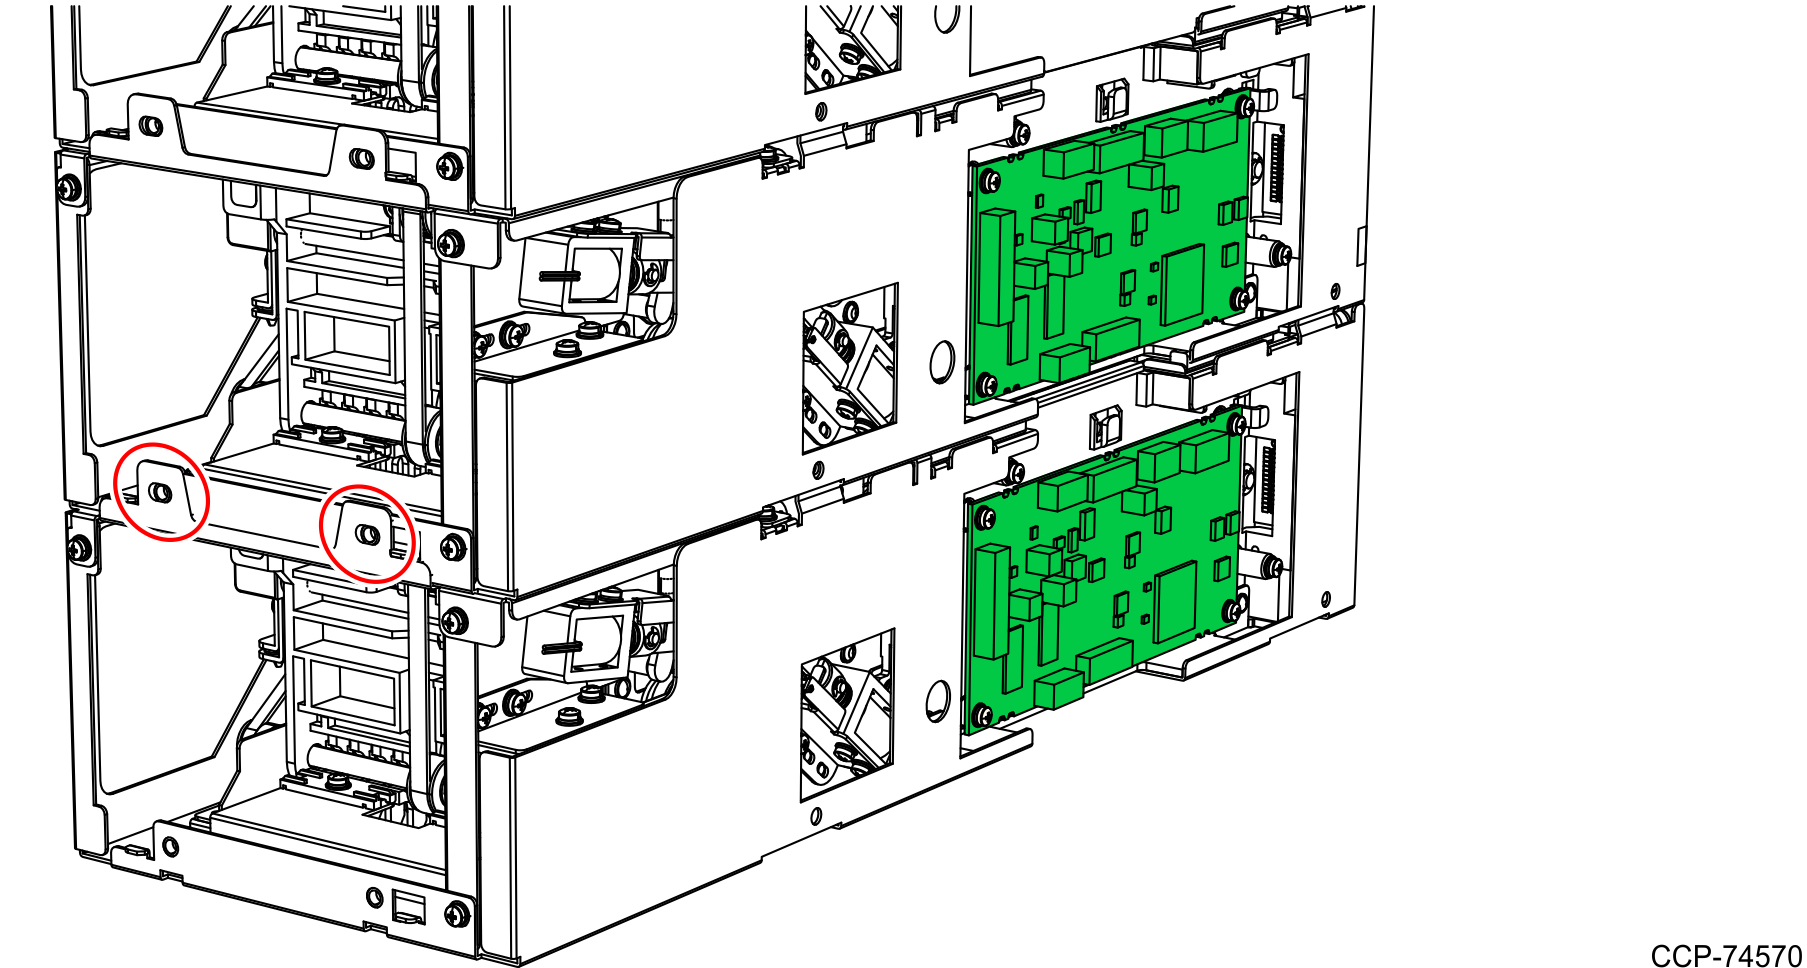
- Secure the Notebox (Cashbox) frame to the back of the GSR50 Recycler Module frame using two screws, as shown in the image below.Note
Reuse the two large screws (larger than the PCB cover screws) previously set aside during removal of modules.
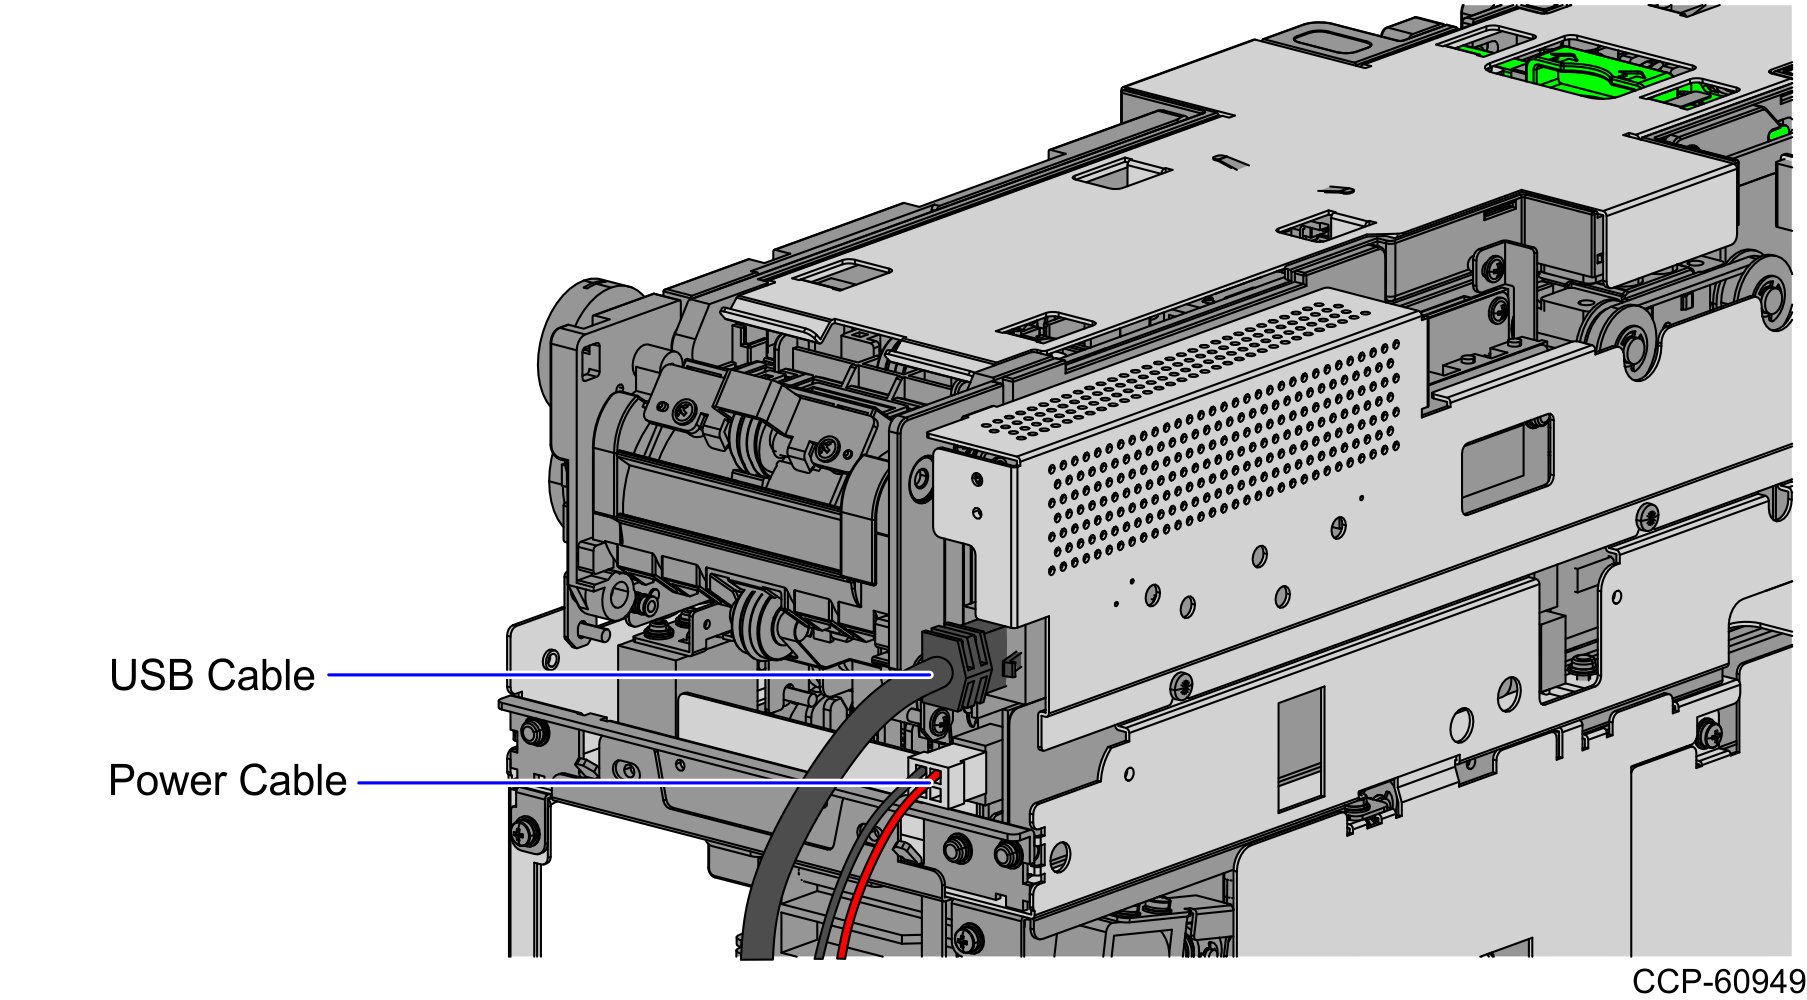
- Connect the communication and power cables on the PCB as shown in the image below.Note
Reuse the communication and power cables previously set aside during removal of modules.
NoteIn connecting the cables, insert the cables until a "click" sound is heard. It indicates that the cables are properly connected to the PCBs.
- Cover each modules with the appropriate PCB covers and secure using screws as shown in the image below.

- Reconnect the power and communication cables to the back of the Top (Main) Module.
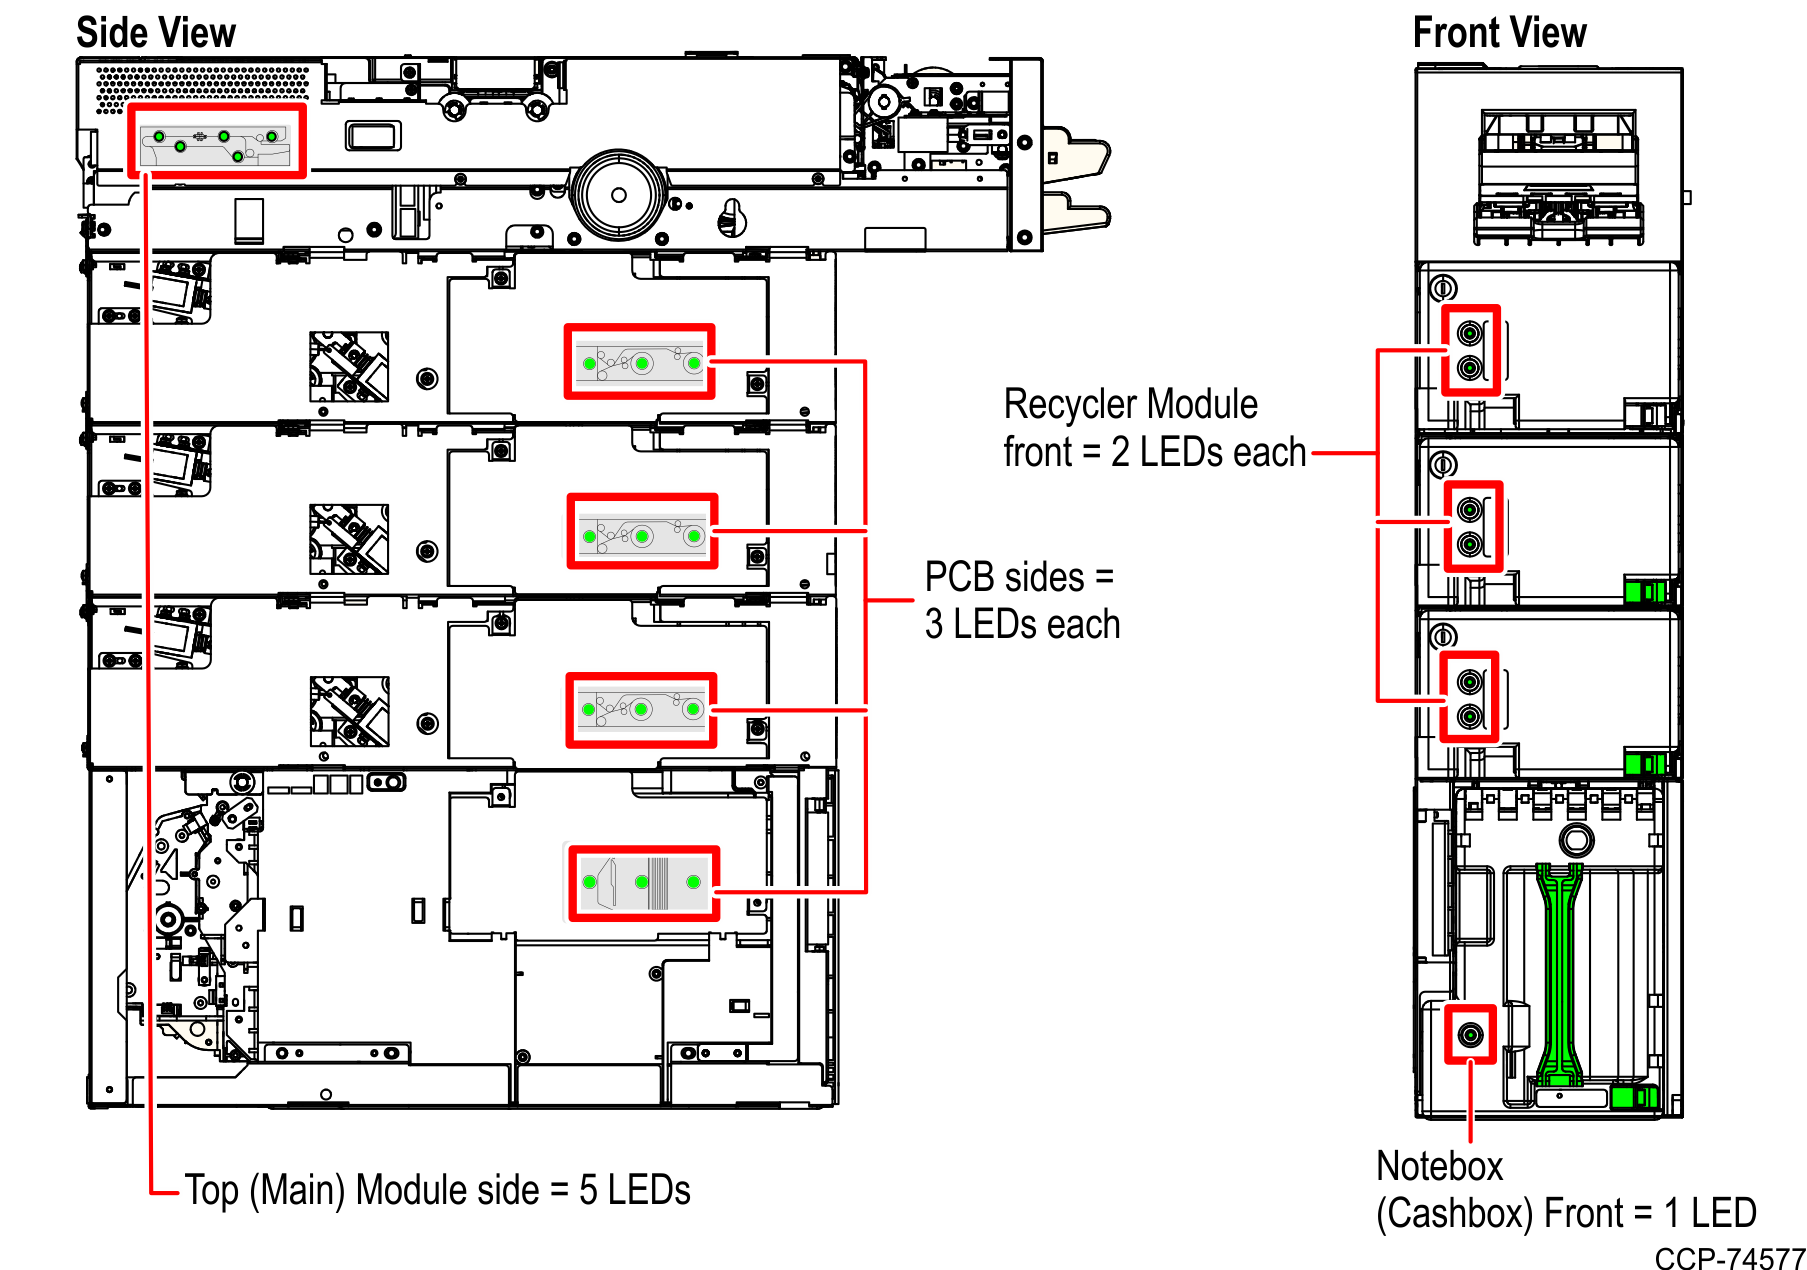
- Ensure that all LEDs are green in color on all modules as located in the image below.Note
LEDs flashing is okay as long as they are all green in color. If the LEDs are in different color, refer to GSR50 Note Recycler Problems.
To configure the new GSR50 Recycler Module, refer to Configuring the GSR50 Recycler Module.
