Installation Procedures
To install the Trackball, follow these steps:
1.Turn off the NCR SelfServ Checkout hardware and software systems.
2.Open the Upper Cabinet Door. For more information, refer to Opening the Upper Cabinet Door.
3.Remove and set aside the Scanner/Scale. For more information, refer to Removing the Scanner/Scale.
4.Depending on the SelfServ Checkout unit, disconnect the Trackball cable from the I/O Box or E-Box.
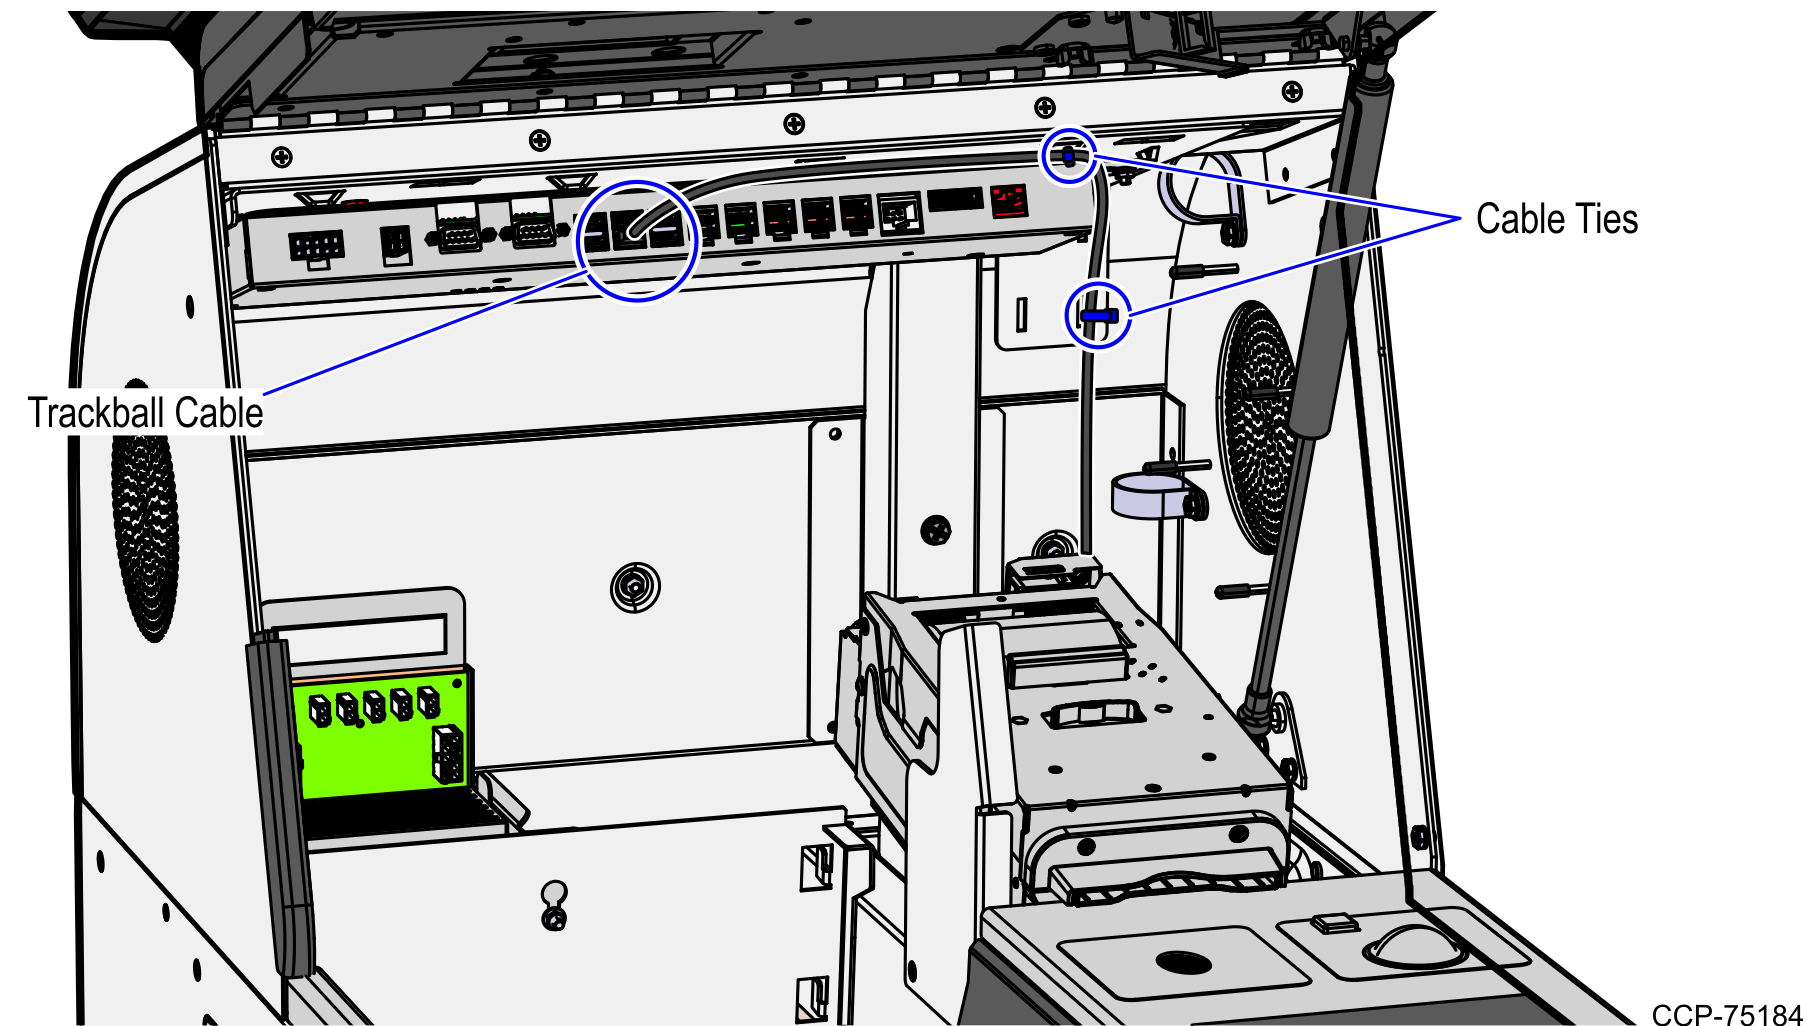
7350 R6 Lite Unit (I/O Box Cable Connection)
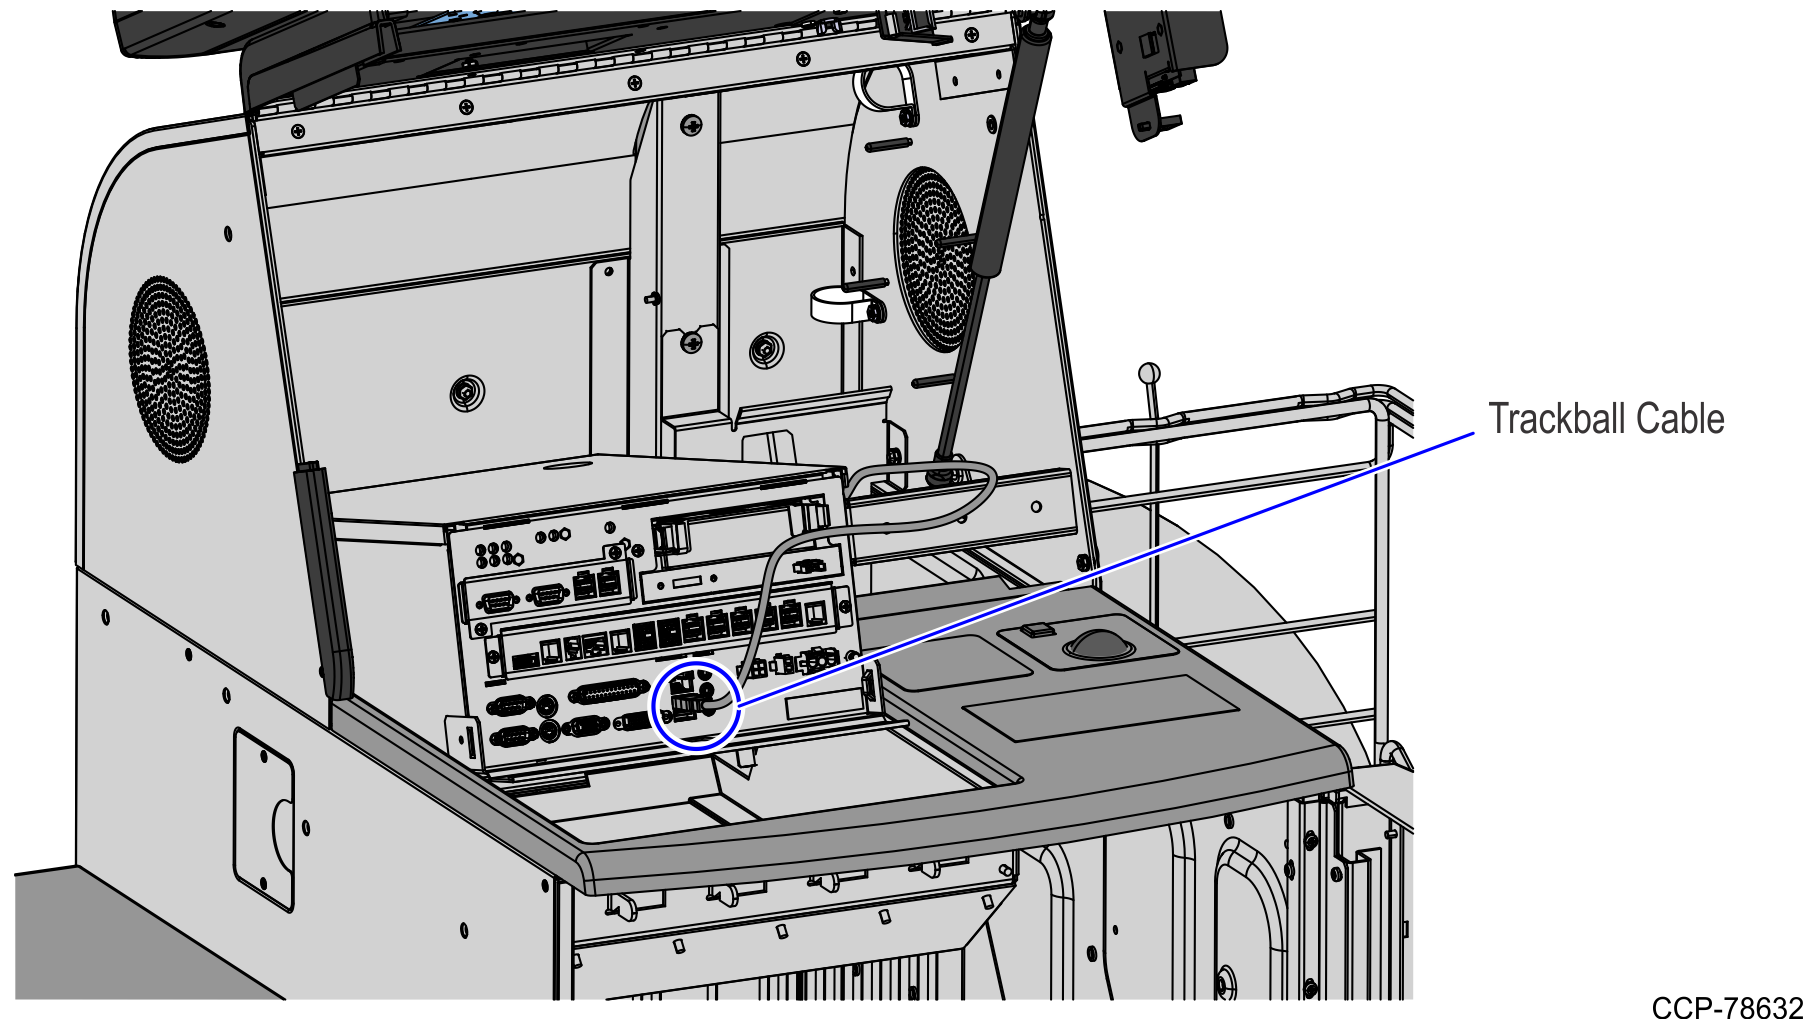
7350 Unit (E-Box Cable Connection)
5.Remove the existing Top Plate from the Core Cabinet. For more information, refer to Removing Top Plate.
6.Assemble the Trackball device. For more information, refer to Assembling Trackball.
7.Install the new Trackball Assembly on the Top Plate. For more information, refer to Installing Trackball Assembly.
8.Install the new Top Plate on the core. For more information, refer to Installing Top Plate.
9.Depending on the SelfServ Checkout unit, route the Trackball cable up and over to the I/O Box or the E-Box.
Note: Secure the cable using cable ties as shown in the image above. Ensure that there is enough cable slack to avoid cables from being stretched during installation or removal procedures.
7350 R6 Lite Unit (I/O Box Cable Connection)
7350 Unit (E-Box Cable Connection)
10.Install the Scanner/Scale. For more information, refer to Installing the Scanner/Scale.
11.Turn on the SelfServ Checkout unit. Verify that the Trackball and button work in the SelfServ Checkout application.